Tuesday, February 07, 2017

Gift set of cards in a folder

Hi, Janja here!

Gift set of cards in a folder which I share with you today are created with new CottageCutz dies - Spring.


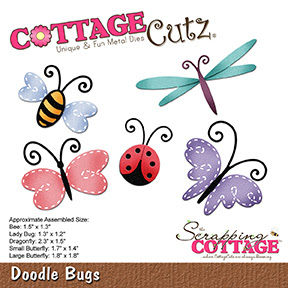
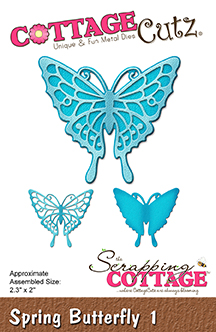
CottageCutz dies: doodle bugs, spring butterfly 1, spring butterfly 2, spring butterfly 3, spring foliage border, stitched square set or pierced square set

For the folder we need:
- white cardstock for the cover: 11.4 x 5.3" (29 x 13,5 cm)
- white cardstock for the insert: 11 x 5.3" (28 x 13,5 cm)
- patterned paper: 5.2 x 5.2" (13,3 x 13,3 cm)
- white and colored cardstock

Trim white cardstock for the cover and insert sheet. Fold them on:
- 5.3" and 6.1" (13,5 cm and 15,5 cm)
- 5.3" and 5.7" (13,5 cm and 14,5 cm)


Trim four pockets from white cardstock in the size of 6.3 x 3" (16 x 7,5 cm). Made the folds 0.6" (1,5 cm) from left, right, and from the bottom edge.
Glue patterned paper on pockets, which should be slightly smaller then the size of the pocket.


On each of four pockets glue spring foliage border.


Glue the cover and the insert sheet in each other.


Make a tab in the size of 5.5 x 1" (14 x 2,4 cm). Fold cardstock at 2.4" and 3.2" (6 cm and 8 cm).


Insert two magnets under a patterned paper, which hold a tab in place, when the folder is closed.


Decorate the front cover and attach it to the base.


Supplies for cards:
- white card base: 4.7 x 4.7" (12 x 12 cm)
- colored cardstock: 3.7 x 3.7" (9,5 x 9,5 cm)
- white nad colored cardstock
- Memento ink: Lady Bug, Bamboo Leaves, Tangelo, Dandelion

Prepare four card bases and trim squares from colored cardstock.
Cut out squares with the largest die from white cardstock. Stamp various sentiments on them.


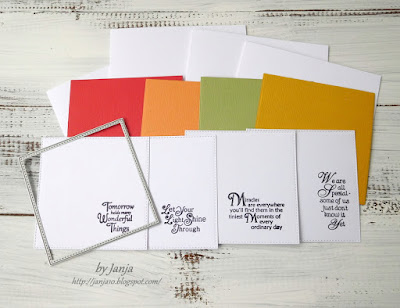
Cut out butterflies.


In addition to sentiments do some smudges. We can use a brush, stamp or ink smooshing technique. Whichever you prefer.
Select colors that match the color of butterflies.
Assemble the cards.


Insert cards into pockets.


That's all for today. I hope you like it. 


Monday, February 06, 2017

Sweet Honey!

Hi, Lois here with a card I created for the Splitcoaststampers Sketch Challenge the other day.  I find that sketch challenges are a good place to start when making your card.  Here is the layout presented to us for that challenge.


Even though there is a heart on this sketch, I decided I wanted to make a card that was not necessarily a Valentine.  Products used on my card are:

Card base gold cardstock 8 1/2" x 5 1/2" folded in half, 4" x 3/4" strip
Yellow layer cardstock 4" x 5 1/4"
White layer cardstock 3 7/8" square
Ink - Memento Tuxedo Black; Ranger Distress Squeezed Lemonade, Scattered Straw, Wild Honey
Dies - CottageCutz Sweet Valentines
Other - Darice bee border embossing folder, hand-made honeycomb stencil, heart punches, sponge applicators


To start my card I secured the honeycomb stencil onto the white panel with removable tape and then sponged on the three yellow inks.  Then I ran the yellow panel through my Cuttlebug with the border embossing folder on the right-hand side.  After sponging the embossing with Wild Honey ink to bring out the pattern, I glued the stenciled piece on the left-hand side and glued down the gold strip.  I adhered this entire panel to my gold background.

I cut and colored the images from the Sweet Valentines set.


I then punched out the two hearts from yellow and white cardstock, glued them together, and glued the hearts over the gold strip.  I stamped the sentiment at the upper left-hand corner.


I then popped on the die-cut pieces and I was finished.


I hope you like my card, and I'll see you next time.

CottageCutz die used on this card:


Sunday, February 05, 2017

Hello


Hi everyone,

It's Donna here, I am sure you have read that CottageCutz has just released stamp and die sets!  They are very nice, if you have not had a chance to see them all, click here.  Now onto my card, I am using the new stamp and die set called "Garden Gnomes 1".  It's a nice set, It has 6 images and a sentiment. I hope you will spend some time on the blog to see all the beautiful creations the design team has created with the Stamp and Die sets.


Closer look at the images

Here is how I put my card together.  

1.  A2 card, 4 1/4 x 5
2.  I die cut a circle from the CottageCutz stitched circle set, I used the second to the largest circle, 
3.  I used the same circle and cut away some of the circle,


4.  I sponged some water, grass and the sky with some distress ink,


5.  Here is what it looks like completed,  I took the largest die from the stitched circle die and cut a frame out for this in black,


6.  I stamped all the images I wanted to use on my card and die cut them out with my big shot,


7.  After I die cut all the images, I colored all the images with copic markers.  Here are most of the one's I used.

That's it, I hope you will check out the store for these newly release Stamp & Die sets!


Saturday, February 04, 2017

Carnation Love


Hello Scrapping Cottage friends! Thanks for taking the time to stop and visit today. It's Mary Marsh here bringing you the Saturday edition of the Blog.

We have some fabulous new stamp & die combo sets released. Today for your viewing pleasure I am featuring one of the new Birthday Flowers sets. This one is the January - Carnation Flower. Not only is it a stamp but it has a matching die. So let's get started on how I created my card.

Card Base: 5" x 4"
Stenciled Layer: 4 5/8" x 3/ 5/8"
Wide Rectangle Frame: 4 3/4" x 3 3/4"

I started my card this week by stenciling a background. I was going for a lattice type look for my flowers. The stencil was done with Tumbled Glass distress ink, a Clarity brush and a stencil from DCWV. I think stenciling creates a special touch on your card.
Next step was to stamp and color my carnations. I used alcohol markers and made the flowers red. I was thinking Valentine's Day or even an anniversary card. Once the coloring was complete I used the matching die to cut the flowers out.
I was now ready to assemble my card. I decided to keep it on the clean and simple side because I wanted the flowers to be the focal point of the card. The pierced wide rectangle die set makes the perfect frame and adds another layer of interest.
 
 I used the Love Bow & Arrow dies for my heart and love word. It added a nice corner embellishment and still allowed the flowers to be the center of interest.  Scattered a few sequins to complete my card.
 
Well, that's it for me for this week.  I hope I have given you another idea for the Birthday Flowers stamps & dies. See you next week! 
 
 
http://www.scrappingcottage.com/cottagecutzcarnation-januarystampanddie.aspx

http://www.scrappingcottage.com/search.aspx?find=wide+rectangle

http://www.scrappingcottage.com/cottagecutzlovebowandarrow.aspx


Friday, February 03, 2017

FLOWER OF THE MONTH-FEBRUARY


Hello !!!!
This is Anita here!!! First let me apologize for not posting last week as I was on vacation and was out of all internet connections. Now I am back, refereshed and recharged and rearing to go with new projects.
CottageCutz has come up with amazing line of stamps and die combos that are too adorable. I have loved each one of them and you too I am sure will like them. You can check these HERE and HERE and HERE

Today I am going to feature one of my favourite floral stamp-Violets-February


This is a beautiful floral stamp with matching die and colouring this is so much fun. I have made two cards here which inspite of being simple are yet very pretty.
So have a look.


To make this, I gathered my stamp and die set, some water colour paper and Zig real brush pens. I stamped the image on a white card stockcut with Memento Black ink and cut it with coordinating die.


Colour the image as shown.


Adhere the image on Cross stitched Oval die with 3d Foam tape.


Cut oval frames using the Cross stitch Oval set. You will need three broad frames and one narrow frame.


Adhere all together and distress the narrow frame as shown.

For the backing , place the oval die cut on a pattern paper and cut out the oval shape. Adhere to the back.

Score a card front on the score board. Add some quick water colour. Adhere the oval panel.


  The finished card


 CottageCutz Products used
CottageCutz Violets - February (Stamp & Die)

I have another card that I wanted to share with you. It is showing the same Violet flower set. I liked the finished result with both the soft water colour and the bold colour. I have stamped and coloured the image on water colour paper using zig brush pens to colour. The colouring has a washed effect which adds to the beauty of these flowers.


Here I have used CottageCutz Double stitched Rectangle die to create the frames of my card.

I hope you liked my cards. There are many more floral stamp and die sets for each month and all of them are so beautiful. Do try them . 
Hope you had a good time here.