Thursday, July 27, 2023

Birthday Flowers

 Hello Friends

I am catching up with my Birthday cards.  I don't have any birthdays in August so I thought it would be a good time to restock.  I get a little over whelmed in September because I have 8 birthdays.

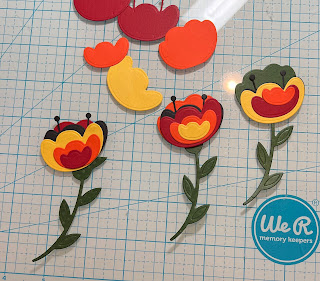
I am using the Folk Art Tulip  This die is from our Folk Art release!  There are 19 wonderfully detailed dies in this collection.  Each die can be used together or separately.  They are perfect for people's birthdays of all ages!

Design Steps:

1.  Begin by using the Folk Art Tulip to cut out the flowers on the following colors of card stock: red, yellow, black, green and orange.  Assemble with a fine tip glue
2.  Next using Sentiment w/ Shadows Happy Birthday cut on black and white card stock.  Glue together

3.  For the card base use a white slimline 8 1/2 x 3 1/2.  Use the Lattice Slimline die and cut it out of white.  Glue the lattice to the front of the white slimline card base
4.  Glue the flowers as shown above and add the sentiment as shown.  I also added a few silver sequin
5.  To add a little to the inside of the card I glued a flower to the right and then stamped the sentiment.  My card is complete


We have more inspiration on our YouTube Channel check it out HERE

Thanks so much for stopping by!  And I will see you next Thursday.

Blessings and Take Care


Wednesday, July 26, 2023

Welcome Fall


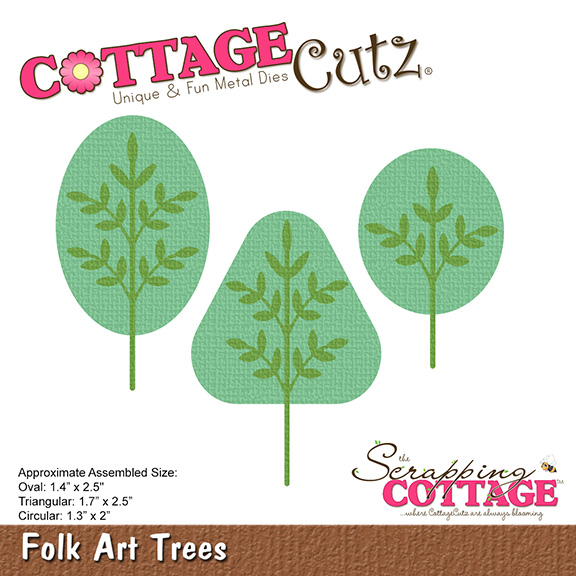
Happy Wednesday.  Marla here back with a new CottageCutz YouTube video tutorial.  Today, I'm bringing a little relief today from the dog days of summer with a fall themed card.  I pulled out my muted jewel tones of cardstock to use with the cute "Folk Art Fox" and "Folk Art Trees."  I have been so inspired by this "Folk Art" collection because it can be used for any season.  

You can find more specific card details and see how you can enter for a chance to win the "Folk Art Fox" in my video.  Until next time..... Marla


Tuesday, July 25, 2023

Gift Basket Banners With Cottage Cutz Dies


Happy Tuesday crafty friends!
I hope your week is off to a fabulous start! Today I am sharing a fun project...err should I say projects created with some fun dies from Cottage Cutz. Here is what I created.
I created these fun gift baskets and used some dies to create the little banners on each one. It is kind of hard to see them here in this group photo. I wanted to share the whole finished set first. 

Here's a photo of one of the gift baskets before I put the cello wrap and bow, etc. on it. I got these baskets from Hobby Lobby on clearance! I had to make 4 baskets for a teacher appreciation event our Chamber of Commerce is hosting next week. I filled the baskets with items that a teacher can use. I decided to decorate the baskets with these cute hanging banners. I strug the 4 banner panels along some jute and then used some wood beads inbetween each panel.


Here's a look at the #1 banner. I used Kraft cardstock to cut out the double stitched rectangle mats from that set. I then cut some black cardstock to create some mats. I used some foam tape between the two Kraft layers to give it a little more dimension. The Award cup and #1 are from a die as well.


Here's a closer look at the puppy with apple and star banner.

Here's a closer look at the folk art fox die on a banner.

And last but not least, here is a close up of the All star banner. 


Heres a closer look at one of the baskets once the cello wrap was on.

Here's a closer look at the one basket that is a rectangle basket. I was only able to find one rectangle so the other three were in the baskets.


Folk Art Fox


Double Stitched Rectangle Set


Patriotic Pennants (For The Doggie and the bow on the apple and the stars)

Circle Windows Slimline Die (For the Apple)


Baseball Phrases (for #1 and for the All in All star)


Well that covers it for today. Be sure to head over to CottageCutz.com. They are currently having a Christmas in July sale and have some of their world famous Christmas dies on sale!


Don't forget to head over the Cottage Cutz YouTube Channel. There you will find some great video tutorials! Check back each day to see what the rest of the super talented designers are up to! 

Until the next time, have a wonderfully crafty day!

Monday, July 24, 2023

Farm Style Folk Art

Happy Monday everyone!

It's Kris sharing with you today some super quick and easy farm style cards that feature the Folk Art Rooster which is part of the Folk Art collection 


Design Steps:

Card Base = 5-1/2" square
B/W buffalo check paper = 5-1/4" Square
Red cardstock = 4-1/4" square
Kraft cardstock = 4" square

I used a white gel pen and black micro-tip marker to add a frame -- chicken scratch would have been super cute as well ;oP  ***I popped up the red layer with foam strips.


I couldn't decide on which color I wanted for the body of my rooster, so I cut it out of both white and black.  


I ended up liking BOTH versions, so I made a 2nd card following the same measurements listed above.


For my sentiments, I die cut (2) of the banners from the Windows Slimline set, then stamped a cute sentiment and fussy cut a red and black border for each.


Here's a few more photos of both cards finished.  Easy peasy -- and loving this Folk Art collection ♥


These would actually be super cute framed and hung as farm-style décor.


Thanks so much for stopping by today!  I hope you are inspired to get crafty with your favorite CottageCutz dies!  

~Kristine


Saturday, July 22, 2023

Celebrate with Folk Art Flowers

Hello CottageCutz friends! Thanks for taking the time to stop and visit with us today. It's Mary Marsh here bringing you the Saturday edition of the Blog.

Our new Folk Art release is still available in the online store at 35% off individual dies. There are 19 new designs that are so perfect for cardmaking, journaling, and scrapbooking.

They allow you to add a beautiful touch of folk art to whatever you may be creating - birthday, thank-you, new home, thinking of you and even Christmas. The design team has featured many creative ideas using these dies so take a look back at our posts for inspiration.

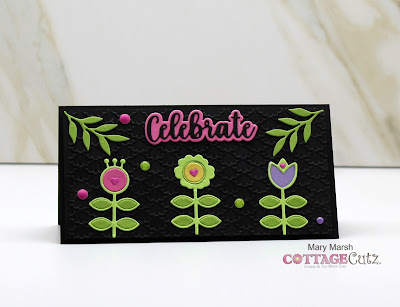
Today, I am featuring the new Folk Art Flowers in a mini slimline design. So let's get started with some details of how I created this card. 

Design Steps:

I decided I wanted a black card base because it's such a striking look combined with bright colors. I embossed the 3" x 6" mat just for added interest. 

Mini Slimline Base: 6 1/2" x 6 1/4". Score in half at the 3 1/4" mark. 
Black Embossed Mat: 3" x 6"
I secured the flower images with clear drying glue. 
I added some greenery to each corner of the image panel. It's cut from the Folk Art Flowers Mixed die. 
For a sentiment I decided to use the Celebrate w/Shadow die. Cut the shadow in a bright pink and the phrase in black. 
To finish off my card, I secured the image panel to the card base with double sided tape and scattered a few enamel dots. 
Well, that's it for me for this post. I hope I have given you an idea for a way to use the Folk Art Flowers die. See you next Saturday.