Showing posts with label wedding. Show all posts

Monday, July 24, 2017

Two Doves

Hi, Lois here with my Monday post.  As you are probably aware,  CottageCutz has two new die collections -- a wedding collection and a nesting shapes collection.  And they are currently 25% off through 9:00 pm tonight PST.  I'm using a die from each set this week for my monochromatic card.


To start my card, I cut two pieces of white cardstock -- 5 1/2" x 8 1/2" (scored at 4 1/4") and 3 7/8" x 4 1/8", and one piece of black cardstock 4" x 5 1/4"; as well as a piece of patterned paper 2 7/8" x 3 7/8".


Next I cut the Stitched Eyelet Rectangle panel, using the largest die in the set, and the Two Doves die-cuts from white and black cardstock.


Using some ivory Copic markers and a black pen, I added some accents to the doves.


I wanted the doves  to be raised from the card, so I placed some foam dots on the backs of them . . .


. . . and adhered the bird stand and doves onto the patterned paper, which had been glued to the black panel.  Sometime ago I bought a package of wedding paper, which also included some tags.  I adhered one of the small tags to the top corner.


I ran the 3 7/8" x 4 1/8" piece of white cardstock through my Cuttlebug using an embossing folder with a similar pattern as that on the patterned paper; then I constructed the card base.


I glued down the finished eyelet panel at an angle, and my card was finished.


CottageCutz dies used on this card are:

http://www.scrappingcottage.com/cottagecutzpairofdoves.aspx

http://www.scrappingcottage.com/cottagecutznestedstitchedeyeletrectangleset.aspx

Tuesday, July 11, 2017

Elegant Wedding Card


Hello friends. It's Janet from SugarShine Designs. I hope you are having a great week! It's the middle of the summer wedding season so I thought I'd make a wedding card using some beautiful CottageCutz dies you can find in the store. Click below for the video tutorial showing how this comes together.


This is a 5" square card that features the Bride & Groom die on the front in holographic white card stock. I just love this simple but beautiful lacy die that is so smart, it cuts out the groom's bow tie so it can stand out. Very elegant! The couple is attached to a 4.75" square black embossed card stock that is lifted off of the card base with a 4.5" square of fun foam. This is a great way to get a little lift but not make it so thick that it can't be mailed. Across the couple, I placed another die called Tweet Love. It includes the Love sentiment and also two "tweet" little birds. I thought the birds were too big for my design but they are cute! I saved them to decorate the envelope. As a substitute, you could choose the new Love Expressions die or give it a slightly different twist by picking Celebrate, Adore, Dream, Cherish, etc. The pretty script in those dies would match the elegant feel of this card perfectly. To finish the front, I used three metallic flower sequins and white gems.


Inside I used the largest square from the Stitched Square set and added the lacy Balloon Bouquet die in the same white holographic paper as the Bride & Groom on the front. The balloon die is super versatile. It would work for any elegant celebration from birthdays, parties, weddings and anniversaries.


Thanks for joining me today. I'll see you soon with another video tutorial!
Janet

Dies used in this project:


Thursday, June 09, 2016

Love Birds!


Hello all,

It's Donna here sharing you one of the dies from the CottageCutz dies! I am using the new release in May called "Tweet". This is another one of my clean and simple cards.  It is a 4x4 card, that I used the largest square stitched die to cut the top layer.  I colored these adorable love birds with copics.  I thought this would be a nice card for a wedding so I added the "Best Wishes" sentiment die and stamped the words "love birds" with black memento ink.

If you missed the May release, please stop by the store and check the dies out. Also visit the blog and browse around and see all the beautiful creations made by the design team.

Here is my card....


I hope you have been inspired!


Saturday, May 07, 2016

3 TECHNIQUE WEDDING CARD

Hello dear friends...

It's Saturday today and I'm Anita with my weekly post. I hope you all are enjoying the spring season and the summer fun in your place. In India, it is extremely bright and sunny but I think in many parts of the world, the spring flowers are still blooming.
So lets begin with today's work. In my post today, I will show you a technique of partial die cutting and adding a little twist to the background of a card, with negatives of diecuts as stencils.And we will make a shaker card!!! Sounds difficult !!!!! Of course not !!! It's super easy and fun to play using these and believe me , the results are very pretty.

So here is my full card reveal.


Please follow the pictures below to see how to proceed with my card.
If you are still doubtful about flower making, then follow my flower making video tutorial .

The card measures 5 inches x 7 inches


Cut a  white card stock measuring 4.75 inches by 6.75 inches.
Draw a line with pencil, 3 inches from the top across the card as shown.
Make a mark on either side of the CottageCutz Swan (Elites) die, a little above the final bottom cutting lines and extend the mark at the back of the die so that you know where to place the die, when you turn it on the paper to cut. Coincide the marks with the pencil line.


Now for cutting , place the die and paper on your cutting plates in such a manner, that the part that is below the pencil line will be extending out of the cutting plate and the part above the pencil line will be on the cutting plate. So the part , that is out of the cutting plate, will not cut through the paper when passed through the die cutting machine. This is how it should look.


Now remove the portion attached to the die cut that is on the top of the line, with a craft knife, giving an empty background space behind the die cut.


Cut a rectangle out of the middle die from the CottageCutz Wide Rectangle Stitched Frame die and further cut it as shown.
Adhere around the cut frame of the partial cut swan with foam tape.

Cut another die cut from the swan die , apply glossy accents and sprinkle Fairy dust shimmer glitter on top . Let it dry and attach to the partial die cut of the swan with foam tape.


Let us make the shaker card  now.

Turn the card and attach a piece of transparent acrylic sheet covering the cut portion behind the swan.
Put foam tape all around and add lot of silver sequins in the centre.
Cut a piece of white card stock and colour with Tumbled Glass Distress ink. Further colour with Wink of Stella clear Glitter pen to add a little sparkle .
Attach this to the foam tape on the acrylic sheet.

Make flowers using 3D Flower # 2 and colour the leaves in green using peeled paint distress ink . I have used cutwork leaves and flourish from the CottageCutz Lacey Rose Die.
Arrange on the corner as shown. Finish with pearlised flowers and lace strips.

For the background, Cut out two die cuts from CottageCutz Congratulations die and stick two die cuts together to get a fairly thick expression. Ink with Tumbled glass ink and colour with glitter pen.
Take the negative of the congratulations die cut and use it as stencil to add a print on the background as shown.
Distress with same colour. Add the expression and finish off with sequins.


Attach the final mat card stock on to the front of the card base.


The card is ready.


I hope you liked this post and my card. Do leave your feed back.
The CottageCutz challenge #2 is active now and the theme is spring. CottageCutz has most beautiful spring themed dies that you can find here.

Happy Saturday and keep crafting !!!!

Sunday, February 28, 2016

Wedding Shaker card

Hi, 
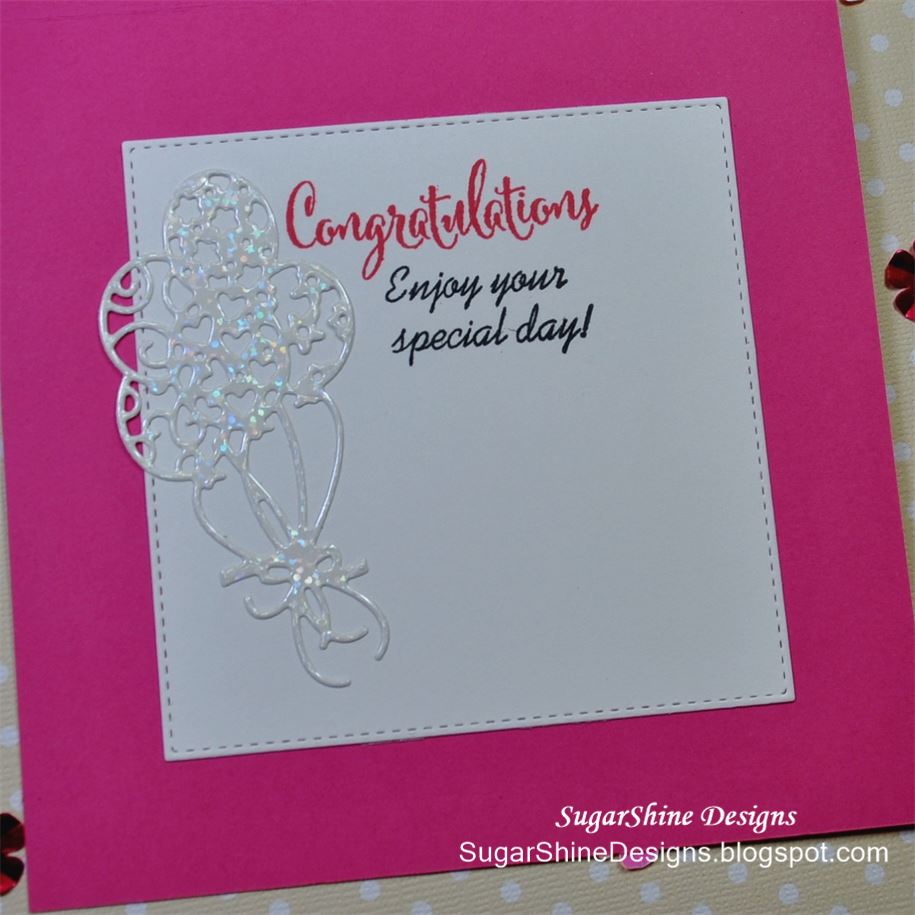
Vladka here! Today I have Wedding Shaker card for you. Are you interested in how you can create it? Let's start.


Basics:

Card base: 4 1/4 x 6 inches (cut 4 1/4 x 12 inches, fold in half)
Additional piece of white cardstock: 3 3/4 x 5 1/2 inches
Piece of white fun foam (3 3/4 x 5 1/2 inches)
Piece of acetate sheet (3 1/2 x 3 1/2 inches)

Other Supplies:

CottageCutz Dies: Listed Below
Cardstock: White and Red Cardstock
Distress Ink: Barn Door, Aged Mahogany
Other: Scissors, Paper trimmer, Sizzix machine, Scor-buddy, Water, Sheet of Acetate, Another small piece of white foam


Let’s prepare everything first:

1. With the CottageCutz Stitched Heart die, cut 2 hearts out with some red cardstock. Use the two smaller stitched heart shapes. (First and the second one from the center)

2. With the "Just Married" expression die and white cardstock cut both words

3. Cut a piece of red paper to approximately 3 3/4 x 1 inch

4. Take additional piece of white cardstock and with the bigger heart die (the fourth from the center) cut out the heart window. Do the same with piece of white fun foam.

5. Add some Barn Door Distress Ink on acrylic block and spritzed some water on it. Then take a piece of plastic acetate and gentle pressed it against the block to pick up some of the ink. Now, press the plastic to paper with heart window to transfer the ink . This will give you a splotchy look. This technique is called "smooshing". Let dry.

6. Heat embossed the sentiment on the piece of red cardstock (you can also distress the edges with Aged Mahogany Distress Ink) and glue the smallest heart on it.

Now that you have all the prep done, let’s make the card!


On the back side of the paper with the “smooshing” and heart window, glue a piece of acetate sheet. Next, apply the fun foam to the back for the shaker base with a strong adhesive. Align the heart windows. Add some beads, small pearls or something similar (small hearts cut out of the same red cardstock will be nice too) into the opening of the fun foam.  Apply more adhesive and add the card base. This will finish off the shaker. On the front of the card, glue the biggest red heart in the middle of the window on the acetate. Add the red paper to the bottom of the card with your embossed message and apply adhesive to the “Just Married” and apply over the red heart on the front. (See photo for placement)

Now the card is done!

There are several steps but I assure you, they are not hard at all. Give it a try! Have fun creating!


Wednesday, September 12, 2012

Just Married!

Hello everyone , Cheryl here with a Wedding Card using the Beautiful CottageCutz Dies from The Scrapping Cottage.

On my card I decided to use the super sweet CottageCutz Just Married Car (4x6) and then cut the car in a glitz white, and the bumper and tail light surroundings in a light grey design paper. My accent color for this card is pink, so I made everything else on the car pink.

Next I used the CottageCutz Wedding Border and doubled it up with Pink and Black to run across the right corner of my card

I used the CottageCutz Baby Frame, and the CottageCutz Magnolia Doily to layer for behind my car.

CottageCutz Dies Used:

Others Used:
DCWV/Forever and Always Stack
Really Reasonable Ribbon/Black satin
Helmar/Premium Craft Glue, Acid Free Glue, Zapdots, 450
Wedding Bells button
Sewing
Copics


Thank you for looking and hope you have a super wonderful day!!!
Hugs to all,
Cheryl
Come see the NEW Hocus Pocus Halloween Release from The Scrapping Cottage!