Monday, September 25, 2023
Holiday Deer
Tuesday, February 07, 2023
It's Your Birthday
Hello Friends
IT'S NEW RELEASE TIME! The collection is called Flowers and More. The whole set is on sale at a bundle price of 50% off and individual dies are at 30% off. The unique thing about this release is that there are not as many pieces in each of the dies. So they go together really quick and easy!
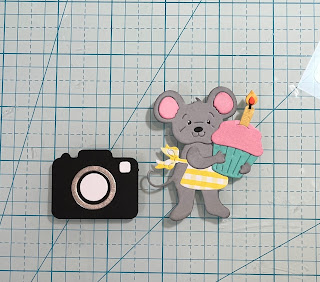
I have a number of birthdays on the way. So I decided to make a happy little card using the new Camera die mixed with a few older dies.
Design Steps:
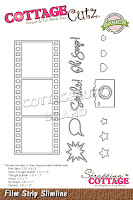
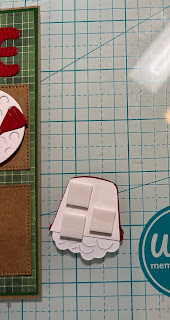
1. Using the following dies: Camera, Mouse w/Cupcake, Film Strips, and Slimline Filmstrip Oh Snap cut them out in the following colors of card stock as shown above: black, silver, white, pink, yellow, checked yellow DP, orange, gray, blue, and black2. Assemble the pieces I inked the little mouse around the edges. To make the picture frame I cut a rectangle 3 x 2 3/4 and then took the 4th from the largest Pierced Square and cut out the opening slight above center
3. The base is a white A2
- Pink card stock cut 4 1/8 x 5 3/8
- Mint polka dot DP 4 x 5 1/4
- Glue mint DP to the pink
5. Add a few sequins to your card and it is complete
CottageCutz Products
Thursday, January 19, 2023
Love Recipe
Hello Scrapping Cottage Friends
It is Pam sharing with you today!
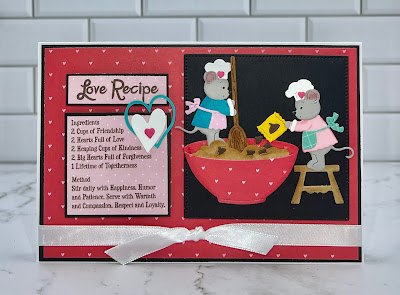
I am making a few more Valentine cards for friends and family. As I was looking through my stash I found this cute little Love Recipe. So I thought I would incorporate it into one of my cards. I found the perfect die to go with it The Christmas Baking Mice. I love when I can use dies for a different purpose such as this one!
Designer Steps:
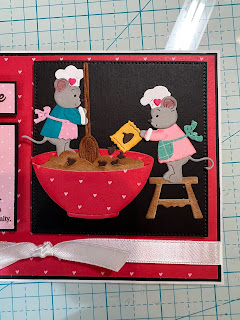
1. Using the Christmas Baking Mice die cut out the pieces in the following card stock colors: pink, brown, dark brown, grey, yellow, and white. Cut out the bowl and aprons in DP. Shade the pieces with a coordinating ink color and a small applicator2. Using the Pierced Square die second from the largest cut out a black square. Assemble the pieces and attach to the black square as shown above
3. Use a white 6 1/4 x 4 1/4 card base
- cut a piece of black 6 1/8 x 4 1/8
- cut a piece of red heart DP 6 x 4
5. Pop up the black square to the right side of the card and then pop up the recipe
6. Add a 3 hearts to the recipe and your card is complete
Thursday, September 22, 2022
Snowman Shaker
Hello Scrapping Cottage Friends
We have a NEW RELEASE FOR AN EARLY START ON YOUR CHRISTMAS CARDS!! The collection is Christmas Part 1 and has 21 fantastic dies. The release includes everything from Gnomes to Reindeer!! Check it out HERE it is on sale now!!
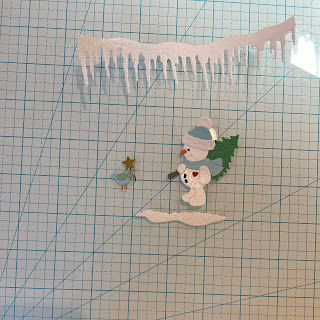
The die I am creating with today is Snowman w/Tree. I made a shaker card with this cute little guy! It seems like young and old love shaker cards!
Design Steps:
1. Cut a piece of white card stock 4 1/8 x 5 3/8 and a piece of red snowflake DP 4 x 5 1/4. Glue the two pieces together and then cut the square for the shaker window (I did it slightly to the left of center). The shaker window is 2 1/2 by 2 1/2 so I used my Pierced Square die 3rd from the largest to cut the opening2. Place the plastic window in the hole and fill it with your shaker pieces. Use glue or tape to seal the shaker with a pieces of glitter white paper measuring 2 3/4 x 2 3/4
3. Glue the whole shaker panel to the white A2 card front
4. Using the Snowman w/Tree die cut out the pieces in: white glitter card stock, green, blue, red, orange, black, mint and gold. Assemble the pieces with a fine tip quick drying glue and set aside
5. Cut the icicles using the Icicle Border die on white glitter card stock. Adhere the border to the top of the card using foam tape. Place dimension dots to the back of the snowman, bird and ground then pop him to your card front as shown below. Stamp your senitment and heat emboss with clear powder. Glue the sentiment flat to the card front and your card is complete
CottageCutz Products
Thursday, August 25, 2022
FORE!
Hello Scrapping Cottage Friends,
We have a NEW RELEASE which is perfect for all those sports fans in the family! It is called Baseball & Golf! It has 16 fantastic dies which will make your card making and scrapbooking pages look great! The release has special pricing right now so go and check it out HERE!
Not only is my husband a golfer but my two nephews take a swing at it too! So I am happy to make a few more cards with the golf theme. Today's card features the Golf Ball & Tee, Golf Basket of Balls, and Golf Bag and Clubs.
Design Steps:
1. Start with an A2 size kraft card base, green DP cut at 4 1/8 x 5 3/8, green plaid DP 4 x 5 1/4, strip of green DP 2 1/8 x 5 3/8 and a strip of newspaper DP 2 x 5 1/42. Cut out the pieces using the Golf Ball & Tee , Golf Basket of Balls, Golf Bag and Clubs on green, red, white, brown and silver card stock. Cut out the squares using the 6th from the largest Pierced Square die on kraft card stock. Cut out the the rectangle 6th from the largest Pierced Rectangle die on kraft card stock
3. Assemble the pieces using a fine tip glue. I traced the golf basket and put a white liner behind it. Using the Stitched Alphabet die cut out FORE in red
4. Glue down the solid green DP to the card front. Next glue down the plaid DP. Glue the green strip to the newspaper DP and add it to the front as shown. Glue the FORE, squares and the rectangle to the front as shown
5. Add dimension squares to the back of the golf basket, golf bag and the ball and then pop them to the card front as shown below and your card is complete


