Showing posts with label Pierced Circle Set. Show all posts

Tuesday, October 24, 2023

Easy Snowman Die Cut DIY Card

Happy Tuesday crafty friends,
Today I am sharing a cute, quick and easy card you can easily recreate. It features a super cute snowman die cut from the new Cottage Cutz release. Here is my card.
It is a standard top folding A4 card. It is a very easy card that you can recreate and make several for the upcoming holiday season.
I started by cutting out some base dies and some corresponding mats from some patterned paper. The paper is from an Echo Park 6x6 paper pad. I used the Pierced Circle Die set and the double stitched rectangle die set for the die cut bases and then cut some mats from the patterned paper to fit. For the circle, I used the next size down in the die set. The base of the card is a white cardstock cut at 4.25 x 11 and folded at the 5.5 mark to make it a top folding card.


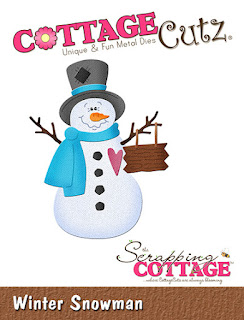
I then went to work on that super cute snowman. I cut him out in all white cardstock. My typical MO. I then colored him in with corresponding colors to the papers I chose. I love doing this method so I can come close to the colors and not have to have so many different paper colors. After coloring the snowman, I assembled him and added him on to the card top I then cut out the stay warm from one of the pieces of paper, You could just as easily  use a stamp or another die cut for a sentiment.

Here's a view of the card standing up and slightly angled. I think it turned out super cute and very clean.


Winter Snowman


Double-Stitched Rectangle Set


Pierced Circle Set

Well that about covers it for today. Be sure to keep stopping back by for some more creative inspiration and the holiday crafting season gets heated up! Also, stop back by this Wednesday as I showcase a super cute project I created for an Instagram Hop I will be participating in! You don't want to miss it!

YOU WILL WANT TO JOIN THE FUN!
You could win 1 of 2 great prizes!
1 $50 Prize from La-La Land Crafts
1- $50 Prize from Cottage Cutz!
Winners will be chosen over on Instagram.

I will also have a full post on my blog with deets on my project! I can't wait to share what I created!

Until then, have a wonderfully crafty day!
-Melinda

Monday, October 02, 2023

Fall Wagon Wheel Shaker

Happy Monday friends!

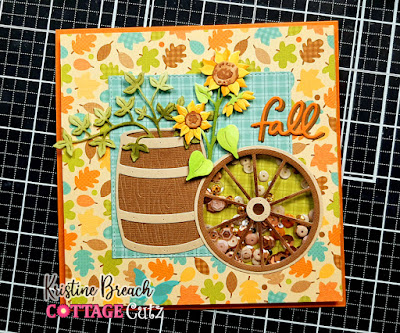
Kris here to share a fun Fall shaker card using some brand new dies from our FALL 2023 RELEASE!  There are 15 designs in this release and they are all on sale!  Individual dies are 30% OFF and for a limited time only, you can get the whole bundle for 50% OFF!
This release has so many wonderful dies (I love Fall!)  and the first thing that came to mind when I saw the Fall Wagon Wheel and Fall Barrel dies was to create shaker cards!!  I decided to use them together and make the wheel into a shaker.  Super easy to do!  


All the patterned papers I used came from the Pumpkin Spice paper pad from Doodlebug Designs

PRODUCTS:

SUPPLIES:
Low-tack tape
Foam strips
Acetate or window sheet
Sequins or other shaker elements

DESIGN STEPS:

• Card Base is a 5-1/2" square in Pumpkin Pie cardstock - set aside until the end.

• Leafy paper is cut at 5-1/4" square.

• I die cut a square using the largest of the Pierced Square Set from the blue plaid and glued to the center of leafy paper.

• I also die cut a circle (not pictured below) using the 4th largest of the Pierced Circle set from the green plaid paper that will be the back inside of the shaker.


• I die cut the Wagon Wheel from 2 shades of brown/tan and the Barrel from white and the same 2 shades of brown.  I then colored the white leaves and sunflowers.


• I glued the leaves behind the barrel and then to the bottom left of my plaid square.


• Next, I taped (with low-tack tape) the 5th largest Pierced Circle slightly overlapping the barrel, then die cut thru all layers.


I glued the larger outer wheel on top of die cut opening, then the smaller wheel on top.


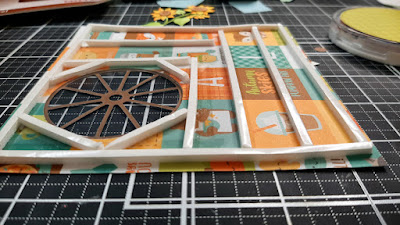
 • On the back, I added Scor Tape all around the wheel, then removed backing and add the window sheet.  

***TIP:  running a used dryer sheet over the acetate will help prevent sequins from sticking!


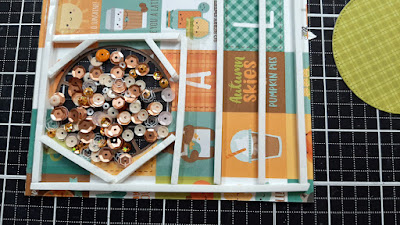
• I added 1/8" foam strips closely around the circle opening and all around the edges... then can fill in with a few strips.


Add sequins or other shaker elements 


Add your circle shaker backing to lock in the sequins.


Apply glue to the back of the shaker part and remove backing of foam strips and center it onto card front.

• Add Sunflowers and "Fall" and glue the wagon wheel center to the wheel.


We have more inspiration on our YouTube Channel HERE
 
Happy Crafting!

~Kris


Thursday, September 21, 2023

Happy Fall Y'all

Hello Friends,

It is Pam sharing with you this fabulous Thursday.

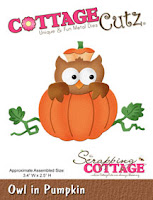
I have another fall card for you.  It can be used to welcome in autumn or for a Thanksgiving card.  I am using the Owl in a Pumpkin die. It is an oldie but a goodie and still available in our store today! 


Design steps:

1.  Using the Owl in a Pumpkin die cut out the following pieces of card stock: brown, green, yellow, white, black and a DP orange
2.  Using coordinating ink colors shade the pieces and then glue together
3.  For the base use an A2 blue card, cut a piece of brown 4 1/8 x 5 3/8, and a piece of leaf DP cut 4 x 5 1/4.  Using the largest Pierced Wide Circle Frame die cut out 2 circles in brown and glue together.  Using the second from the largest Pierced Circle die cut out blue and then run through an embossing folder of your choice.  I used a leaf embossing folder
4.  Glue the brown to the blue card base and then add the leaf DP.  Glue down the blue circle slight above center as shown above.  Place dimension dots on the back of the circle frame and pop of the blue circle
5.  Place dimension dots on the back of the Owl in the Pumpkin and pop it to the blue circle as shown.  Add your green leaves.  I cut a few extra leaves as you can see below
6.  Finish your card by adding the sentiment


We have more inspiration on our YouTube Channel check it out HERE

Thanks so much for stopping by!  And I will see you next Thursday.

Blessings and Take Care


Tuesday, July 04, 2023

4th of July Pinwheel Table Decor

Happy 4th of July crafty friends!
I hope you are having a wonderful time with family and friends and maybe getting a little crafting in too! Today I am sharing a fun 4th of July table decor piece I created. With some fun dies from Cottage Cutz. Take a look.

Here is my fun little table decor piece. It is a pinwheel with a festive 4th greeting with some stars and fireworks shooting out and sitting on top of a patriotic top hat.


To Make The Pinwheel
I started with a 6x6 piece of red cardstock. I drew a line from diagonal corner to diagonal corner and found the halfway points more or less in each quadrant. I also found the center by going 3" in both ways. You can see my markings very lightly above.

Next I cut from each corner to the more or less center of each square. I then slightly curled the left side of each corner.

I bent each of the curled corners in to the center. I used a glue dot at the bottom and then put another one on top to secure it.


Next I took some sparkly silvery tool and gathered about 15" or so of it in an accordion type style and used a little wire twist to secure the middle. This created the puff/pleats.


I poked the twist through the middle and secured it in the back.


Here is what the pinwheel looked like with just the poof on. You can also barely see the clear stick I used to hold it up.


Next, I went to work creating the center. I cut out two pierced circles from the die set and then created some corresponding mats in two shades of blue cardstock. I then cut out the Happy 4th of July phrase and adhered it. To get the Happy to stand more erect and sturdy, I cut it out three times. Two of them I put in front of the larger pierced circle and the third one, I put from behind the circle. This gave the letters some good stability. I then added the firecrackers and then added some glitter to their tops.


I then created a couple of these super cute fireworks from the die set. I used a couple of circle punches for the backs and glued some light weight wire to them. I also had some styrofoam glittered stars and used the same wire to pock into them and added them to the pinwheel too. 


Lastly, I added a blue metallic bow and then poked the clear stick into the top hat and it was done. The top hat came from the dollar tree just the way you see it. 

Check out the fantastic sale Cottage Cutz is currently having!


Well that about covers it for today. I hope you are inspired to give the pinwheel a try. Don't forget to head over to Cottage Cutz and pick up these super fun dies. 

Also head over to the Cottage Cutz YouTube channel for some more fabulous crafty inspiration!

Until the next time, have a wonderful crafty day!

Melinda