Showing posts with label Nested Wacky Stitched Circle Set. Show all posts

Monday, May 18, 2020

Father's Day

Hello Scrapping Cottage Friends!

It is Pam sharing with you today on the blog!  I hope you are enjoying your Monday!

I am having so much fun creating with our new Garden Release.  I decided to make a card for my brother for Father's Day.  He loves working out in the yard and at one point in his life he had a landscape company.  So I thought this card would be perfect for him!

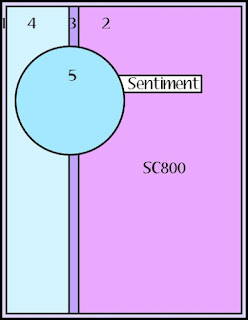
To make this card I used a sketch from one of the Splitcoaststampers Challenges.  The sketch looked like this:

I used a variety of designer papers and a bright red ribbon to finish it off.  The dies I used are the LawnmowerSpring Grass and Wacky Stitched Circle.  I have linked them so you can take a peek.  

CottageCutz Dies


Thanks so much for stopping by and I do hope you check out all the wonderful dies we have in stock right now!
Blessings
Pam

Friday, September 20, 2019

Teacup Christmas Kitty

Happy Friday!  It's Jeanne today with a die from the new Christmas release.  When I saw this Kitten in Teacup die I fell in love.  The kitty is so cute and although it is a Christmas die, it doesn't need to be.  Just take off the Santa hat and holly and it can be used all year long!
To start I chose some Christmas paper so I would have my colors.  I like the two tones of red in this pattern.  I cut an A2 panel and a circle in vanilla using the second largest of the Wacky Stitched Circle dies.
Then I cut my pieces using various colors of card stock.  I cut two sets of paws, one grey and one white as I wasn't sure which ones I wanted to use.  I used two shades of red - bright for the hat and berries, and a dark for the saucer and teacup decoration.  For the greenery, I used an older Christmas die in two shades of green. To make the teacup a bit "fancy" I cut the rim in gold to match the sentiment.
Using a fine tip liner pen I colored his eyes.  I used Distress Oxide ink and a sponge dauber to tip the edges of the cup, cat, paws and hat pompom and band.  This gives them a little bit of depth.
I assembled my teacup and kitty on a silicone mat.
The I assembled my card front, angling my sentiment and using a thin gold washi tape down the left side.
My kitty is popped up using foam dots on the back.  I adhered the panel to a vanilla A2 card base.
As you can see, I decided on the white paws.  I think this card will be my Christmas card for a friend who adores her gray and white cat.  (And it has white paws!)

Don't forget to stop by the online store where the new Christmas release is 25% off for a limited time.  They are adorable and the design team is looking forward to sharing them with you!

Dies used:
http://www.scrappingcottage.com/cottagecutzkitteninteacup.aspx

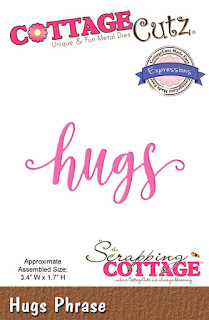
http://www.scrappingcottage.com/cottagecutzexpressionsplushugsphrase.aspx

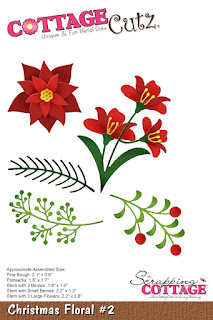
http://www.scrappingcottage.com/cottagecutzchristmasfloral2.aspx
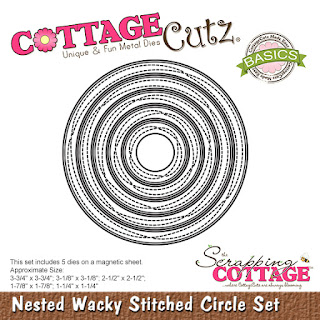
http://www.scrappingcottage.com/cottagecutznestedwackystitchedcircleset.aspx

Thanks for joining me today.  I hope you have a fun and creative weekend!

Tuesday, August 27, 2019

Sweet Birthday Wishes


Hello Scrapping Cottage friends! Thanks for taking the time to stop and visit with us today. It's Mary Marsh here bringing you the Tuesday edition of the Blog. 

The new release of Birthday dies have been restocked in the online store. So if you didn't get the ones you wanted previously, all 25 designs are in stock. This release is filled with cute little whimsical animals, birthday cakes, cupcakes and birthday phrases. Everything you need to create some outstanding birthday cards.

Today for your viewing pleasure I am featuring the Mouse with Cupcake die. I created this card using the colors from the Splitcoaststampers color challenge #754. I am the hostess of the challenge this week.

I don't have a lot of photos but I will give details on all dies used as well as paper sizes. So let's get started.

Step 1: I started my card with the challenge colors. They are lovely lipstick (red), gorgeous grape (purple) and coastal cabana (tropical green). I used these colors on the mouse apron, the cupcake and the birthday present. I used Ranger multi medium matte to secure.
gorgeous grape, lovely lipstick, coastal cabana
I came across a nice sketch online that I used for my card layout. I kept it on the simple side to allow my mouse image to be the star attraction.
gorgeous grape card base: 4 1/4" x 5 1/2"
designer paper background layer: 4 1/8" x 5 3/8"
coastal cabana striped sentiment panel: 1 5/8" x 4"

Step 2: I used the 4th largest die from the nested wacky stitched circle set for my 2 circles. One is cut in white and I cut another in coastal cabana and offset it slightly. The birthday present is from the Birthday Hedgehog die set.

I stamped the sentiment directly on the striped designer paper in gorgeous grape ink. To finish off the card, I scattered a few gorgeous grape enamel dots.

That's it for this post. I will be back on Saturday featuring another card from this whimsical new release.

dies I used to create card:


Wednesday, March 14, 2018

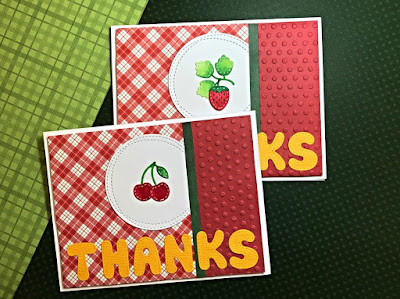
Stitched Fruit Thank You Set


Hi everyone! It's Janet here to show you a set of thank you cards for the spring season. I have really enjoyed working with the dies in the new In Stitches collection. There is so much to choose from and they can be used year around. I am a huge fan of the stitched look so these are right up my ally!

Today's set of five cards feature the delicious Stitched Fruit dies. Here you will find a lemon, apple, pear, strawberry and cherries. These are nice sized dies when assembled and were perfect as the focal points for my card set. They would be awesome on tags also.


The Thanks sentiment is cut from the Stitched Alphabet set. The entire alphabet cuts out at once and are a nice chunky size at 1" tall for words or short phrases on your card projects. The letters would also work wonderfully on your scrapbook layouts. There are matching numbers to match the letters although I didn't use them in today's project.

The circle die cut comes from one of my most favorite shape sets, Nested Wacky Stitched Circle Set. To create a little additional interest, I trimmed about 3/8" of the circle off and butt it against a narrow green strip and a red embossed strip of card stock.

Please click on the video thumbnail below or this link to watch how these cards were created.


Thanks for stopping by to get some inspiration for your projects. Have a crafty day!

Dies Used In This Card:


Thursday, December 14, 2017

Sick Pup!

Good Morning Scrapping Cottage Friends!

It is Pam creating with you today!  I hate to say it but flu and cold season is upon us!  And Cottage Cutz is a step ahead of it with a new release with tons of adorable Get Well dies!  Check out this card I made for a friend!

Design Steps:

1.  Cut out all of the pieces in a cream color and then cut out the dogs body in brown using the Nurse Puppy die

 2.  Assemble the piece shading and coloring as you assemble

 3.  Using 3 different patterns and colors of DP cut out 3 different size circles.  Use the Nested Wacky Stitched Circle Set
4.  Use an A2 white card base and cut a slightly smaller piece of pink. Next cut a piece of green checked designer paper 4 x 5 1/4 glue the checked paper to the pink.  Add the circles popping up the largest circle then added all the die cut pieces as shown.  Cut the sentiment in pink using the Ouch with Tooth and add it to the top left corner


Hope your check out all of the Get Well Dies! They are so much fun and would make a great gift for any crafter!

Blessings
Pam

Sunday, August 27, 2017

Pretty Woman Card

Hi!

This is Anja again. I'm still playing with the new wedding dies. Today I made a card that can be used for one of your girl friends. The one that likes to look good, loves to dress up and put on some make up. All this small pieces are so fun to color and put together. With a little moderation you can use this card for a bride to be.


- Cottage Cutz Dies (Bridal Lingerie, Cosmetics, Wedding Gown, Live Laugh Love, Rose with Wedding Rings, Nested Wacky Stitched Circle Set),
- Distress Oxides (Worn Lipstick, Vintage Photo, Peeled Paint, Lucky Clover, Seedless Preserves, Antique Linen,Wilted Violet, Black Soot),
- white card base (12,5x12,5 cm),
- white card stock for die cuts,

- patterned paper (3 12,1x12,1 cm),
- silver ink pad,
- paper glue.

First I cut the squares from patterned paper and circles with the nested stitched die. I decided to decorate the inside of the card, that
's why I cut three of each.


Then I die cut all the small pieces for the cosmetics and clothes. I colored them with Distress Oxides and glued them together. 


When I had everything prepared I just assembled the card together. 


Have a beautiful and creative Sunday. See you again next week.
Anja Z.