Showing posts with label Nested Stitched Rectangles Slimline. Show all posts

Sunday, May 23, 2021

Happy Birthday

Hi!

It's Anja here. I have a circus themed card for you today. 

For this card I used:

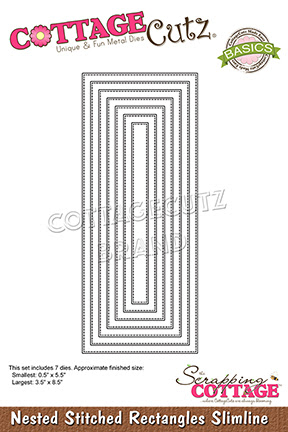
- Cottage Cutz dies (Clown with Balloons, Circus Tent, Nested Stitched Rectangles Slimline, Grass Slimline, Clouds Slimline),

- Distress Inks,

- dark blue card stock for card base (9,5x22 cm) and background (8x20,5 cm),

- white card stock for die cuts, 

- black pigment ink,

- sentiment stamp,

- acrylic block,

- paper glue. 


First I cut and colored the tent and the clown.

Next I cut background paper and made paper stencils for the grass and the clouds. I colored the background paper with Distress Inks. 

I cut additional papers for the background. I made the card base from dark blue card stock.

I added the sentiment to the middle of the background.


I adhered all the layers to the card base and my card was done. 


That's all form me for today. Have a nice Sunday and see you again on next week. 

Anja Z.


Cottage Cutz dies I used:


Friday, May 21, 2021

Always Tea Time

Happy Friday!  It's Jeanne today with a vertical slimline card for the tea lovers in your life.  For this card I used the Nested Stitched Rectangle Slimline and the Rounded Rectangle Slimline dies along with Spring Tea Party from the Spring release.

I started by picking my background paper so that I could have the colors for my fox and flowers.  I used the Stitched Rectangle for the background and the Rounded Rectangle for my banner.

I cut all pieces of my image from white cardstock and colored with Distress Oxide inks.  I cut two of all the flowers and tea cups.

I stamped my sentiment 1 1/4 inches from the top of the banner and placed my fox just below.  Then I added the flowers and teacups, angling them.  I decided not to use the purple teapot.

I wanted to add some ribbon to give a bit of interest to the base and highlight the fox.

I cut a piece of ribbon 7 inches long, folded it in half and adhered in 3 1/5 inches from the top.  I angled the ends.

Because of the height of the ribbon, I used foam tape on the back of my banner piece to adhere it to the card.  I placed it 1/4 inches from the top.

I used some coordinating pearls to give a little bit of playful shimmer and draw your eye down the banner.

I hope you have enjoyed my card today.  Be sure to visit the online store where the new Slimline dies are on sale for a limited time.

Products used:


Thanks for visiting today!  I hope you have a fun and creative weekend.


Tuesday, May 18, 2021

A Cupcake for Your Birthday

It's time for another Throwback Tuesday!  It's Jeanne here today and I have a fun birthday card fusing a die from the 2019 Birthday release combined with the new Slimline dies.  These new dies are a great way to give variety to your card layouts!

I started with a card sketch from Splitcoatstampers that I rotated 90 degrees.  Card sketches are a great way to save time when creating.  Sometime I use them exactly, and other times they are a great starting point.

Next I chose papers and ribbon to get my colors.  The fun thing about this little mouse is that by changing up the colors you can make it more for a younger or older recipient, male or female.  I wanted mine to be very bright for a child so I went with this rainbow stripe paper.

I stamped my sentiment on a strip cut with the smallest of the Nested Stitched Rectangle Slimline dies.  Further contributing to the throwback theme I found some small old wooden alphabet stamps.  These worked perfectly to make the "Happy Birthday" sentiment.  I placed my die on my cardstock and drew a light pencil line around the outside edge.   I stamped my sentiment before cutting it out so I could adjust the placement and make sure it was centered.  Stamping at random angles adds to the casual, happy feel and is more forgiving than if I had tried to line up all the stamps!

My background paper is cut using the largest of the Nested Stitched Rectangle Slimline dies and I used the Stitched Circle and Nested Stitched Scallop Circle dies to give focus to my mouse.  She is cut from scraps and popped up using foam dots.

I love some bling, so I added some rhinestones to the final card.  Be sure to visit the online store where the new Slimline Release is on sale for a limited time!

Dies used:


Thanks for stopping by today.  Have a wonderful rest of the week!


Wednesday, May 12, 2021

I Shore Love You!

Hello!  This is Sukie and today I have a project to share for my design team post.  My card features several dies from the new Slimline die release.  These dies make slimline cards so quick and simple to create!

My card base was cut with the Nested Stitched Rectangles Slimline die set.  I used a cloud stencil to create the puffy cloud background.  I left the bottom portion of my card alone since I knew it would be covered up.  I used the Hills Slimline for the sand border and the Clouds Slimline for the 2 sets of clouds.  The Sandcastle was cut with white card stock and shaded with some Oxide Inks.

The next step in my design process was to cover the bottom portion of my card base with the sandy hill.  The splattered paint adds a bit of interest to the sand.
Next, I layered the set of clouds on top portion of my card base.  The addition of the white cloud border breaks up all of the blue in the background.

The sandcastle was affixed on top of the sandy hill as the focal point of my card.  This die cut is so detailed and was perfect for finishing off the beachy scene!

The sentiment was stamped on a hand cut flag and was affixed between the sandcastle and clouds.
Here are the die sets used on my card, available in store:

Saturday, May 08, 2021

Hello There Kitty

Hello Cottage Cutz fans!  It's Jeanne with the Saturday edition of the blog.  I am loving the new Slimline dies - they make creating slimline cards a breeze.  For my card today, I used the Nested Stitched Rectangles, the Hills Slimline along with the Cat in Spring Window die to create a bright all occasion card.

I love slimline cards, but I have a lot of patterned paper that is only 6 x 6 inches - way to short to cover the card!  And I'd love to use my embossing folders but they don't cover the whole card either.  So today, I have design tips that will allow you to use both of these from your stash!

I started by cutting and assembling the adorable Cat in Spring Window.  (You may have noticed I usually make a gray kitty - this is because we had one for years! So Andreya shows up on many of my cards.)

Using the largest Stitched Rectangle I cut a rectangle from white cardstock and a partial rectangle from the 6 x 6 inch patterned paper. 

Using an embossing folder I embossed as much of the white panel as possible.

I placed the lavender panel over the white panel along with my sentiment and window so I could decide where I would place the Hills die to cut my curve.

After it was cut I glued it to the white panel covering the plain side. Then added my phrase and window.  I used foam dots for the window box to give some dimension.

I love the stitching on the Stitched Rectangles and Hills dies. They give a cohesive and polished look when combining panels on a card.  The stitching goes all the way around the card and the added panel has a nice finished look to the curved edge. Any of the Hills dies will work for this giving a variety of looks!

Be sure to visit the online store where the new Slimline release is on sale for a limited time!

Dies used:


I hope you enjoyed my card today!  Have a wonderful weekend!