Showing posts with label Merry Christmas Tree. Show all posts

Tuesday, November 21, 2023

Easy Deer Christmas Masculine Card

Happy Terrific Tuesday crafty friends! 
Melinda here with you today. I hope your Turkey day week is off to a great start. Can you believe it is going to be Thanksgiving this week?! Where is the time going?! Well, I need to get cracking on some Christmas/Holiday cards, so I decided to make this easy, masculine card. Take a look...


I started by applying the foliage to the patterned paper mat. I decided to use black for the leaves.

I then cut out a few of the trees and plain black cardstock. I glued them together to give them some great sturdiness.

I used my Spectrums Noir glitter marker to give my deer head some subtle, bling. Even though this is a 
"masculine" looking card, I think the glitter gave it a nice touch without making it "girly".


I colored the antlers with my gold marker. 


Here is my finished card. I layered the deer head onto the christmas tree. I then added the Merry Christmas tree's sentiment in kraft cardstock on the bottom of the tree. Overall a very eady and yet very effective card!


Merry Christmas Tree


Well that about covers it for today! Be sure to hit up CottageCutz.com for their fantastic 
Black Friday Sale! 
You won't want to miss it!

Until the next time, hae a wonderfully crafty day.

Melinda

Tuesday, December 20, 2022

Easy Snowman Tag

Happy Tuesday Cottage Cutz Friends!
Melinda here with you, and today I am sharing a very easy tag for a present I created with the adorable Snowman w/Tree Die from  from this year's amazing Christmas release! As we get down to the wire and finish wrapping all of those presents, here is a very quick and easy tag solution that you can get done fairly quickly!
To create my cute and very simple tag, I used the second largest double stitched rectangle die from that set for my base. I cut it out of plain white cardstock. I then proceeded to cut a piece of patterned paper for the background mat. 

I then cut out the adorable snowman die in white cardstock. I colored the various pieces with my markers. and assembled them and put them onto the mat. I added some puff paint for the snow, the brim of the hat and the ball. I also added some of that same paint onto the tree too.

Next, I cut out the Merry and Christmas from the Tree die set. I colored in the pieces with my pink markers. 


Lastly, I took the second smallest stitched scalloped rectangle from the die set to make my to and from tag. I stuck all of that onto the double stitched mat. To finish off my gift, I wrapped the center in some pretty ribbon. I adhered the finished tag over the ribbon. I hand wrote the To and From on the tag. For a little extra touch,  I added a cute snow flake charm to the corner.

Here's a closer look at my finished tag. I think it turned out super cute and really makes my package look finished!


Dies I Used


Snowman w/Tree


Nested Scallop Rectangle Set


Double Stitched Rectangle Set


Merry Christmas Tree


Here's a look at the entire release. Be sure to head over and grab them while they last!

Well that about covers it for today! Until the next time, have a wonderfully craft-die day!
Melinda Beltran


Saturday, December 03, 2022

We Wish You A Merry Christmas Owl Card.

Happy Saturday Cottage Cutz Friends!
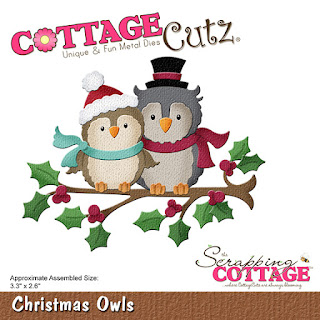
Melinda here with you, and today I am sharing a simple but effective Christmas themed card I created featuring the cute Christmas Owl die from the FABULOUS Christmas release!
My card is a standard A4 size: 4.25 x 5.5. This card is a regular side fold card. I thought these Owls were adorable. I wanted to make them in  my favorite color...pink. So I ended up with this very non-traditional looking Christmas card. 

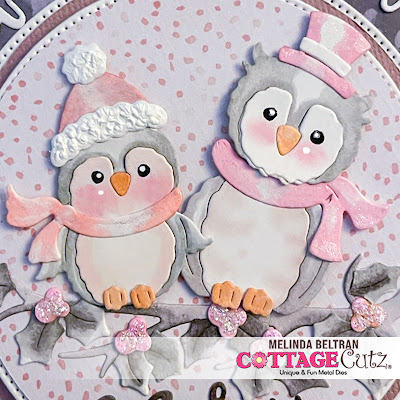
I started by die cutting all of my pieces in white cardstock. I then proceeded to color the various pieces in. I wanted to keep my little owls on the lighter colored side. So I used shades of gray and light pink-peach for their bodies. I used some chalks for their cheeks. I also added some stickles to the berries and some puffy paint to the little owl with the hat on the left. I added the paint to the rim and the pom pom of the hat and it gave it the perfect texture and dimension.  


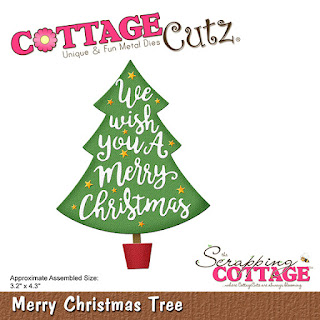
I mounted the adorable owls onto a pierced circle mat cut from white cardstock. I used some pretty patterned paper for the mat layer. I then repeated that with the largest pierced circle die cut in white cardstock and to that I added a mat of some rusty pink cardstock. I then used the phrase We Wish You A Merry Christmas from the Merry Christmas tree die. I curved the letters around the large circle die. 


Here is a closer look at the work merry. I colored that in some dark gray marker and it matched the leaves and theme of the card perfectly.


Here is one last look at the completed card. I loved the way this turned out!


Don't forget to head over to the CottageCutz YouTube channel and check out all of the amazing projects on there. Our video team is doing a wonderful job of filling the channel with all sorts of creative content! You don't want to miss it!

Dies I Used
Christmas Owls

Merry Christmas Tree


Pierced Circle Set

Here's a look at the entire release. Be sure to head over and grab them while they last!

Well that about covers it for today! Until the next time, have a wonderfully craft-die day!
Melinda Beltran

Saturday, November 12, 2022

Gingerbread and Cocoa Easel Card

Happy Saturday Cottage Cutz Friends!
Melinda here with you, and today I am sharing a cute and easy Christmas themed easel card I created with some dies from the FABULOUS Part2 Christmas release!
Here is my finished card. It is an A4 sized card. I created an easel card base to give this little card some extra wow. My card features one of the super adorable Ginger friends. I also included the phrase die, Cookies & Cocoa with those cute chocolate chip cookies and that adorable cup of cocoa. I also used the tree from the Merry Christmas Tree die from the Christmas Release Part 1.  I mounted the cookies and the cup of cocoa onto the smallest nested stitched doily from that die set. I then layered some patterned paper mats onto the two different largest sized scallop stitched rectangle dies for some extra layers and dimension. To keep the Easel open, I added some layers of the double-stitched rectangle dies and used some thick foam tape to give them some lift. I added the "Tis the Season Sentiment" to those dies along with some patterned and cardstock mats.


Here's a closer look at the front of the card standing in the easel position. Here you can see all of the fun dimension I added to the die cuts with some foam tape. For the cup of cocoa, I added some dimensional white paint and some stickles glitter to add some dimension to the "whipped cream". I also added some stickles to the cute little hearts and the little snowflakes.

TIP: Making an Easel card is super easy!
Simply score the top of your card in half. Then cut a piece of the same base of cardstock paper you are using and cut it to the same size as the top. You will always adhere it to the lower half of the scored top only. This will allow the card to lay flat for giving and storing and will allow the top to stand once you use something in the inside to create a "stop".


Here's a look at the inside of the card. I used a Scallop Stitched Rectangle die and mounted it to the top of the inside of the card. This is where I will write my personal greeting.

Here's a closer and side view of the inside, "Tis the Season" sentiment. You can see I added some glitter to the sentiment. It adds a nice touch without being too overbearing.

Here's a closer look at the sentiment "Cookies & Cocoa" die. I cut them out of some plain white cardstock. I then colored them in with my markers. 


Here's a view of what the card looks like closed.

Here's a closer look at the gingerbread girl. I cut her out of some gingery brown cardstock. I edged her with some chalk and then added the cute little stitch lines. I colored her bow and scarf with some pink markers and my spectrum noir glitter pen. The photo doesn't capture the subtle glitter from the pen. I also added some stitch lines to her scarf and bow. 


Don't forget to head over to the CottageCutz YouTube channel and check out all of the amazing projects on there. Our video team is doing a wonderful job of filling the channel with all sorts of creative content! You don't want to miss it!

Dies I Used


Double Stitched Rectangle Set


Nested Stitched Doily Set


Nested Scallop Rectangle Set


Here's a look at the entire release. Be sure to head over and grab them while they last!


Well that about covers it for today! Until the next time, have a wonderfully craft-die day!
Melinda Beltran

Tuesday, September 20, 2022

Easy Reindeer and Snowman Christmas Card

Happy TuesDIE Cottage Cutz Friends!
Melinda here with you on this terrific Tuesday. Today I am sharing a fun and very easy card I created featuring dies that are part of the new Christmas Part 1 Release.

Here's a look at my completed card. 
It is a standard A4 Top Folding card. It is so easy to make, you could easily mass produce these.


I started out with all my die cuts cut from white cardstock. This is hands down my favorite technique. I guess I like to do this because I find coloring so therapeutic. While I don't have any coloring books, coloring in these die cuts is a great alternative.

Here is a shot where I am adding some chalking details to the snowman. It gives it a nice shading effect without having to bust out the markers.

Here is a closer look at the super cute snowman and reindeer. I added them to a pierced circle die that I cut from some patterned paper. I then added all of that to a scalloped circle die cut from some basic white cardstock. In this closeup you can also see the white paint that I used for the snow as well as for the snowman's cap.


Here is a closer look at the sentiment. I cut it from the Merry Christmas tree die . I added it to two layers of patterned paper to create a border.


Don't forget to head over to the CottageCutz YouTube channel and check out all of the amazing projects on there. Our video team is doing a wonderful job of filling the channel with all sorts of creative content! You don't want to miss it!


Dies I Used


Nested Scallop Die set


Pierced Circle Set


Here's a look at the entire release. Be sure to head over and grab them while they last!


Well that about covers it for today! Until the next time, have a wonderfully craft-die day!
Melinda Beltran