HelloCottageCutzfriends! Thanks for taking the time to stop and visit with us today. It's Mary Marshhere bringing you the Saturday edition of the Blog.
Our Folk Art release is still available in the online store at 35% off individual dies. There are 19 new designs that are so perfect for cardmaking, journaling, and scrapbooking.
In fact, all of the releases from 2023 through Halloween of 2022 are currently on sale. Check them out here if you want to pick up any that you may have missed and still want.
Today for your viewing pleasure, I am featuring a die from our Classic 50's release . It's the Motorcycle die, and I used it for a masculine birthday fun fold card. The fold is a gate fold with a belly band. My friend asked me to make a card for her son who loves to ride his motorcycle.
Design Steps:
I started by preparing the card base and the layering panels.
Card Base -8 1/2" x 5 1/2". I scored both panels at 2 1/8" on each side.
White Layers - 5 3/8" x 2"
Designer Paper Layer - 5" x 1 7/8"
Next, I adhered these pieces with double sided tape.
Belly Band -11" x 1 1/2" - scored at 7 3/8" & 3 1/8".
I placed the band around the card front and then folded in on the score lines. I used clear drying glue to form the band.
I cut the pieces for the motorcycle. I used red and black since that's the color of her son's bike.
I cut a circle using the 3rd largest Stitched Circle die. Sponged some clouds using Tumbled Glass distress ink and Mowed Lawn distress ink for grass. Attached the motorcycle image with dimensional adhesive.
I wanted a sentiment on the front but I didn't have any stamps that would work. So I used the letters from the Cinema Drive-In Sign and Fifties Phrases #2 dies for the "Ride On" phrase.
I attached the image on the belly band and slid it over the card front.
I finished the inside of my card using the Happy Birthday w/ shadow die. I also stamped a sentiment.
That's it for me for this post. See you again next Saturday.
Reminder: Marla has a new video up on the CottageCutz YouTube channel. Click here.
Hello CottageCutzfriends! Thanks for taking the time to stop and visit with us today. It'sMary Marsh here bringing you the Saturday edition of the Blog.
We have a brand-new release of dies in the online store. It's our Flowers & More release. The individual dies are currently on sale for 30% off. This release has what we are calling "simple cuts". Meaning not as many pieces to put together so they assemble quickly.
They are so perfect for the many card making occasions that we all have. Easter, Birthdays, Thank You, Sympathy, Mother's Day or even a scrapbook layout just to name a few.
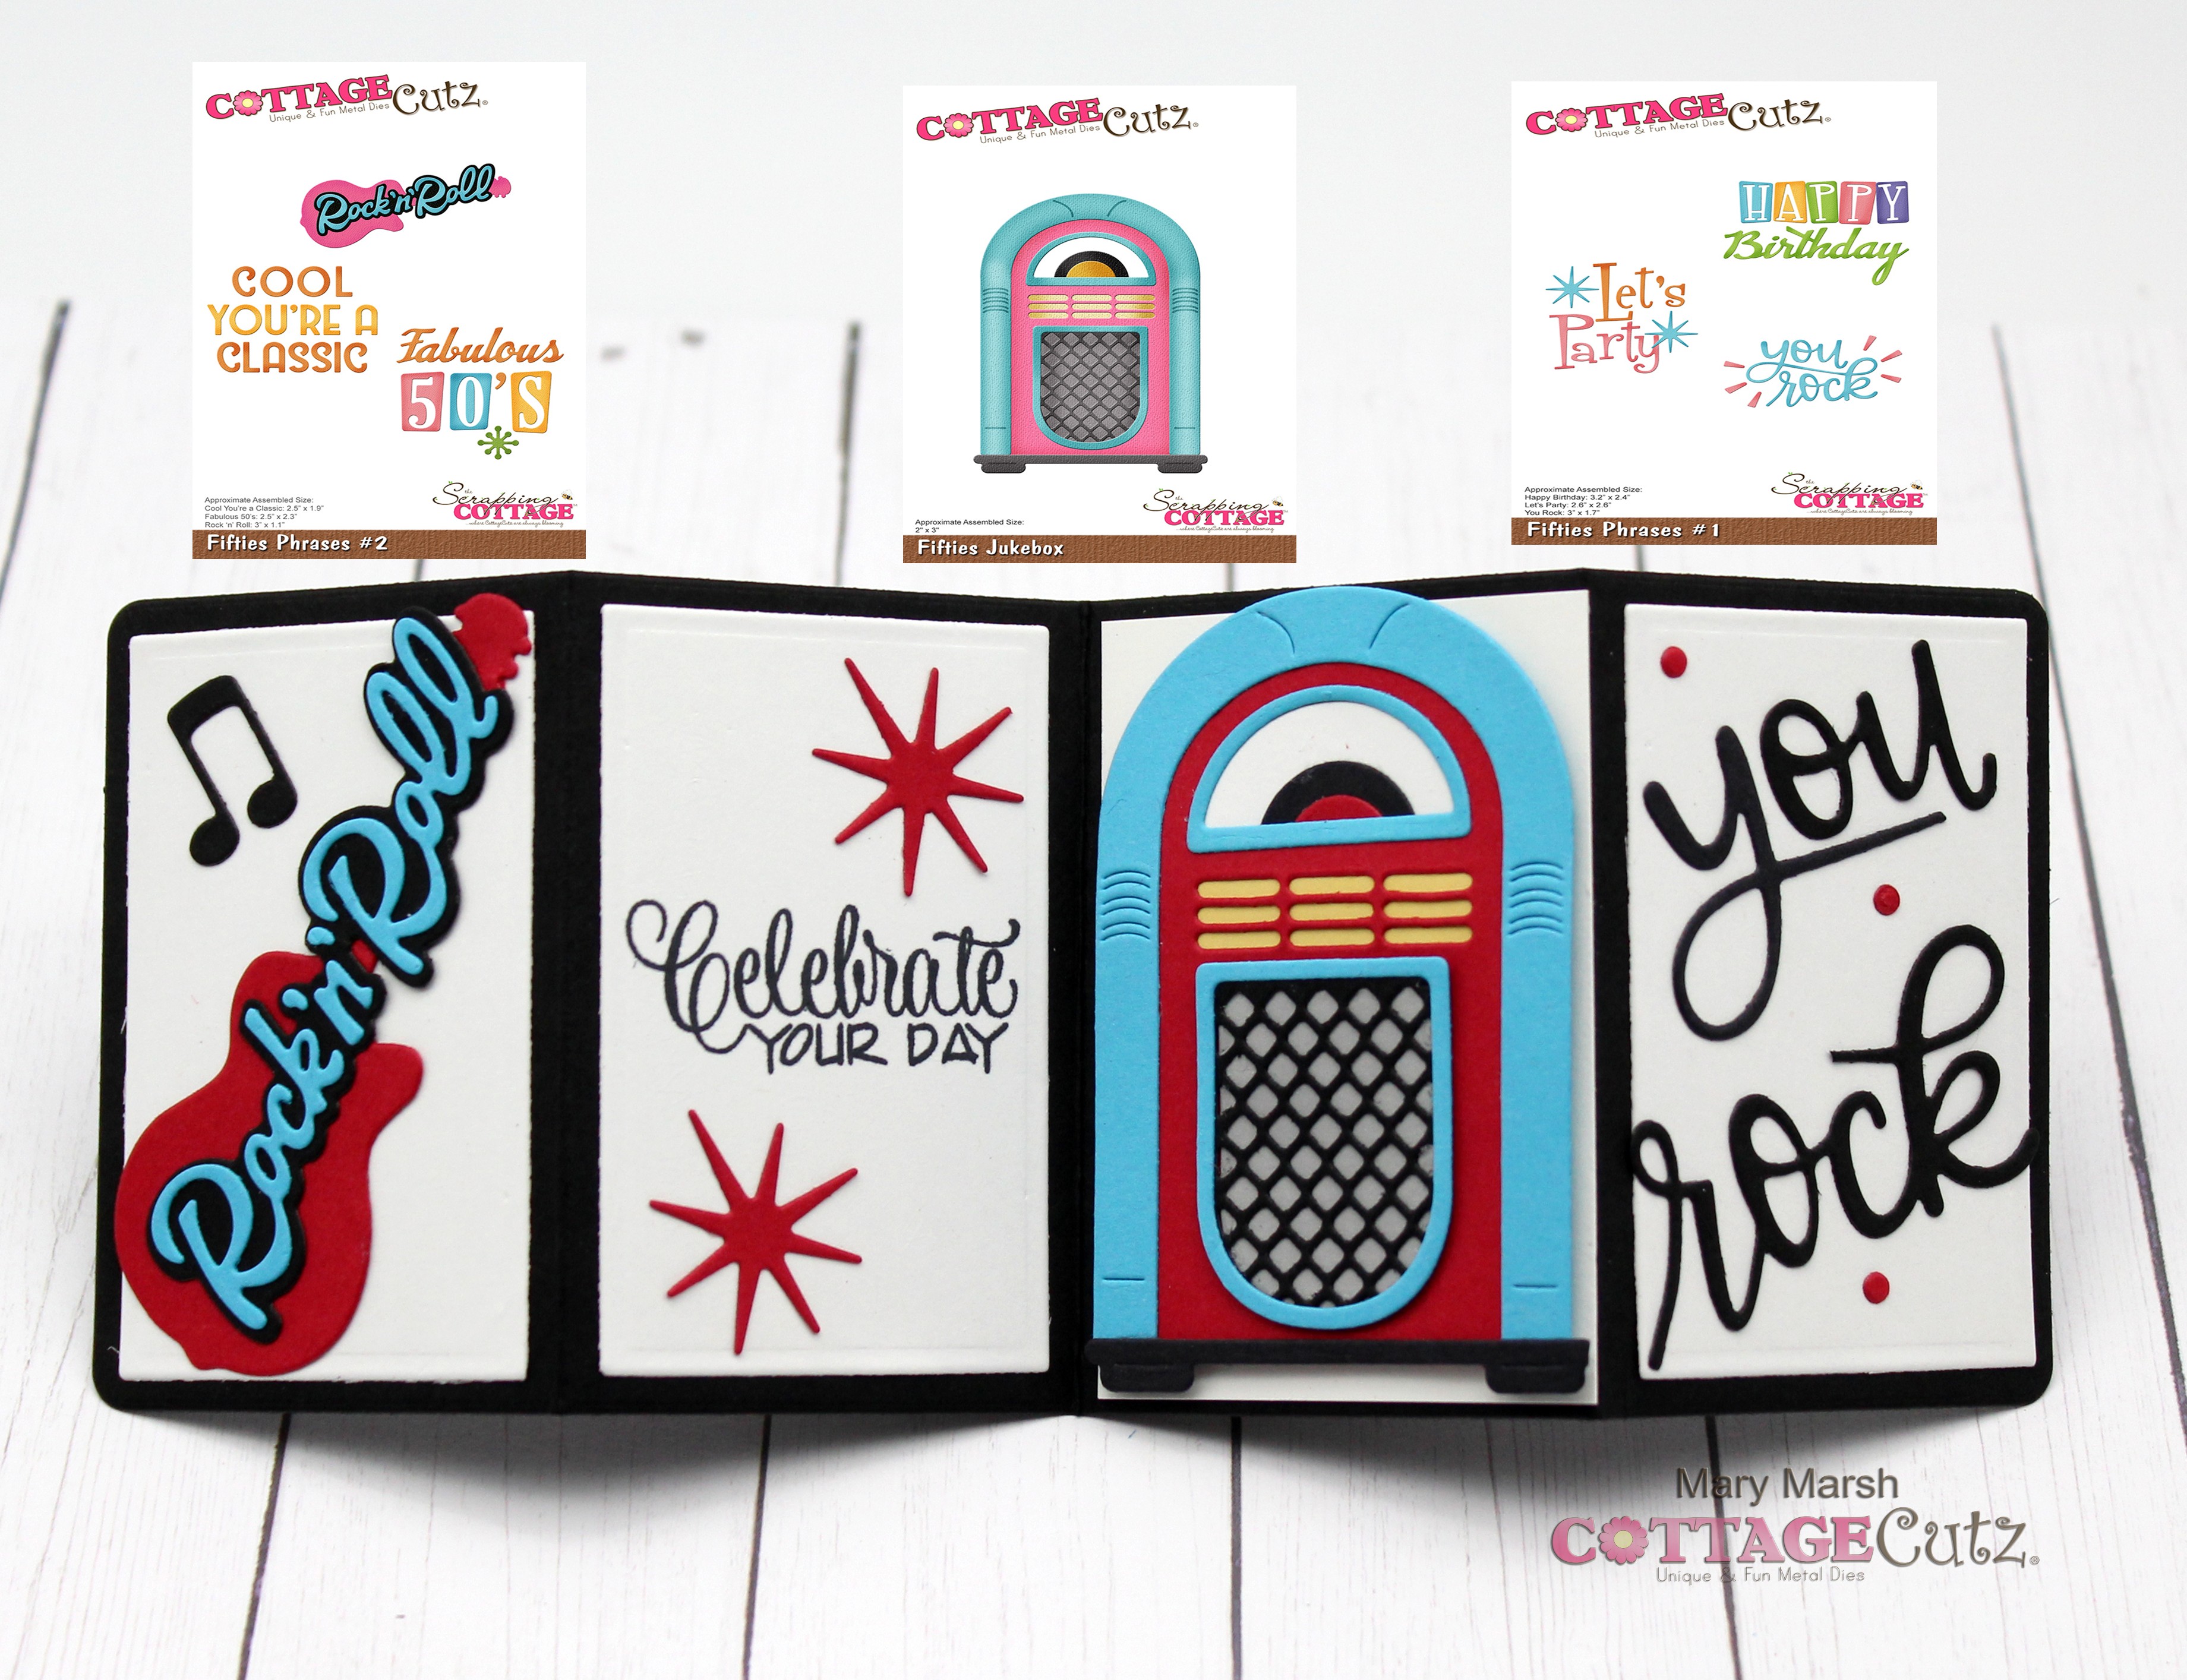
Today for your viewing pleasure I am revisiting the Black Friday Classic 50's release. These dies are currently 40% off. I needed a special birthday card for my son. He's not 50 but he definitely likes rock music. So, I decided to use some of these dies and create a pop-up fun fold card. Let's get started with some card info.
I attached the Happy phrase and stamped the birthday sentiment.
To complete the front of the card, I attached the records, stars and music notes images.
Now I am ready to start my card inside.
I started with decorating the four inside panels. I used the guitar image from the Fifties Phrases #2, the Jukebox die and the "you rock" phrase from the Fifties Phrases #1 die. I layered the images on white panels and then attached to a black rectangle panel. This will get attached to the pop-up mechanism.
White Image Panels: 1 3/4" x 2 3/4"
Black rectangle panel: 8" x 3"
Next, I started on the pop-out mechanism. I cut a piece of white cardstock at 8" x 3 1/2". I scored it at 1 3/4" on the short side. then on the long side I put a tick mark at 2 1/4"& another at 5 3/4".
I used the scoring blade on my paper trimmer to make the next score lines. It's easier for me to line up at an angle on the paper trimmer. You score on both sides of this panel. Tick mark to tick mark.
When it's finished you will have an "X" pattern.
Then you pinch this panel in, so it forms a sort of arrow shape.
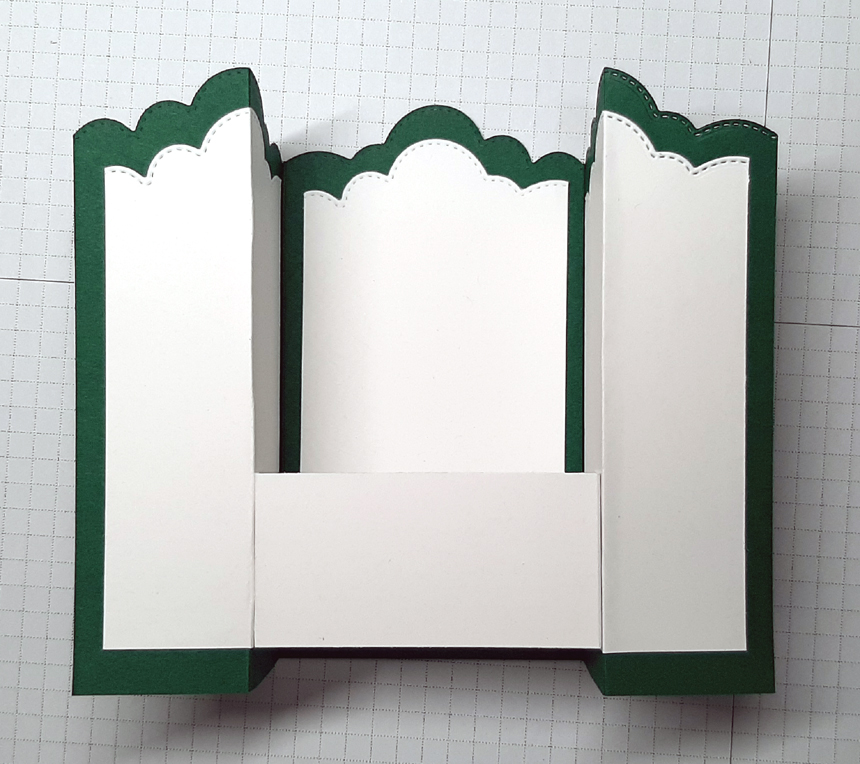
Then to attach this to the inside of the card you use a strong adhesive (I used Scor tape) and attach to the top and bottom of the triangle areas only. Then lay it inside the card at the top of the card and close it. The photo below shows the mechanism open without the image panels attached.
Now I am ready to attach my image panels to the mechanism. You use a strong adhesive- again I used Scor-tape on the bottom right and top left part of the mechanism only. Then the image panel is attached to the mechanism, and you fold and close it.
This is what it looks like when it's opened.
To finish off my card I added another sentiment and layered in red and black cardstock.
Well, that's it for me for this week. See you next Saturday!
Here is a short video that shows the card open & close.
Reminder: Our YouTube Channel has a new video from Linh Van. There is a giveaway for being a subscriber, liking the video and leaving a comment. Click here.
Happy Monday CottageCutz friends! Kris here with you today, sharing a card using the Classic 50's Release!
My dad and hubby's birthdays are in December, so this card works for either one! It's a Bridge Fold card and I'll show you how I made it, but if you'd like a video, there's a great one on Splitcoast Stampers here.
DESIGN STEPS:
Step 1
Cut a cardstock base to 5 1/2" x 9”.
Score at 3” and 6". Fold into a Z and burnish.
Step 2
Center one of the Clouds Slimline Dies (or die of your choice) over the Z folded piece at the top. Secure with Post it notes or Washi tape and run thru machine back and forth a few times to go thru all 3 sections.
Step 3
Cut 3 pieces of white cardstock to 2-3/4” x 5". Using the same cloud die you used on your folded piece, and in the same position, die cut the tops of all 3 pieces.
Step 4
Score down the center of the outside two pieces of card base and 2 of the white pieces, and mountain fold them. Adhere the non-folded white piece to the center of card and the folded ones to the outside panels.
Step 5
Cut a piece of white cardstock that is 4" x 1-1/2" and score 1/2" on each end.
Cut another piece of white that is 4" wide by about 2" tall and score 1/2" on each end. Then cut the top with one of the cloud dies.
Step 6
Add glue to the side flaps of the straight-topped piece and adhere to the inside sides and so the bottom is flush with the bottom of the white sides as shown below.
Adhere the cloud-topped piece half-way between the front "bridge" piece and the back, but up higher, but so the bottom is hidden below the top of the front piece. (See photo in Step 9)