Showing posts with label Double Stitched Circle set. Show all posts

Saturday, August 17, 2019

Ballerina Mouse Birthday

Hello Scrapping Cottage friends! Thanks for taking the time to stop and visit with us today. It's Mary Marsh here bringing you the Saturday edition of the Blog. 

The new release of Birthday dies have been restocked in the online store. So if you didn't get the ones you wanted previously, all 25 designs are in stock. This release is filled with cute little whimsical animals, birthday cakes, cupcakes and birthday phrases. Everything you need to create some outstanding birthday cards.

Today, I am featuring the Ballerina Mouse die. I needed a birthday card for a little girl turning 3 and I was invited to the birthday party. So let's get started with some details on how I created my card.

Step 1: I found this interesting sketch #762 on Splitcoaststampers this week. I thought it would be a good layout to feature this new die and allow me to use designer paper, a birthday number balloon and a stamped sentiment. 
I wanted the papers to be girly and I found this designer paper with shades of pink, teal and cocoa. I used the coordinating cardstocks as layering panels. 
Cocoa Card Base: 4 3/8" x 5 3/8"
Pink Layering Panel: 4 1/4" x 5 1/2"
Designer Paper: 4 1/8" x 5 3/8"


I cut the ballerina mouse in a light gray (smoky slate) and her outfit in 2 shades of pink (pretty in pink and pink pirouette). Her ballerina slippers are cut in teal cardstock. 
For the number balloon. I used the Stitched Numbers die and the streamer is from the Ballerina Mouse die. 


For the circle elements of the sketch, I used the Circle (4th largest), Stitched Circle (4th largest), Double Stitched Circle (5th largest) and the Sweetheart Doilies (2nd largest) dies. The sizes fit my image and sentiment well.

Step 2: I am ready to start card assembly Next, I stamped my birthday sentiment. It's a one liner but with the help of my MISTI and masking I changed it to 3 lines. I stamped in teal ink.
Attached the designer paper to the pink layering panel with double sided tape.
Next I secured the ballerina to the circle layer with double sided tape. I am using the #3 balloon as element 5 of the sketch. I just moved it to the other side.
Then I added the sentiment circle.
I thought I was finishing off my card by attaching the cocoa card base and adding enamel dots to the sentiment circle. But I thought it still need something to balance the lower left corner.
So I cut the balloon bunch from the Festive Birthday die.
Still wasn't quite right for me.  I thought I needed something on the top left. I couldn't add any enamel dots because of all the dots on the designer paper. So I cut the happy phrase from the festive Birthday die in teal cardstock. And my card is complete.

Well that's it for me for this week. I hope I have given you an idea for a way to use this sweet Ballerina Mouse die. See you again next Saturday.

dies I used to create card:


Saturday, June 29, 2019

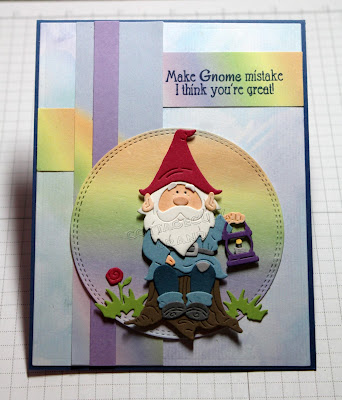
Make Gnome Mistake

Hello Scrapping Cottage friends! Thanks for taking the time to stop and visit with us today. It's Mary Marsh here bringing you the Saturday edition of the Blog. 
We have released the new Magical Garden dies. There are 14 new designs and they are currently on sale at 25% off.
If you love fairies, fairy gardens, gnomes and flowers, you will love these dies.  Today, I am featuring the new Gnome on Tree Stump die. Let's get started with some details on how I created my card. 

Step 1:  As I have said so many times before, having a layout in mind at the start of my card is always a big boost for me. It jump starts my creative thought process. I love working with the sketches that are out there in the online world. That way I just choose the colors and designer paper and I am good to go.
I liked this week's sketch #755 from Splitcoaststampers.
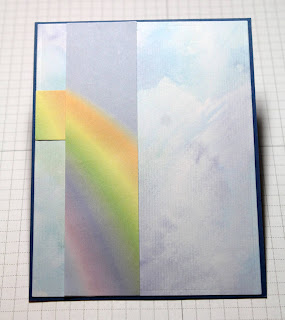
I used this blue watercolor wash patterned paper for my background. It has an outdoor sky look to it. Then I found this other paper that had a rainbow in on it and decided to use it for the circle that the gnome is sitting on. The paper is also element 2, 3 and 4 of the sketch.
Blueberry Card Base: 4 1/4" x 5 1/2"
Patterned Paper Background: 4 3/8' x 5 3/8"
Sketch Element 2: 2 3/8" x 7/8" 
Sketch Element 3 : 1/2" x 1"
Sketch Element 4: 1 3/8" x 5 3/8"
Sketch Element 5: 3/8" x 5 3/8"
Circle: 2nd largest of double stitched circle die. 

I cut my gnome image in different colored cardstock. I used the colors that were on the packaging. I colored his face, ears and hands with Copic markers. I used E000, E00, and E21. 
I stamped my sentiment directly on the patterned paper in blueberry ink. Used my MISTI for placement and also I knew I was going to stamp twice to make sure it was dark enough. It's element 2 of the sketch. I started off with a larger piece of paper than what I needed and then trimmed it down to the 2 3/8" x 7/8".
Step 2: I am ready to start card assembly. Attached the background layer and element 2 and 3 of the sketch to the card base with double sided tape. 
I am ready to attach the image panel. I used dimensional adhesive on the gnome and double sided tape on the circle. 
To finish off my card, I added a few glitter enamel sequins. Well, that's it for me for this post See you next Saturday! I hope I gave given you an idea for another way to use this Gnome die. 

dies I used to create card:


Thursday, May 23, 2019

Make A Wish

Hello Scrapping Cottage friends! Thanks for taking the time to stop and visit with us today. It's Mary Marsh here bringing you the Thursday edition of the Blog.

We are still featuring cards using the new Magical Fantasy release.  If you haven't seen the Magical Fantasy release yet, you have to drop by the online store and check it out. These new dies are all so cute and whimsical. There are 27 new designs and I am in love with everyone of them. 

Today, I am featuring the new Sweet Unicorns die. It looks like it's currently out of stock but it should return soon. I needed a birthday card for a 4 year old girl and she loves unicorns. They are hot with the kids these days. Unicorns are everywhere along with rainbows and glitter. I thought I would turn it into a shaker card. She will love shaking the sequins around. They really aren't hard to make and it has that "wow" factor. So let's get started with some details on how I created this card. 

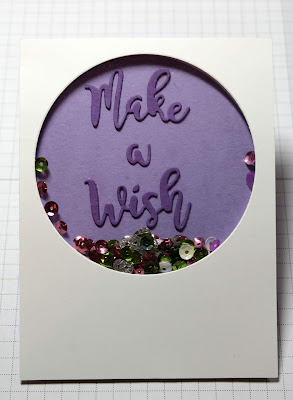
Step 1: I decided to cut the circle first to make sure I had enough room for my sentiment inside the circle. Using white cardstock 3 3/4" x 5" and the 2nd largest double stitched circle die I cut my circle. I used this die because it was the size I wanted for my opening. I will save the die cut circle for another use. 
Now I need to make my "window". I used a window sheet cut to 4" x 3 1/2". It's smaller than my white panel but larger than the circle opening. I used double sided tape to secure the window sheet in place. To avoid static on the window sheet I used my powder tool on both sides of the sheet. You could also use an embossing buddy. It will keep the sequins from sticking to the sheet. 
Next I used foam tape and ran it around my circle opening. I also used dimensional adhesive on the corners to make sure it's the same height all around my card. I again used the powder tool on the inside of the foam tape. It cuts down on the stickiness and the sequins won't stick to it. 
I cut the Make a Wish words in grape cardstock from the Fairytale Birthday die. I added to a lighter shade of purple. I wanted to have some color in the shaker background. 
Added the sequins to the inside of the circle. I added a little more than I thought  I would need because I wanted her to be able to shake it. 
I peeled off the foam backing and placed my sentiment panel on top. Since it is the same size as the shaker panel I lined it up at the top first. 
I wanted the shaker panel to pop and so I added a layer of the grape cardstock to this panel. The layering panel is 4" x 5 1/4"

Step 2:  Now that the image panel is ready, I cut my unicorn images from the Sweet Unicorns die. I used the package coloring as my color guide. 
Added them to the image panel and secured with double sided tape. 
To finish off my card, I secured the image panel to the pink card base. The base is 4 1/4" x 5 1/2". Added a few pink enamel dots and my card is complete. Don't you just love the unicorn images? I hope I have given you an idea for a way to use this new die. See you on Saturday with another card from this new release. 
dies I used to create card: