Showing posts with label CottageCutz. Show all posts

Wednesday, February 08, 2023

Easy Coloring with Distress Inks


Hello my crafty friends.  It's Marla back again with a new video over on the CottageCutz YouTube Channel.  The new "Flowers & More" release is live and packed with products to get you longing for spring.  My card today, features Flower 1, Flower 6 and Flower 7 dies from this release.  I just love a good flower die, don't you?

I have linked the products that I used on my card today.  If you would like an opportunity to enter to win the Flower 6 die, head over to the CottageCutz YouTube Channel to see how you can win.  Prize opportunity open to those in the U.S.A. only, due to shipping costs.


Until next time....Marla


Sunday, October 16, 2022

Vintage Halloween Card


Hi my crafty friends!  Marla here to share a card I created using dies from the new CottageCutz Halloween release.  I followed a sketch from my friend Kendra's card challenge for the layout.  I used pattern paper from my stash to follow the simple design.   The sketch called for a 2.75" x 2.75" square that gave me the perfect place to build a scene.

For the Halloween scene I used the "Jack-O-Lantern Witch" die and inked the pieces with various Distress Oxide inks.  The sketch called for a shape to be in the upper right-hand corner of the square, so I knew the "Web" would fit perfectly with the theme. I cut it out with vellum.  

After assembling all of my images I adhered them to the card adding foam tape behind the pumpkin witch and a double layer behind my cat.  I still felt like the scene needed something else, so I added one of the ghosts from the "Haunted Ghost House" die and tucked it behind the pumpkin and above the sweet cat.

If you would like to see more details, you can head over to my YouTube Channel MAD About Cards and Crafts to watch.  

Thanks for stopping by today.  Until next time....Marla


Wednesday, October 12, 2022

Keeping Things in Perspective


Hello, crafty friends!  This is Marla back with another YouTube video tutorial.  Halloween is around the corner and the new CottageCutz Halloween release is filled with both spooky and cute products. I mixed a little of each for a non-spooky slimline.

 It's no surprise that I am a fan of slimline cards. I know they aren't for everyone, but let's talk about one of the reasons you should considered using them, perspective.  The dies from this new release come in a variety of sizes, but for this card two of the focal points are pretty much scaled the same.  In reality, one should be much bigger than the other and that's where a slimline card changes the visual design to allow you to stretch your products.  I hope you will head over to watch to see what I mean.

In case you are wondering, I used the "Pinking Shear Edge" Slimline die to begin building my scene.  I found it hard to choose between all the fun dies, so I used a little bit of this and a little bit of that from several dies and then some.  I included the "Haunted Ghost House", "Spooky Tree Gnome" and "Fresh Strawberry Patch" sign.  I also used the "Spooky Truck" that will be restocked soon.  

I am giving away the "Haunted Ghost House" over on the CottageCutz YouTube Channel.  Please join me and while you're there don't forget to comment, like and subscribe to enter.  

Until next time .....Marla


Wednesday, September 28, 2022

Faux Snow Globe


Hi, Marla here today with a fun and festive card featuring the "Nordic Santa and Reindeer" from the Christmas Part 1 release.  When I saw this die, I knew I needed to create a scene card.   I had several CottageCutz dies from last year's Christmas release that I thought would complement this darling die.  After much consideration I settle on using the Snowman w/Country Shed.

I wanted to create a faux snow globe shaped card with of course falling snow.  What I really like about this card is that the snow is on the ground when the card is upright; but when shaken, it appears to be a blustery night.   I share all of the details for creating this faux snow globe in my video on the CottageCutz YouTube Channel.  


In my last video, I was giving away the "Christmas Tree Peekers."  If you entered that giveaway head over to see if you were the lucky winner and don't forget to enter for a chance to win the "Nordic Santa and Reindeer" die.

I have linked the CottageCutz products I used in my card below for easy shopping.  Until next time... Marla


Wednesday, June 08, 2022

A Rainbow of Flavors & GIVEAWAY


   One of my fondest memories as a kid was going to Thrifty's for an ice cream cone.  I can't tell you how many times I ordered Rainbow Sherbert.  The swirls of color and touch of tang always made me happy.

It's what inspired my card today, which I am sharing over on the CottageCutz YouTube Channel. For my video, I am featuring the "Build an Ice Cream Cone" die and bonus, I am also giving it away.  This die is filled with several styles of ice cream cones so you can build the cone of your dreams.  An ice cream card is a great way to send a note to let someone know you're thinking of them and would pair perfectly with a gift card to someone's favorite ice cream shop.  Who wouldn't love this sweet surprise in their mailbox?

I hope you'll head over to watch and don't forget to check if you are the winner of the "Candy Cart" die I gave away in my last video.

Thanks for joining me.  Until next time.... Marla


Wednesday, January 31, 2018

Spring Happy Mail!


Hi everyone and hope you're having a great week so far! It's Janet here with an extra video post to show off the Happy Mail I received from the Scrapping Cottage this week. It's the dies I ordered from the Spring and In Stitches releases that just arrived and I am super excited to share them with you!

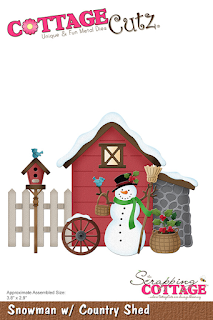
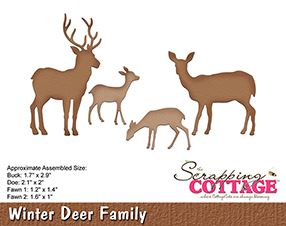
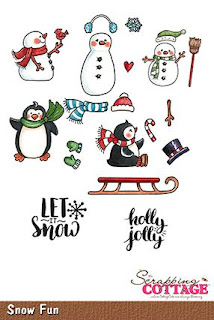
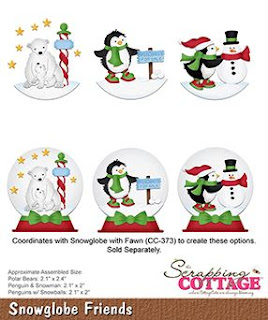
Now, I'm always a fan of all things CottageCutz but I have to say that this release is even more wonderful than normal. The Easter and Spring themes in the release are so cute and fun! CottageCutz does animals better than anyone and you'll not be disappointed in the little critters in this release! The bunnies and chicks are adorable! There are also butterflies, eggs, flowers and scenes that will seriously get your creativity flowing. Just a few of these darlings are shown in the picture below.

The In Stitches collection included in this release are 12 images outlined and accented with stitches. You'll find fruit, flowers, bees, an owl and bird, sewing notions, mushrooms, a new sun, cloud and umbrella set, canning jars and best of all, a set of letters and numbers!
Please make sure you click on the cute animated owl at the top of the blog to visit the store. These dies are are available now and are currently 25% off. Get them while you can because I suspect some of these will sell out.

Click on the video link below to see the dies I picked up. I hope you enjoy it.


Thanks for spending a few minutes here today. I'll be back on Valentine's Day with a new video tutorial.

Wednesday, January 10, 2018

Winter Loaded Envelope


Hello everyone! It's Janet here for my first post of the new year. January has certainly started with a cold slap in the face for many. It's been rough but I don't mind having an extra excuse for hibernating in my craft nook! How about you?

I'm detouring from my normal video tutorial to show you a loaded envelope I created using a winter theme. I have long admired the beautiful and complex looking loaded envelopes that many in the crafting world have shown off. I finally took the plunge and made one myself and I really had fun with it. I honestly was skeptical when people said they found making loaded envelopes relaxing but I have to admit that I found it therapeutic. I created as I went with little more than the basics planned before I started. First I picked a theme (winter) and then chose dies I thought fit the theme. I picked a color scheme and made the empty envelope with paper stock that worked. Then I set about cutting pieces for the project, coloring and putting them together. Finally, I looked at all the die cuts I had completed and started creating the elements that would ultimately load the envelope. Many of the items I made are featured in the photos below.


In the end I created cards, flowers, snowflakes, various clips with snowflakes and deer, rosette wands, gift card holders and several pockets and tags for my loaded envelope. I have a few extra pieces left over but I will be able to use them in future projects. I'm not sure how others approach making the items that will go into their envelopes but this method worked great for me. I had a lot of fun letting the pieces tell me what to do with them. I certainly encourage you to give it a try!

To see all the parts and pieces and learn what dies I used, please click on the video thumbnail below.


Thanks for visiting today. Stay warm and safe!
- Janet

Dies used in this project: