Showing posts with label Cottage Cutz Nested Stitched Scallop Rectangle Set. Show all posts

Saturday, April 22, 2023

Set of Two Floral Cards

Hello crafty friends,
Melinda here with you and today I am sharing a set of quick and easy cards to help you build your stash. Take a peek!

My two cards are both A2 cards with a pretty floral theme. The center piece for this set is the Flower 5 die from the recent Cottage Cutz Flowers and more release.


Here's a closer look at the first card with a single flower in the center.

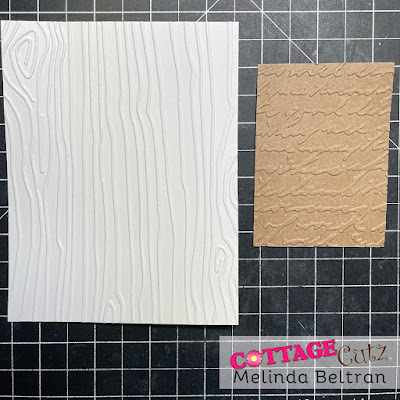
After cutting out my card base, I cut out a couple of mats. I ran them through some embossing folders I had in my stash. 


For the larger one, I spritzed some Shimmerz Vibez spray to give it some fun color and bring out the wood grain texture.

I cut out my flower 5 die in white cardstock and then used my markers to color in the leaves and the flower heads. I used some of my Nuvo Dew Drops for the center of the flowers and also as a decorative touch on the top right corner. I used some White Shimmerz Vibez spray on the kraft embossed mat. It gives it a subtle added touch without being too overpowering. I then mounted all of that onto a scallop stitched rectangle die mat and then wrapped that with some twine. I did use some foam tape on the back to give it just a little lift.

Here's a closer look at the second card. I used the same elements as the other card. I traded the colors of the mats and also used one size bigger scallop stitched mat. I used two of the Flower 5 dies on this one.


Here's a look at the same word embossed mat. I inked this with some of my navy ink.

For the larger mat on this card, I used kraft cardstock and then sponged some of my white ink onto the mat to bring out the texture.

Here is one last look at both cards. A great tip to build your stash is to make sets of cards just like this. You don't have to put a sentiment on them until you know what the occasion is for. These are perfect for everything from Hello, thinking of you, to condolences, and anything in between!

Don't forget to check out the Cottage Cutz YouTube channel! Plus you want to check back here daily to see what the other amazing designers create. Until the next time, have a wonderfully crafty day! 

Dies Used To Create This Project


Thursday, February 09, 2023

Two Simple Floral Cards

Happy Thursday Cottage Cutz Friends!
Melinda here with you, and today I am sharing two pretty and very easy cards I created with the amazing new Flowers & More release from Cottage Cutz!

This release is amazing and a true MUST HAVE for your creative collection! All the dies in this collection are a wonderful addition and will fast be staples in your creative stash!
Here are my projects for today.


I created this simple yet pretty card featuring the Flower 1 die from the new release! It is such a great sized die and very, very easy to put together. I cut the pieces in white cardstock and then used my markers to color them. Once colored, I mounted the flower onto a piece of yellow cardstock. Underneath that is a purple gingham mat and all that is adhered to the scallop stitched rectangle. For the larger part of the card's background, I cut out the Vintage Trellis slimline die in white cardstock. I then cut it down to fit onto the larger yellow mat. I then added a patterned paper mat and then a purple mat all onto my white cardstock base. 

Here's a closer look at the pretty flower 1 die. I added some sequins and some stickles to create the "veins" on the petals. For the sentiment, I used the I Love You die and cut it out of white cardstock. I then colored the letters with my purple marker and adhered all that onto the smallest scallop stitched rectangle. 


Next up, I created this pretty and simple card with the little flowers die set from the release. I cut all of them again in white cardstock and then colored them in.

I then layered them onto the double-stitched oval. I then staggered and layered in a series of double-stitched and scalloped ovals from both sets. I mounted all of that onto some polka dot papers and adhered it all to my white cardstock base. I then used the sentiment love you and cut that from some more white cardstock. Very easy but effective.

Both of these cards came together quickly and can be reproduced quite easily! 

Here is a look at the fabulous collection!

Flowers & More collection!

Grab it fast while you can get the entire bundle for one amazing low price!


Dies I Used


Flower 1

Little Flowers


I Love You Sentiment


Double Stitched Oval Set


Scallop Oval Set

Nested Scallop Rectangle Set


Vintage Trellis Slimline


Don't forget to head over to the Cottage Cutz You-Tube Channel where you can see some of our amazing design team members create some beautiful projects!


Well that about covers it for today! Until the next time, have a wonderfully craft-die day!
Melinda Beltran

Tuesday, January 24, 2023

Hot Cocoa Box

Hello Cottage Cutz Friends!
Melinda here with you, and today I am sharing a fun Hot cocoa box I made. I decorated it with some of the fun dies from the Christmas release. I love that you can invest in these seasonal dies, but use them well past their intended season. It is great to get a lot of mileage out of them!
Here's a look at my fun box. I used white cardstock for the base of the box. I then used some blue cardstock for the mats. From there I did all the fun stuff of decorating my box. 

here is another view of my box. You can see the front is just a bit shorter so you can pull out the hot cocoa packets.


Both pieces of the box. I have to take the time to measure out the two pieces. I will update this when I do. I made SEVERAL versions before I settle on what I was happy with. I think one of these days, I need to add in some photos of what my desk looks like when I am coming up with these boxes. There is a LOT of trial and error involved before I get it right...lol. Of course that is a part of the fun of crafting, right?! Dreaming up something and having it come together. I do know the large rectangles on the left side piece are 3.5 x 5. That is the right size for the Swiss Miss hot cocoa packs. 


Here is a photo of the box as I am putting the two pieces together.


Here is another picture as I am putting the box together.


Here is a picture of the base of the box as it is first put together.

Here is a picture of the bottom. I added some half beads on the bottom for the "legs". I also added some extra mats at the bottom for some extra stability.

Here is a closer look at the top. I added some of the super cute snowmen friends die to a scalloped rectangle mat. I added some pink paper and some pretty patterned paper too.


For both sides I used the scalloped rectangle and added a pink cardstock mat and some more of that pretty Doodlebug patterned paper. To that I added my hot cocoa mug with the little "steam curl" and the cookies & cocoa verbiage.

I think my little box turned out super cute and will be taking this to my office.

Dies I Used


Cookies & Cocoa

Santa Gnome w/Cookies

Snowmen Friends


Nested Scallop Rectangle Set


Stitched Heart Set


Well that about covers it for today! Until the next time, have a wonderfully craft-die day!
Melinda Beltran


Thursday, July 07, 2022

Sweet Wishes

 Hello Friends,

It is Pam creating with you today!

The new release is just plain adorable.  It is called Strawberries and Bees perfect for those fun summertime cards. There are 16 designs in this new collection and you can get the individual dies for 30% off right now! This sale will not last so shop today to get the incredible savings.

Here is my card using the new release die Strawberry Gnome Girl!


Design Steps:

1.  Cut all the pieces using the Strawberry Gnome Girl die and the following colors of card stock: green, blue, black, tan, red, and white
2.  Shade the hands and nose with a pink ink and a small applicator.  Assemble the pieces with a fine tip, fast drying glue
3.  Use an A2 white card stock base and cut a piece of black 4 1/8 x 5 3/8, cut checked black and white DP 4 x 5 1/4 and finally use the second from the largest Scalloped Rectangle die cut on white.  Stamp the sentiment in black ink on the white rectangle as shown above
4.  Glue the black card stock to the white base, glue the checked DP to the black.  Wrap the scalloped rectangle with black and white twine and glue dot a bow to the twine just slightly off center as shown above.  Pop the whole rectangle onto the center of the card front.  Pop dot the little gnome to the card as shown and then add a few black pearls and some yellow Stickles to the center of the flowers
5.  I decided to add a little decoration to the inside of the card.  Cut a piece of black card stock 4 1/8 x 5 3/8, piece of white 4 x 5 1/4 and a strip of checked DP 4 x 1.  Cut the vine using the Strawberry die and white, green and red card stock. Assemble the vine 
6.  Glue the black card stock inside of the card.  Stamp the sentiment to the white card stock as shown. Then glue the white on top of the black. Glue the checked strip to the left side of the card and add the strawberry vine.  Add some yellow Stickles to the white flowers and your card is complete

CottageCutz Products


Here is the new release so please check it out in our store today!!

We have more inspiration on our YouTube Channel check it out HERE
Thanks so much for stopping by!  And I will see you next Thursday.

Blessings and Take Care