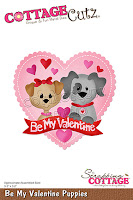
Showing posts with label Be My Valentine Puppies. Show all posts

Friday, January 20, 2023

Ewe and Me Forever

Hello CottageCutz friends! Thanks for taking the time to stop and visit with us today. It's Mary Marsh here bringing you the Friday edition of the Blog.

Hope you are settling in for the winter months. It's a perfect time for cardmaking, scrapbooking and other crafting pursuits. I am onto my Valentine cards. I make extra ones and let our friends pick one for their wives. 

We do have some sales going on over at the online store. The Classic Fifties release is 40% off and the Christmas Part 1 & Part 2 dies are 30% off.   

Now onto my card for today. I am featuring the Spring Sheep die as a Valentine themed card. This die is from the January 2022 Spring release.  So let's get started with some details of how I created my card. 

Design Steps:

I started my card by selecting the designer paper. I looked through my Valentine papers and found this pretty heart design paper. 

Highland Heather (light purple) Card Base:  5 1/2" x 4 1/4"
Designer Paper Layer: 5 1/8" x 3 7/8"
 
Next, I cut my sheep in shades of light and gray cardstock. For their furry heads I used fun flock. You can't really tell on the photo but IRL - its fluffy and adds a bit of dimension and interest. 
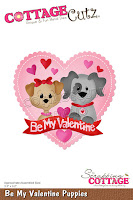
I wanted a large heart to place them in and also for stamping my sentiment. I used the heart from the Be My Valentine Puppies (2019 release). It's still available in the online store. Stamped my sentiment with the help of my stamp-a-ma-jig in red ink.
Now that my card elements are prepared, I am ready to start card assembly. I attached the designer paper to the card base with double sided adhesive. 
The heart is secured with dimensional adhesive as are the sweet little sheep.
To finish off my card I added a few heart enamel dots. That's my card for this week. 
Reminder: Our YouTube Channel has a new video featuring a pocket card from Linh Van. There is a giveaway for being a subscriber, liking the video and leaving a comment. Click here.

dies I used to create card:


Saturday, January 14, 2023

Festive Elephant Valentine

Hello CottageCutz friends! Thanks for taking the time to stop and visit with us today. It's Mary Marsh here bringing you the Sunday edition of the Blog.

Hope you all had a great Christmas and holiday week. Now it's time to settle in for the winter months. It's a perfect time for cardmaking, scrapbooking and other crafting pursuits. I am onto my Valentine cards. This one I am sending off to my nice who loves elephants. 

For your viewing pleasure today, I am featuring the Festive Elephant die. It's from the Christmas Part 1 release. I like taking dies intended for one season and move them to a different holiday. It allows you to get more use out of your dies that way.

Card Details:  

I started my card this week with the layout. I saw this older sketch #838 on Splitcoaststampers using a slimline design and decided to use it for my card. Slimline cards are so popular now and add such great eye appeal.

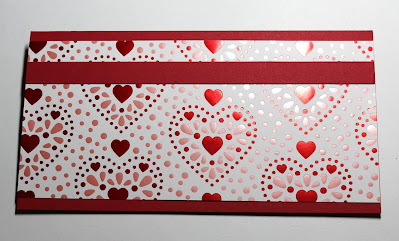
Then I chose my designer paper and card base colors. I really like this metallic heart paper from my Valentine collection for my card. I changed the circle image to a heart. It's from the 2019 "be my valentine puppies" die.
 
Red Card Base: 7 1/2" x 4"
Heart Designer Paper: 7 1/2" x 3 1/2"
Red Cardstock Strip (Element 3): 1/2" x 7 1/2"
Next, I cut the elephant image from 2 shades of gray cardstock. I sponged around the edges for more contrast. Instead of using the Christmas Tree, I cut a heart from the Stitched Heart Set.  
I stamped my sentiment in red ink on the heart. It is a one-line sentiment and I had to space it on the heart with my elephant. So I masked and with the help of my MISTI, I was able to stamp it vertically.
Now I am ready to start card assembly. I attached the designer paper and the red strip to the card base with double sided tape. I ended up having to recut my designer paper and the pattern is a bit different than this photo. 
For the elephant, I used dimensional adhesive to lift the image off the heart background. And, I used the same adhesive to attach the heart to the designer paper. I added some additional white and red hearts to finish off this card.
If you have this Festive Elephant die, I hope I have given you a way to use it for another season. If you would like to purchase this die, it's still available in the online store at 30% off. And you can get it in time to create Valentine cards. 

dies I used to create card:


Saturday, January 07, 2023

Valentine Wishes From the Puppies

Hello CottageCutz friends! Thanks for taking the time to stop and visit with us today. It's Mary Marsh here bringing you the Sunday edition of the Blog.

Hope you all had a great Christmas and holiday week. Now it's time to settle in for the winter months. It's a perfect time for cardmaking, scrapbooking and other crafting pursuits. I am onto my Valentine cards. I send them out to family and friends. 

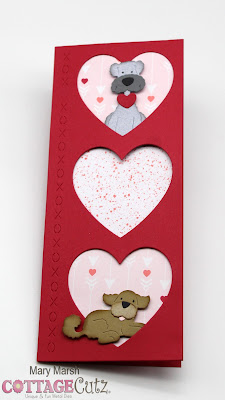
For your viewing pleasure today, I am featuring a slimline card using the Christmas Puppies and the Heart XO Windows Slimline dies. I like taking dies intended for one season and move them to a different holiday. It allows you to get more use out of your dies that way. 

card details: 

I started my card by using the Heart Xo die and cutting it in red cardstock. For the background for the hearts, I am using designer paper. I only had a small piece of the heart paper, so I decided to do something different with the middle heart window. I used another paper that I only had a small piece of, but it complements the other paper. 

The slimline panel is 3 1/2" x 8 1/2". I cut red cardstock in the same size for the card base. 
Next, I cut the puppy images I used different colors of cardstock. You could also cut them in white cardstock and use the medium of your choice to color them. 
I started some card assembly at this point. Attached the designer paper inside the hearts with double sided tape. For the puppy images I used dimensional adhesive to lift them off the background slightly. 
I wanted a phrase for the middle heart window. I thought about stamping something but then I decided to use the "be my Valentine" phrase from the 2019 Valentine Puppies die. For the bottom heart window, I used the XOXO from the Valentine Phrase & More die also from the 2019 release. 
Now I am ready to finish off the card. I attached the phrases with clear art glue. In the middle heart, I added some hearts cut from the Valentine Puppies die. On the top heart, I added the puppy paws. And then scattered some white hearts on the card front. I had those saved from another project. I am not sure which die they came from. 
Well, that's it for me for this week. I hope I have given you a way to use this Christmas die for another holiday. See you next Saturday! 

dies I used to create card:


Sunday, February 14, 2021

Monkey Love

Hi!

It's Anja here. I have another Valentine's Day card for you today. 

For this card  used:

- Cottage Cutz dies (Safari Monkey, Be My Valentine Puppies, Love Phrase, Bow Mini),

- Distress Inks,

- white card base (10x21 cm),

- white and colored (red, pink, dark brown, light brown) card stock for die cuts,

- score tool,

- black pen,

- white pen,

- plastic stencil (clouds),

- brush,

- thread,

- adhesive foam pads,

- paper glue. 


First I cut three sets of hearts and colored it around the edges. I scored in the middle. I cut the sentiment out of the white card stock.

Next I cut the monkey out of the brown card stock. I emphasized the edges with brown ink.

Then I cut the bow.

Last I did the background. I used a plastic stencil to make the cloudy sky.

Then I adhered the hearts and added the thread in the back. I used adhesive foam pads to adhere the heart on the card base. I also added the monkey and the bow and my card was done.


Hope you have a nice Valentine's Day. See you again next Sunday. 

Anja Z.


Cottage Cutz dies I used for this card:


Thursday, February 11, 2021

Love Train

 Hi To All My Crafty Friends!

It is Pam sharing with you on the blog today.

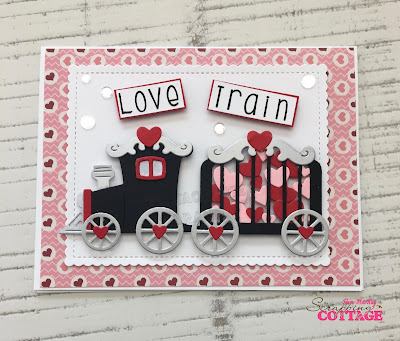
I don't know if you all are old enough to remember the song Love Train By the O'Jays.  It was an R&B hit back in 1972!  Now I am really dating myself! Anyway it is now playing in my head and that was the inpiration for this fun Valentine card.


Design Steps:

1.  Using the Circus Train die cut out the pieces on silver, white and black card stock. The little window and headlight I cut in white then colored with an C1 copic marker.  Next use the Be My Valentine Puppy die and cut out the pink and red hearts several times.  Turn the cage car over and glue down the hearts, add hearts to the wheels and car tops as shown
2.  For the base use a white A2 card, heart DP 4 x 5 1/4 and cut a white retangle using the second from the largest Stitched Scallop Rectangle die
3.  Glue the heart paper to the white card base then center and glue down the rectangle
4.  Pop up the train using dimensional dots or tape
5.  Add the sentiment layered on red card stock and finally add the sequins

6.  I decided to decorate the inside with some leftover paper and a little pink heart and your card is complete

CottageCutz Products


I hope you enjoyed this little trip back in time and I will see you next Thursday!  Remember to check out all of the wonderful dies in our online store HERE!

Blessing and Take Care
Pam