Showing posts with label Barn & Windmill. Show all posts

Wednesday, February 22, 2023

Double Z-Fold Farm Scene

Welcome CottageCutz friends!

Kris here with some Wednesday inspiration for you!  In honor of our HUGE President's Day Sale going on right now, I've created a fun Double Z-Fold card using lots of dies that you can find on sale - up to 83% OFF! Shop early for best assortment - sale ends this Friday 24th!


This card was so much fun to make!!  We've lived right next door to an upscale ranch for 26 years, and have been lucky that they only keep the baby calves and their mamas in the field that borders our fence.  They're so cute when they frolic and play.  So I just HAD to buy a few cow dies. 

DESIGN STEPS:

1.  I cut a piece of light blue cardstock 4-1/4" x 11" - then scored at 5-1/2" and 2-3/4" (card base).

2.  I cut  a piece of lime green cardstock to 4-1/4 x 11" - then scored at 5-1/2" and 2-3/4" (grass).


3. I cut the lime green panel into (2) pieces of 2-1/4 x 11.  One of the panels I cut off the 2-3/4" end to make it a 2-1/4" x 8-1/4" piece.

4.  I die cut the tops of both green pieces with the Grass Slimline die - 83% OFF!!  ***BE SURE you are cutting the correct edge --- the longer green piece will have the 5-1/2" section on the left and the shorter piece will have the 5-1/2" section on the right!  


5.  I glued the shorter lime green piece to blue card base, clear to the right and aligned with bottom edge.  (You may find it easiest to attach just the part before the score line, then fold your card onto the short scored part so your card will fold flat to fit into an envelope.)  

6.  I glued the longer lime green piece to the front ***ONLY glue 1/2 of the longest scored section... and then the shortest outside edge section as pictured below.

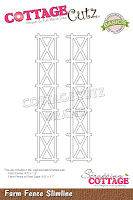
7.  I die cut the Farm Fence Slimline - 83% OFF!!  and scored it at 2-3/4" and 5-1/2" and glued it to the front grass piece as pictured.


8.  Next, I die cut all my design pieces and inked 'em up, and assembled!  

Just LOOK at all these SAVINGS!!  


9.  Glued everything in place and done!  ☺☺☺ How cute is this?


This card folds up to fit into an A2 envelope ☺


PRODUCTS I USED:


I hope you're inspired to see what you can create with your favorite CottageCutz dies!!

~Kristine

Wednesday, February 23, 2022

Easter in the Netherlands!


Hello CottageCutz friends! Thanks for taking the time to stop and visit with us today. It's Mary Marsh here bringing you the Wednesday edition of the Blog.
 
IT'S NEW RELEASE TIME! The Spring Release with 20 new designs is in the online store. The individual dies are currently at 30% off. There is a nice combination of both religious and whimsical designs. So perfect for all card makers out there.

And the dies don't have to be used strictly for Spring or Easter. The team has done Valentine, Birthday and Thinking of You cards with these new dies. Take a look back on the Blog for lots of ideas.

We are celebrating President's Day here at the Scrapping Cottage with a huge sale with up to 60% off selected dies. It ends on Thursday night so don't delay. 

Today for your viewing pleasure, I have a card that is celebrating Easter and tulips. The background designer paper reminds me of the tulip fields in the Netherlands. Never been there just have seen photos. And I remembered that we had a windmill die that would work perfectly for my idea. 

The card colors are from this week's Splitcoaststampers color challenge. I am the hostess of the challenge and for my color trio I chose pumpkin pie, so saffron and highland heather. Optional is to use any designer paper. 
pumpkin pie, so saffron, highland heather

The windmill is from the Barn & Windmill die. I used so saffron & highland heather cardstock to cut the image. It's currently on sale at 50% off.   

The Easter phrase is from the new Spring Sentiments die. This die has 6 phrase words and 6 Easter or Spring images.  I cut the phrase 3x for more definition and then sponged with the highland heather ink to darken it a bit.   

To finish off this card I stamped a sentiment on the front panel and added a few Spring tulips. The tulips are from the Spring Sheep die. 
That's it for me for this post. I will be back again this weekend with another card sample for you from the Spring collection of dies. 
Reminder: Our YouTube channel is active again. Check out the latest video from Marla, and we are having a giveaway for subscribing, liking the video and giving it a thumbs up. Click here. 


dies I used to create card:


Thursday, May 30, 2019

Farm Scene

Good Morning Friends!

It is Pam creating with you today!

I know so many girls and boys love horses.  So I thought it would be fun to create a farm scene using the horse from our Magical Fantasy release.  I have to admit I love horses too!  This card also combines some dies from other releases.  I love mixing the old and new dies!!


Designer Steps:
 1.  Using the Royal Horse die cut out the body in dark brown card stock.  Then cut out the mane and hooves in tan.  Color the tan hooves black with your favorite markers.  Then use TH ink to shade the mane and add a little pink to the inner ear.  Assemble the horse
 2.  Using the Barn and Windmill die cut out the barn in white.  Color the barn pieces using a black and red marker
 3.  Assemble the barn
 4.  Cut a piece of designer cloud paper 4 x 5 1/4 and add the barn and grass
 5.  Using the Picket Fence Border die cut out a white fence.  Using the Spring Grass die cut out to rows of grass in the same green and as the background grass.  Glue down the fence and then the 2 layers of grass as shown.  Then add the horse
6.  Use a white A2 card base cut a slightly smaller piece of red and glue it to the front.  Then add the panel with the horse and barn and your card is complete
CottageCutz Products


Thanks so much for stopping by and be sure to check out the sales in our store!
Blessings
Pam


Sunday, November 18, 2018

Rise & Shine

Hi!

It's Anja here. I have a simple card for you today. I used one of the new dies and one of the older ones. They go together so well.


For this card I used:
- Cottage Cutz dies (Barn & Windmill, Rise & Shine Phrase),
- Distress Inks (Pumice Stone, Scattered Straw, Walnut Stain, Peeled Paint, Black Soot, Barn Door, Fired Brick, Aged Mahogany),
- craft card base (12,5x18 cm),
- red card stock for background (11,5x16,5 cm),
- watercolor paper for background (10,5x16 cm),
- white card stock for die cuts,
- gold pigment ink,
- paper glue.

First I cut the barn and colored it.


Then I cut the sentiment and colored it with gold ink.


Then I made the background.


And when I had all the pieces I glued everything together. And this is my finished card.


Have a great Sunday and see you again next week.

Anja Z.


Cottage Cutz dies I used:


Tuesday, October 23, 2018

Old MacDonald had a farm ...

Hi, Janja is here!
Today I have two cards for you with a lovely scene on the farm.
Let me show you how I created my cards.


Supplies:
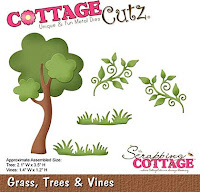
- CottageCutz dies: Barn & Windmill, Chickens & Coop, Cow, Pony, Goat, Pig, Geese, Old Farm Fence, Grass, Tree & Vines
- white card base: 4.25 x 5,35" (10,7 x 13,9 cm), folded
- white card stock: 4 x 5.2" (10 x 13,2 cm)
- colored card stock
- colored ink pads
- glue, double-sided adhesive tape, self-adhesive pads

From the "Autumn" release I have chosen two new dies.
Cut out all the pieces we need.
I used different colors of card stock. The edges are further highlighted with colored pads.


I added some animals from the older release "On the Farm".


Now prepare the card base and a rectangle from a white card stock, which is slightly smaller than the base surface of the card.
Spray the white rectangle with a blue and green color.


To finish the card attach all the elements to the prepared background with glue and self-adhesive pads.


Thank you so much for joining me. Have a nice day.