Tuesday, June 06, 2023

Folk Art Easel Card With Extra Opening

Happy Tuesday cottage cutz friends,
Melinda here and today I am sharing a card I created with some wonderful dies from the new Cottage Cutz Folk Art Release. There are some unique and fun dies in this set! Here is what I created.
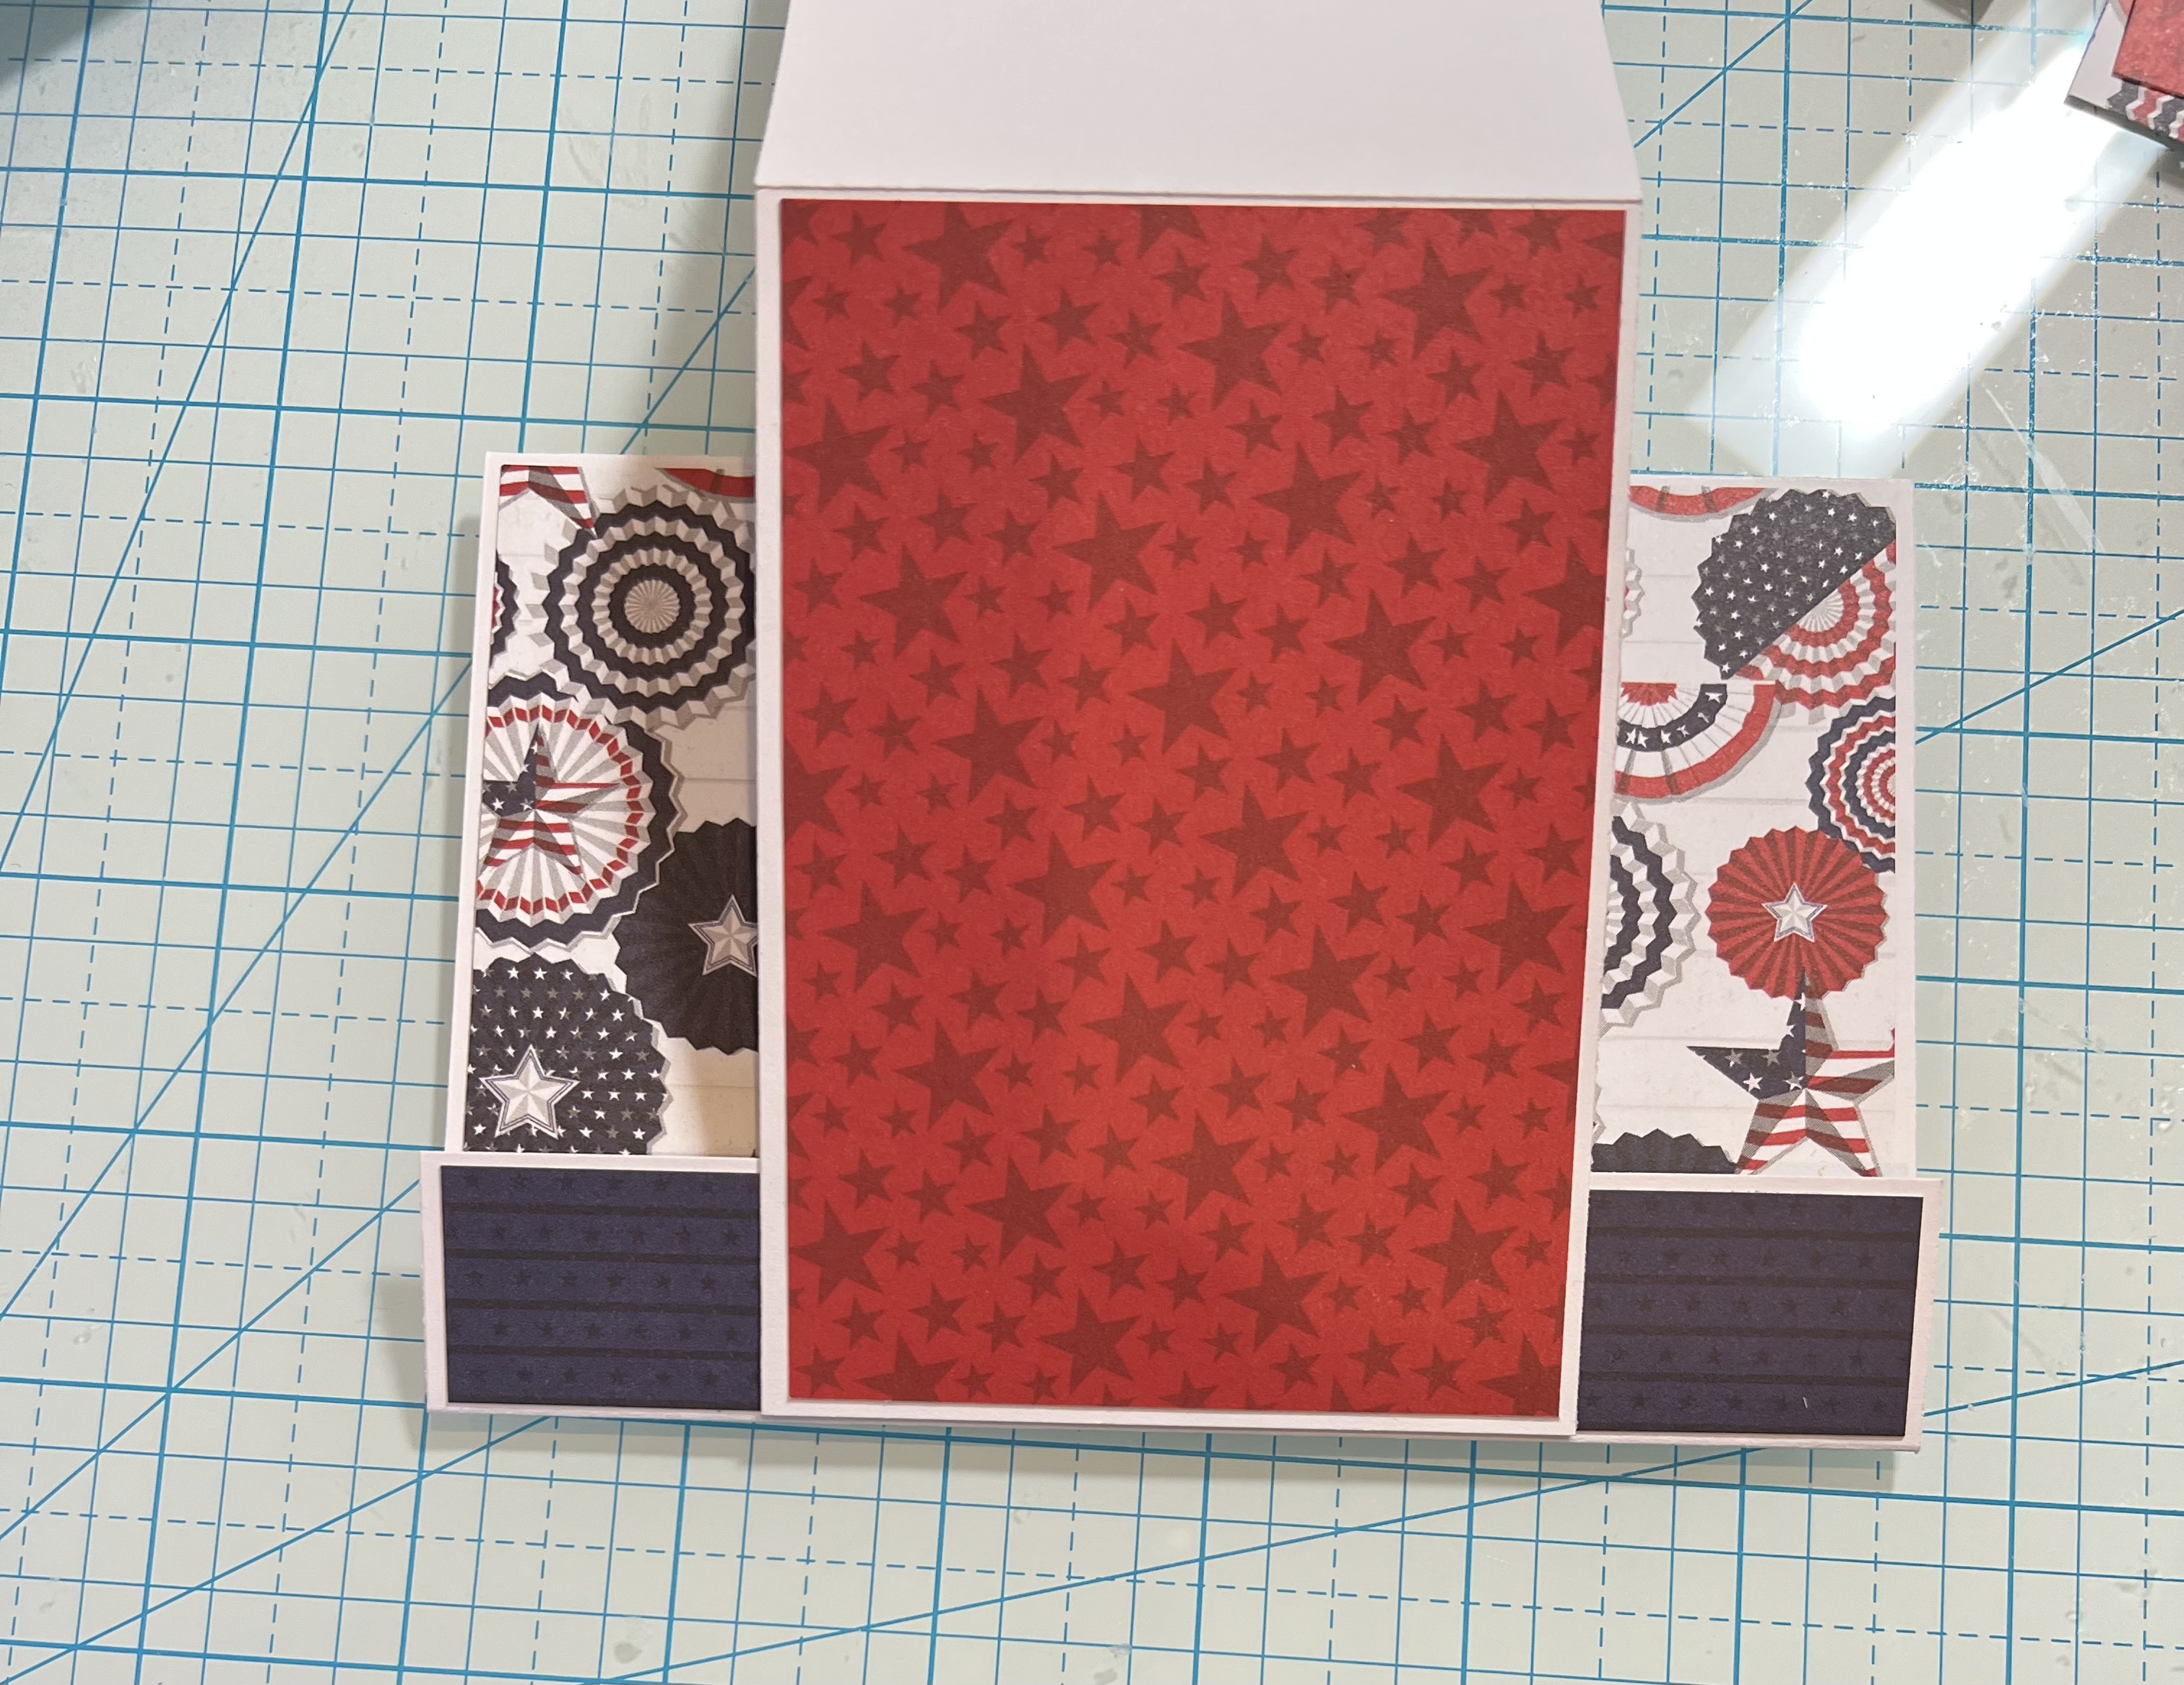
My card is a top folding easel card with an additional inside opening. Here is a view of the card as it stands open with the easel base.


This is the top flap of the card. It is top folded so the card opening is at the bottom. It is a horizontal 5x7 top folding size.  I love the way it turned out.


To create my card, I started with two card bases of white cardstock. They are both folded 5x7 cards. To achieve these, I cut my papers to 7 x 10 and scored and folded them along the 10" side at 5" I turned them so the folds would be on the top. 

For the easel base, I did an additional score at 2.5" along the same 10" side. Essentially that is one flap of your card folded in half.


Once I did that, I took the second top folded card and glued the bottom 2.5" flap to the bottom of the back of the second card. 


I then used some patterned paper from an old paper pad from Hobby Lobby called Kellerkurtz & company. The pad has a vintage type theme. The two photos above show the different layers with the patterned paper only. 


Next I went ahead and cut out all the die cuts I planned to use in white cardstock. I decided I wanted the card to have a very minimalist type look even though the patterned paper was a bit shabby and vintage looking. Here is a closer look at the beautiful heart and butterfly dies from this collection. I added some Nuvo Pearl drops as well as some stickles and some clear glaze to the various areas to give them a bit of understated pizzaz.


Here is a look at the card when it is opened up and with the easel flap. I left two areas to write a sentiment and also for other co-workers to sign as this card is for a co-worker. This card turned out so nice and I love this new release from Cottage Cutz. Be sure to head over and pick yours up today!


Happy Birthday w/Shadow
(Out of Stock)


Well that about covers it for today. Be sure to head back by each day this week as the rest of the design team will be sharing projects featuring this fantastic set. Also be sure to come by Friday and Saturday as we will have ADDITIONAL group project featuring this amazing release!

Also, don't forget to head over to the Cottage Cutz YouTube channel for some more great content and inspiration!

Until the next time, have a wonderfully crafty day!

-Melinda

Monday, June 05, 2023

Folk Art Bear

Hello crafty friends!

It's Kris sharing with you today. ☺

This week we are showcasing the brand new Folk Art Collection All 19 dies in this new release are 35% OFF!


I admit, I had to Google "Folk Art" to get a good feel for what this style is before setting out to make my card.  But I was drawn to the striking contrast of vibrant colors popping off of a black background, so that was my inspiration today.  You won't see any coloring on this card today as it's all die cut paper!  (Although, in hindsight... I wonder if I should have filled in more black space with some white gel pen dots that are so "me"?! ☺)

Design Steps:

I started by cutting the Folk Art Bear, Folk Art Flowers, Folk Art Flowers Mixed and the Folk Art Tulip from a mix of textured colored cardstock.  I didn't know exactly what I was going to use, so I cut a bunch and had some left over for another card/s.


Next, I cut a black card base at 7" x 10" and scored the 10" side in half.  Then I cut a light blue mat (same color as my bear) at 4-3/4" x 6-3/4" then set those aside until the end.

Then, I cut another smaller black panel at 4-1/2" x 6-1/2" -- this will be my main panel for my die cuts.

I just started playing with layouts and getting a feel for where I wanted the elements and color placement, without gluing anything down yet. 


Once I found the layout I wanted, I took a pic on my phone for reference, then I cleared my black panel and started to glue together my elements, and then adhered onto the black panel.  


I knew I wanted my bear to be on top, possibly overlapping some of the greenery around it, so I only laid it on there for reference while I arranged and adhered the rest of my elements under and around him.


Once I got everything glued down (except my bear), I added foam dots to the back of him and attached on top.


And the front is done!  How do we feel about no sentiment on the front of a card??  I'm not sure, but I certainly didn't leave room for one without covering stuff up, so I opted to add it to the inside.  


I cut a piece of white cardstock at 4-3/4" x 6-3/4" and attached to inside.  I then glued one of the tulips I had already die cut to the right bottom corner.  I'm going to leave a sentiment off until I know what I want to use it for.  ☺


I hope you like this new Folk Art Collection!!  It's amazing!

Happy Crafting!
~Kristine

PRODUCTS I USED:


Saturday, June 03, 2023

Folk Art Flower Pot (New Die)

Hello CottageCutz friends! Thanks for taking the time to stop and visit with us today. It's Mary Marsh here bringing you the Saturday edition of the Blog.

We have a brand-new release in the online store. It's our Folk Art release with 19 new designs. For a limited time, you can pick up the entire bundle for 65% off. The individual dies are 35% off.

The folk-art designs are so perfect for cardmaking, journaling, and scrapbooking. They allow you to add a beautiful touch of folk art to whatever you may be creating. 

Today, I am using the Folk Art Flower Pot and I created a thinking of you card. I don't make this type of card very often and when I want to send one, I don't have any on hand. I thought this new die was so perfect for this type of card. 

Design Steps:

I first selected my card colors. I decided on a tahitian blue shade, and I had glimmer paper to match for my background. I wanted a rectangular frame around the flowerpot. The only die I had that was the size I needed is the Pierced Wide Rectangle Frame die. Looks like this one is out of stock, but you could use another rectangle die and cut a frame easily.
Next, I cut the flowerpot in cardstock using some cardstock that coordinates with the tahitian blue. These are bright summer colors. I just love the hearts on the pot. 
I cut my hello phrase in a bright pink cardstock. It's the same shade as one of the flowers. 
Now I am ready to start card assembly. I first attached the glimmer paper to the white frame. I used dimensional adhesive to attach the flowerpot. I wanted it lifted off the background. 
To finish off my card, I attached the image panel to the card base using double sided tape. Added the hello phrase on an angle for interest and secured with liquid glue. I added a couple more hearts to the glimmer paper. 
That's my card for this week. I hope I have given you an idea for this new die. Stop back every day this week to see what the other DT members are creating with these new dies. So, you don't miss any of our posts you can subscribe to our Blog and an email will go out to you every day that we have a new post.

Reminder: Marla has a new video on our YouTube channel and there is a die giveaway. Click here. 

Dies I used to create card:


Thursday, June 01, 2023

Red, White and Blue Bouquet

 Hello Friends,

It is Pam sharing with you today.

I am working on another card for July!!  And I especially like how this die worked with the pattern paper I chose.  I used one of the dies from the recently released Easter Collection.  The die is Spring Potted Flower w/Bird.  I also decided to do a fancy fold that I have never done before.


Design Steps:

1.  Use a piece of white card stock 8 1/2 x 5 1/2 and score it on the horizontal side at 1 and then at 4 3/4
2.  Fold the card on the 4 3/4 score mountain style and on the 1 inch score the valley style as show above
3.  Next cut a piece of white card stock 3 x 8 1/2 and then fold in half

4.  Cut some designer paper to cover the card: For the front cut a piece 3 5/8 x 5 3/8 (this is the rosette DP)  For the front strip cut a piece 5 3/8 x 7/8 (this is the navy DP).  Last for the separate little card front cut a piece 4 1/8 x 2 7/8 (red star DP)
5.  Glue the navy DP on the front flap and then glue the rosette DP on the card front
6.  On the small card glue the red star paper to the front
7.  Put glue only on the bottom of the small red card and glue it to the navy front flap
8.  Turn the card over and place glue only on the bottom of the small card and glue it to the bottom of the larger white card
9.  Using the Spring Potted Flower w/Bird cut out 5 white flowers, 5 red centers, 2 leaf stems and 4 single leaves in green.  Cut out the pot in the navy DP.  Arrange your potted flowers and glue together
10.  Place dimension dots on the back of the flower pot and stamp your sentiment.  Pop the flowers to the front of the card as shown below.  And then glue your sentiment above the flowers and your card is complete

CottageCutz Products


We have more inspiration on our YouTube Channel check it out HERE

Thanks so much for stopping by!  And I will see you next Thursday.

Blessings and Take Care