I hope you are all doing well. I am in Arizona and the temperature is starting to heat up! We will be close to 80 this week. So I am in the mood to start my spring card which includes Easter. I am doing a card with a fun fold for this weeks demo. I used two of the new release dies Little Flowers and Fence & Grass. I also added some older dies to create the Easter Theme.
2. Here is a link for the video I used to create the white card base by Dini at SplitCoast Stampers
Cut a 3 1/2 square out of green DP then cut it on the diagonal one of the pieces will be for the center flap
The other piece of left over DP you will cut in half for the sides of the flap
Cut a strip of cloud DP 5 1/4 x 1 3/8
3. Tape the two center flaps pieces together and then glue on the green triangle. This creates a little pocket. Glue the side green triangles and the blue strip across the top
4. Start to decorate the top of the card sliding the pieces down into the pocket. Cut the Easter Wishes on yellow card stock and glue to the flap. After you have decorated the card front you can either leave the little pocket at the top open to slide in a gift card or glue it shut which is what I did
5. Stamp the inside of the card and decorate with additional flowers. Add a small velcro dot to the tip of the flap and your card is complete
CottageCutz Products
We have more inspiration on our YouTube Channel check it out HERE
Thanks so much for stopping by! And I will see you next Thursday.
Hey Krafty Friends, Jen from Katahin Krafts, back with another CottageCutz YouTube video on the CottageCutz Channel. I crafted my fun Easter scene using "Bunny Tree Cottage", "Spring Sentiments", "Spring Chicken", "Little Flowers" and "Bunny Express Carrot Cars" dies.
I love creating scenes using elements from several different die sets, even if it's just a small element like the Easter eggs from the "Bunny Express Carrot Cars." I was excited to add the vine from the "Spring Chicken" sign to the Bunny Tree, I loved how well they fit together!
You can find all my card instructions over on the YouTube Channel!
While over on the channel, make sure you like and comment for a chance to win the "Bunny Tree Cottage" die!
The winner of the "Playful Piggies" die from my last video is Katherine Lavender, the details for collecting your giveaway prize are over on YouTube!
HelloCottageCutzfriends! Thanks for taking the time to stop and visit with us today. It'sMary Marsh here bringing you the Tuesday edition of the Blog. I am filling in for Melinda for a couple of weeks while she recovers from some recent surgery.
We have a brand-new release of dies in the online store. It's our Flowers & More release. The individual dies are currently on sale for 30% off. This release has what we are calling "simple cuts". Meaning not as many pieces to put together so they assemble quickly.
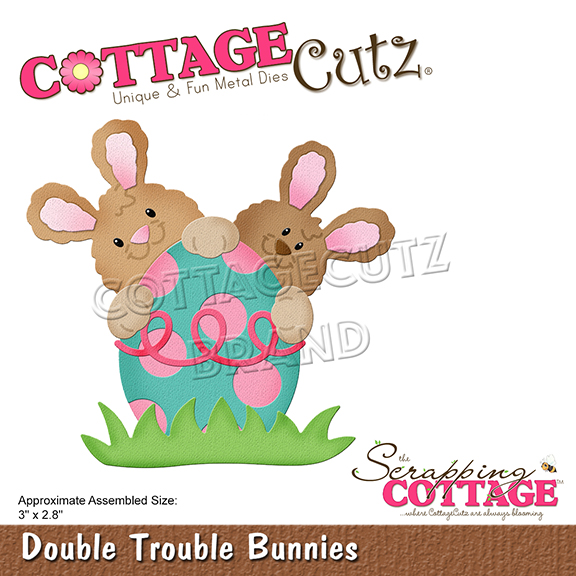
They are so perfect for the many card making occasions that we all have. Birthdays, Thank You, Sympathy, Mother's Day, Easter or even a scrapbook layout just to name a few. Today for your viewing pleasure, I am revisiting an older die from our Spring 2020 release. It's the Double Trouble Bunnies die.
I used the colors from this week's Splitcoaststampers color challenge #939. We are to use polished pink, garden green and tahitian tide for our color trio. Optional is to use layers.
polished pink, garden green, tahitian tide
I decided to make an Easter card with these bold and bright colors. I had the white card base and the tahitian tide tag in my stash. The top of the tag is partially covered by my circleimages, but it has a tahitian tide color gradient.
My first circle is cut in tahitian tide color. I used the largest die from the Sweetheart Doilies set. Looks like that one is out of stock but you could use the Nested Stitched Scallop Circle die. The image circle is the 4th largest Stitched Circle die.
I cut the Double Trouble Bunnies in an allowed neutral and the egg and grass in the challenge colors. Stamped my sentiment and added a few polished pink opal rounds to complete my card.
Hello CottageCutzfriends! Thanks for taking the time to stop and visit with us today. It'sMary Marsh here bringing you the Saturday edition of the Blog.
We have a brand-new release of dies in the online store. It's our Flowers & More release. The individual dies are currently on sale for 30% off. This release has what we are calling "simple cuts". Meaning not as many pieces to put together so they assemble quickly.
They are so perfect for the many card making occasions that we all have. Easter, Birthdays, Thank You, Sympathy, Mother's Day or even a scrapbook layout just to name a few.
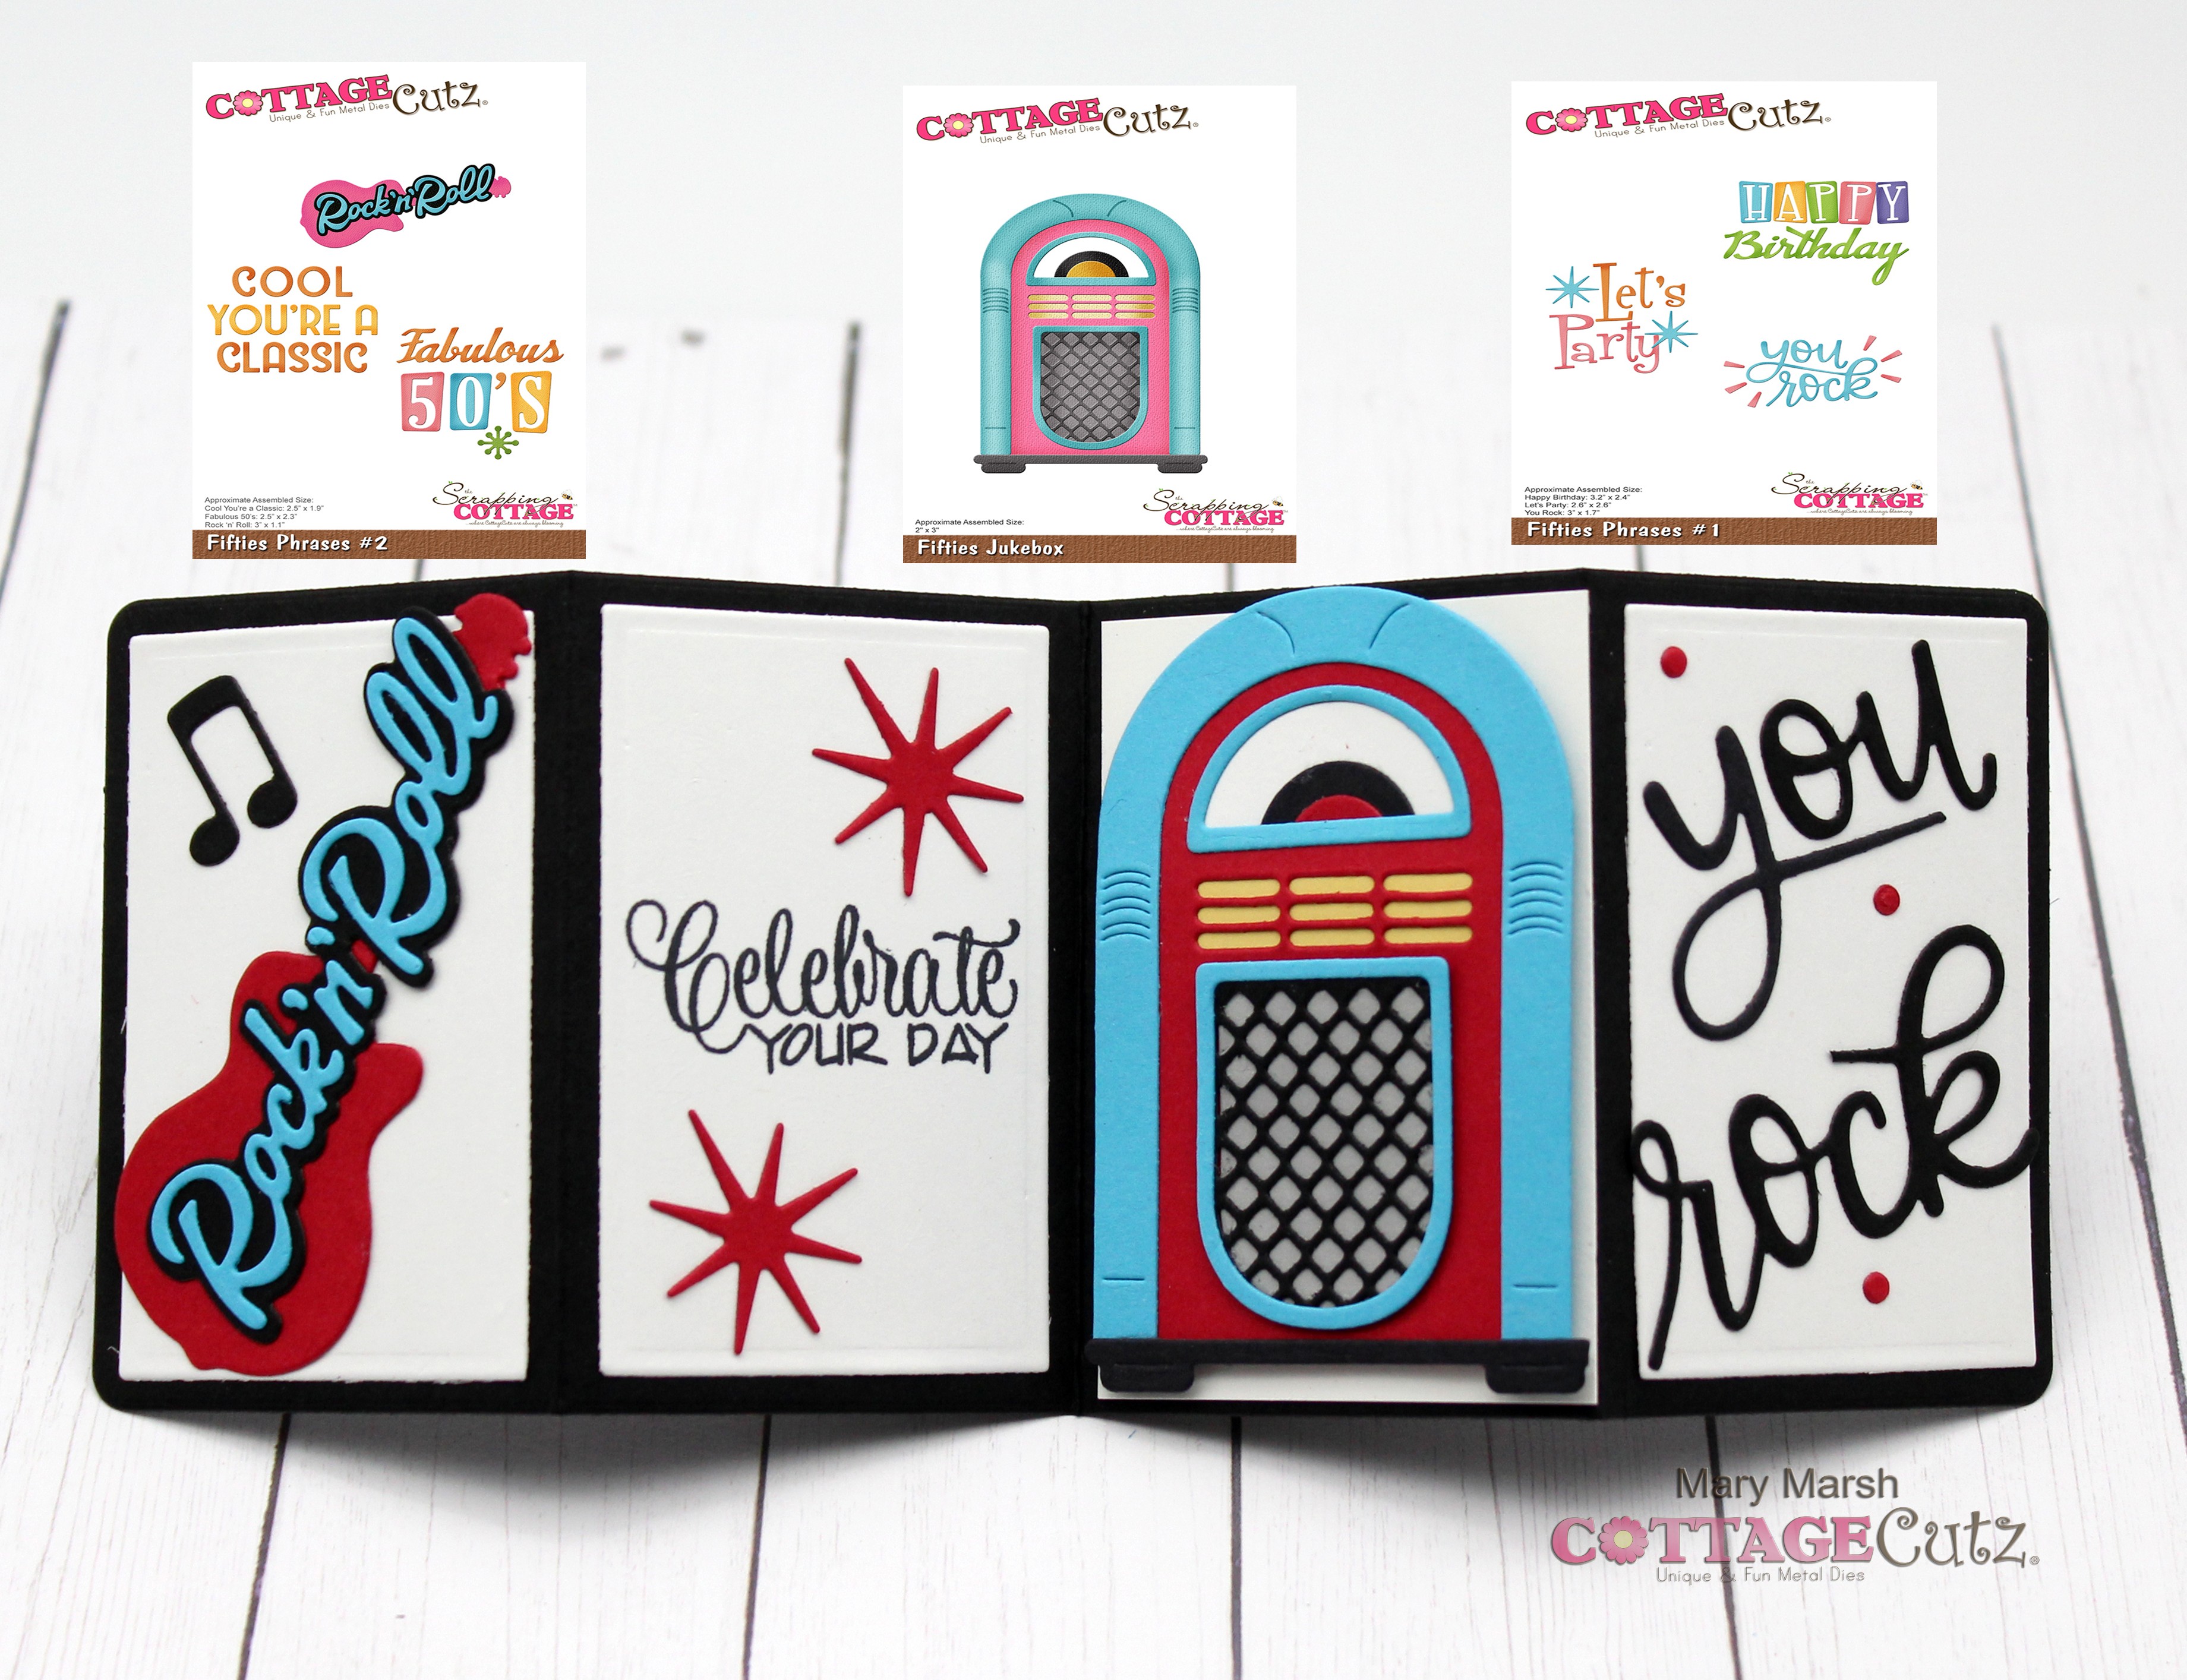
Today for your viewing pleasure I am revisiting the Black Friday Classic 50's release. These dies are currently 40% off. I needed a special birthday card for my son. He's not 50 but he definitely likes rock music. So, I decided to use some of these dies and create a pop-up fun fold card. Let's get started with some card info.
I attached the Happy phrase and stamped the birthday sentiment.
To complete the front of the card, I attached the records, stars and music notes images.
Now I am ready to start my card inside.
I started with decorating the four inside panels. I used the guitar image from the Fifties Phrases #2, the Jukebox die and the "you rock" phrase from the Fifties Phrases #1 die. I layered the images on white panels and then attached to a black rectangle panel. This will get attached to the pop-up mechanism.
White Image Panels: 1 3/4" x 2 3/4"
Black rectangle panel: 8" x 3"
Next, I started on the pop-out mechanism. I cut a piece of white cardstock at 8" x 3 1/2". I scored it at 1 3/4" on the short side. then on the long side I put a tick mark at 2 1/4"& another at 5 3/4".
I used the scoring blade on my paper trimmer to make the next score lines. It's easier for me to line up at an angle on the paper trimmer. You score on both sides of this panel. Tick mark to tick mark.
When it's finished you will have an "X" pattern.
Then you pinch this panel in, so it forms a sort of arrow shape.
Then to attach this to the inside of the card you use a strong adhesive (I used Scor tape) and attach to the top and bottom of the triangle areas only. Then lay it inside the card at the top of the card and close it. The photo below shows the mechanism open without the image panels attached.
Now I am ready to attach my image panels to the mechanism. You use a strong adhesive- again I used Scor-tape on the bottom right and top left part of the mechanism only. Then the image panel is attached to the mechanism, and you fold and close it.
This is what it looks like when it's opened.
To finish off my card I added another sentiment and layered in red and black cardstock.
Well, that's it for me for this week. See you next Saturday!
Here is a short video that shows the card open & close.
Reminder: Our YouTube Channel has a new video from Linh Van. There is a giveaway for being a subscriber, liking the video and leaving a comment. Click here.


.JPG)


.JPG)