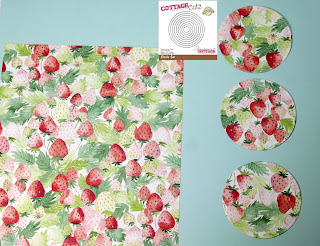
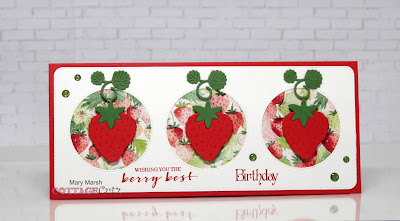
IT'S NEW RELEASE TIME! We have a new collection of Slimline Designs. Your slimline cardmaking is going to get a lot easier. We have 20 new designs and they are on sale. You can get each individual die for a limited time 25% off. The dies have appeal for all styles of cardmaking. So check them out and make your selections.
Saturday, July 10, 2021
Berry Best Birthday Slimline
IT'S NEW RELEASE TIME! We have a new collection of Slimline Designs. Your slimline cardmaking is going to get a lot easier. We have 20 new designs and they are on sale. You can get each individual die for a limited time 25% off. The dies have appeal for all styles of cardmaking. So check them out and make your selections.
Friday, July 09, 2021
Snowflake Present Slimline
Happy Friday! It's Jeanne today and I hope everyone has had a chance to check out the new Slimline dies in the online store. They are wonderful! There are a great variety of styles including some beautiful background dies. I'm using one today to create an elegant holiday card. I know it's July but so many blogs are celebrating Christmas in July, I thought I'd give it a go with these beautiful snowflakes.
I layered these together. By cutting the glitter paper slightly smaller I can glue around the edges and sandwich it between the two white layers.
When using the Snowflake die save the snowflakes that come out of the holes. They make wonderful embellishments or shaker bits!
I added sparkly ribbon like you would see on a package.Next was time for the bow. Cut approximately 18-22inches of ribbon and a few pieces of gold twine. I added some silver later.Wrap the ribbon around three of your fingers and then hold in the center. Add the extra twine in loops on the back and hold these down in the center as well.
Using the twine tie the ribbon tightly in the center.
When the center is secure, fluff up the bow. Pull the sides out and twist and scrunch. It looks more complicated than it is. There really is no wrong way to do it. (And you can use larger ribbon and this same technique for gift wrapping presents!)
I used a couple of glue dots to hold down the bow and added a few rhinestones for extra sparkle. I love the elegant simplicity of this card.
Be sure to visit the online store to see the 20 new Slimline designs! Right now they are on sale for a limited time!
Products used:
Thanks for visiting today! I hope you have a fun and creative weekend!
Thursday, July 08, 2021
Miss Ewe
Hello Scrapping Cottage Friends
It is Pam on the blog creating with you!
We have a HUGE SLIMLINE DIE RELEASE with 20 fantastic dies. The dies are at a savings of 25% off right now in the store. The new designs are just so amazing. They are sure to put your imagination into overdrive!! Check them out right HERE.
I have used two of the new dies on this card the Clouds Horizontal Slimline and the Farm Fence Slimline.
Design Steps:
1. Using the Curly Sheep & Lamb die cut out the animals. I cut out 1 sheep and 3 lamb.2. Shade the pieces and glue them together with a fine tip glue applicator
3. Cut out a piece of white card stock 3 1/2 x 8 1/2, cut out a piece of blue using the Cloud Horizontal Slimline, cut out a piece of brown card stock using the Farm Fence Slimline, and last cut out a piece of green using the Grass Slimline. Glue the cloud piece to the white background. Glue down the fence next and then the grass
4. Use a 4 x 9 white slimline base. Cut a piece of red gingham just slightly smaller then the base. Glue the two together
5. Glue the cloud panel to the card base. Pop up the sheep and then glue the little lambs flat as shown below. Add your sentiment and bow to complete your card
Thanks so much for stopping by today. I hope you have a great day and you get some time to get crafty!
Wednesday, July 07, 2021
Boots and Bling - it's a Cowgirl Thing!
Hello! This is Sukie and today I have a quick card to share. The Country Farm die release was perfect for creating this all occasion card which came together very quickly! There's a brand new release of Slimline dies in the store too, be sure to check them out while they are on sale!
Since I had the cowboy paper in mind for this card, I selected some coordinating card stock colors for all of the die cuts. The die cuts are from the Dog in Cowboy Boot, Country Farm Cows (fence) and the Mail Tag Set.I wanted to showcase the patterned paper for this card so I kept my card base very simple and adhered the set of tags on top. The double tags were tied together with some jute twine.
The fence was adhered along the bottom edge of the tag, slightly overlapping it.
The sweet doggy in the boot was affixed on top of the tag with the fence behind.
The fun sentiment was stamped on a hand cut flag. I tied some more of the jute together and added it to my car as an embellishment.
Here are the die sets used on my card, available in the store:
Monday, July 05, 2021
Happy Hello
Hello Scrapping Cottage Friends
It is Pam on the blog this fine Monday Morning!! I hope you had a wonderful 4th of July celebration.
We have a HUGE SLIMLINE DIE RELEASE with 20 fantastic dies. You can get the entire collection for a whopping 58% off right now or if you wish a single die at 25% off! The new designs are just so amazing. They are sure to put your imagination into overdrive!! Check them out right HERE.
I have used one of the new dies on this card. It is called Circle Window Slimline.
I used a white card base and cut the die piece out in white using the Circle Windows Slimline. Because I really wanted the little roosters to stand out. The roosters where cut out using the Country Farm Rooster from our last release. I cut 3 of them out and glued them to each window.
After I glue them to the windows I used dimensional tape to attach the die cut panel to the card base. I then cut out the Happy Hello 2 times using the Happy Expressions die and the Hello Expressions die. I glued them together and then glued them to the card front
CottageCutz Products
Take Care and Blessings
Pam


