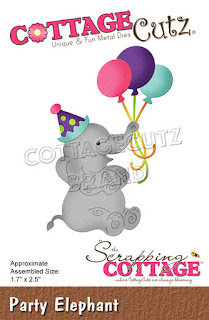
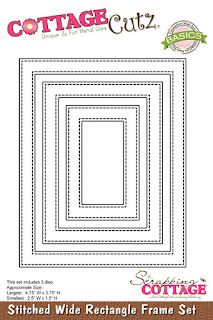
Hello! This is Sukie and today I'm sharing a fun and festive birthday card. I took a break from creating Christmas cards and used one of the new die sets from the Safari die release for this card.
The Safari Peekers were perfect for tucking inside the Stitched Wide Rectangle Frame. The frame coordinated perfectly with the patterned leaf paper. Once the animals were nestled inside the frame, I used the Party Elephant die set to cut out the bouquet of balloons and the party hats. The party hats were added to the lion and monkey. The finishing accent on my card was the sentiment.Monday, December 14, 2020
Sunday, December 13, 2020
Christmas Cookie
Hi!
It's Anja here. I have another Christmas card for you today. This time is all about baking.
For this card I used:
- Cottage Cutz dies (Gingerbread Baker, Sweet as a Christmas Cookie),
- Distress Inks and Oxides,
- white card base (10x21 cm),
- white card stock for die cuts,
- black pen,
- white pen,
- water spritzer,
- heat gun,
- adhesive foam pads,
- paper glue.
First I cut and colored gingerbread cookie.
Next I did the same with the sentiment.
Then I used Distress Oxides and did the background. I colored directly on the card base.
After coloring I spritzed over the paper and dried it with the heat gun.
And after that I glued all the pieces to the card base. I adhered the gingerbread cookie with the adhesive foam pads. And my card was done.
That's all from me for today. Have a nice week and see you again next Sunday.
Anja Z.
Cottage Cutz dies I used for this card:
Saturday, December 12, 2020
Snowman in the Meadow
Hello Scrapping Cottage friends! Thanks for taking the time to stop and visit with us today. It's Mary Marsh here bringing you the Saturday edition of the Blog.
 |
| pumpkin pie, silver, bermuda bay |
Friday, December 11, 2020
A Warm and Toasty Holiday
Happy Friday! It's Jeanne today with a card that made my mouth water while creating it! S'mores bring back many of good memories for me - from Girl Scout camp when I was young to sitting in front of our fireplace and making them when our girls were little.
This card was fun and easy to create. Starting with a sketch is always a time saver and I found one on Splitcoaststampers.I cut three pieces of cardstock and paper. First I cut an A2 size panel cut from Crumb Cake, I then used two different patterns and cut a rectangle using the second largest of the Nested Stitched Scalloped Rectangle dies and a square using the middle of the Nested Stitched Scalloped Square dies. I found this paper in my stash and although it's not Christmas, it fits the theme perfectly.I used Distress Oxide ink in Vintage Photo to antique all the edges and then I heat embossed the sentiment with dark brown embossing powder.For my marshmallow snowman and s'more cookie I cut all the pieces from white cardstock. I used markers to color the nose, hat, scarf and chocolate. I also antiqued all the edges of these pieces. After all, s'mores should be toasted!
Finally I popped up my snowman using foam dots.
Dies used:
Thursday, December 10, 2020
Santa and Reindeer
Hello Scrapping Cottage Friends
It is Pam on the blog today.
I am continuing to make a few more Christmas cards for friends and family. Believe it or not I am almost finished. My family all live back east so I need to get them in the mail very soon. I am using a few new dies today to create this fun flip/swing card. There is also a cute surprise on the inside!
2. Shade the pieces and then assemble with a fine tip glue
3. Create the base of the flip card. There are a number of great videos on YouTube to create the base. Just type in flip card or swing card. I used designer paper to create the layer of snowflakes and glitter paper for the snow on the bottom. Glue the DP to the flaps and the snow to the bottom
5. On the left side I popped up the largest deer and I cut a circle for the center using the snowflake DP and the Cross Stitched Circle die. I also cut white glitter card stock using the Santa's Express Tag and glued it to the cross stitched circle


