
Hi!
It's Anja here for my Monday's post. I made another "interactive" Christmas card today. I'll tell you a bit more about the crafting process below.

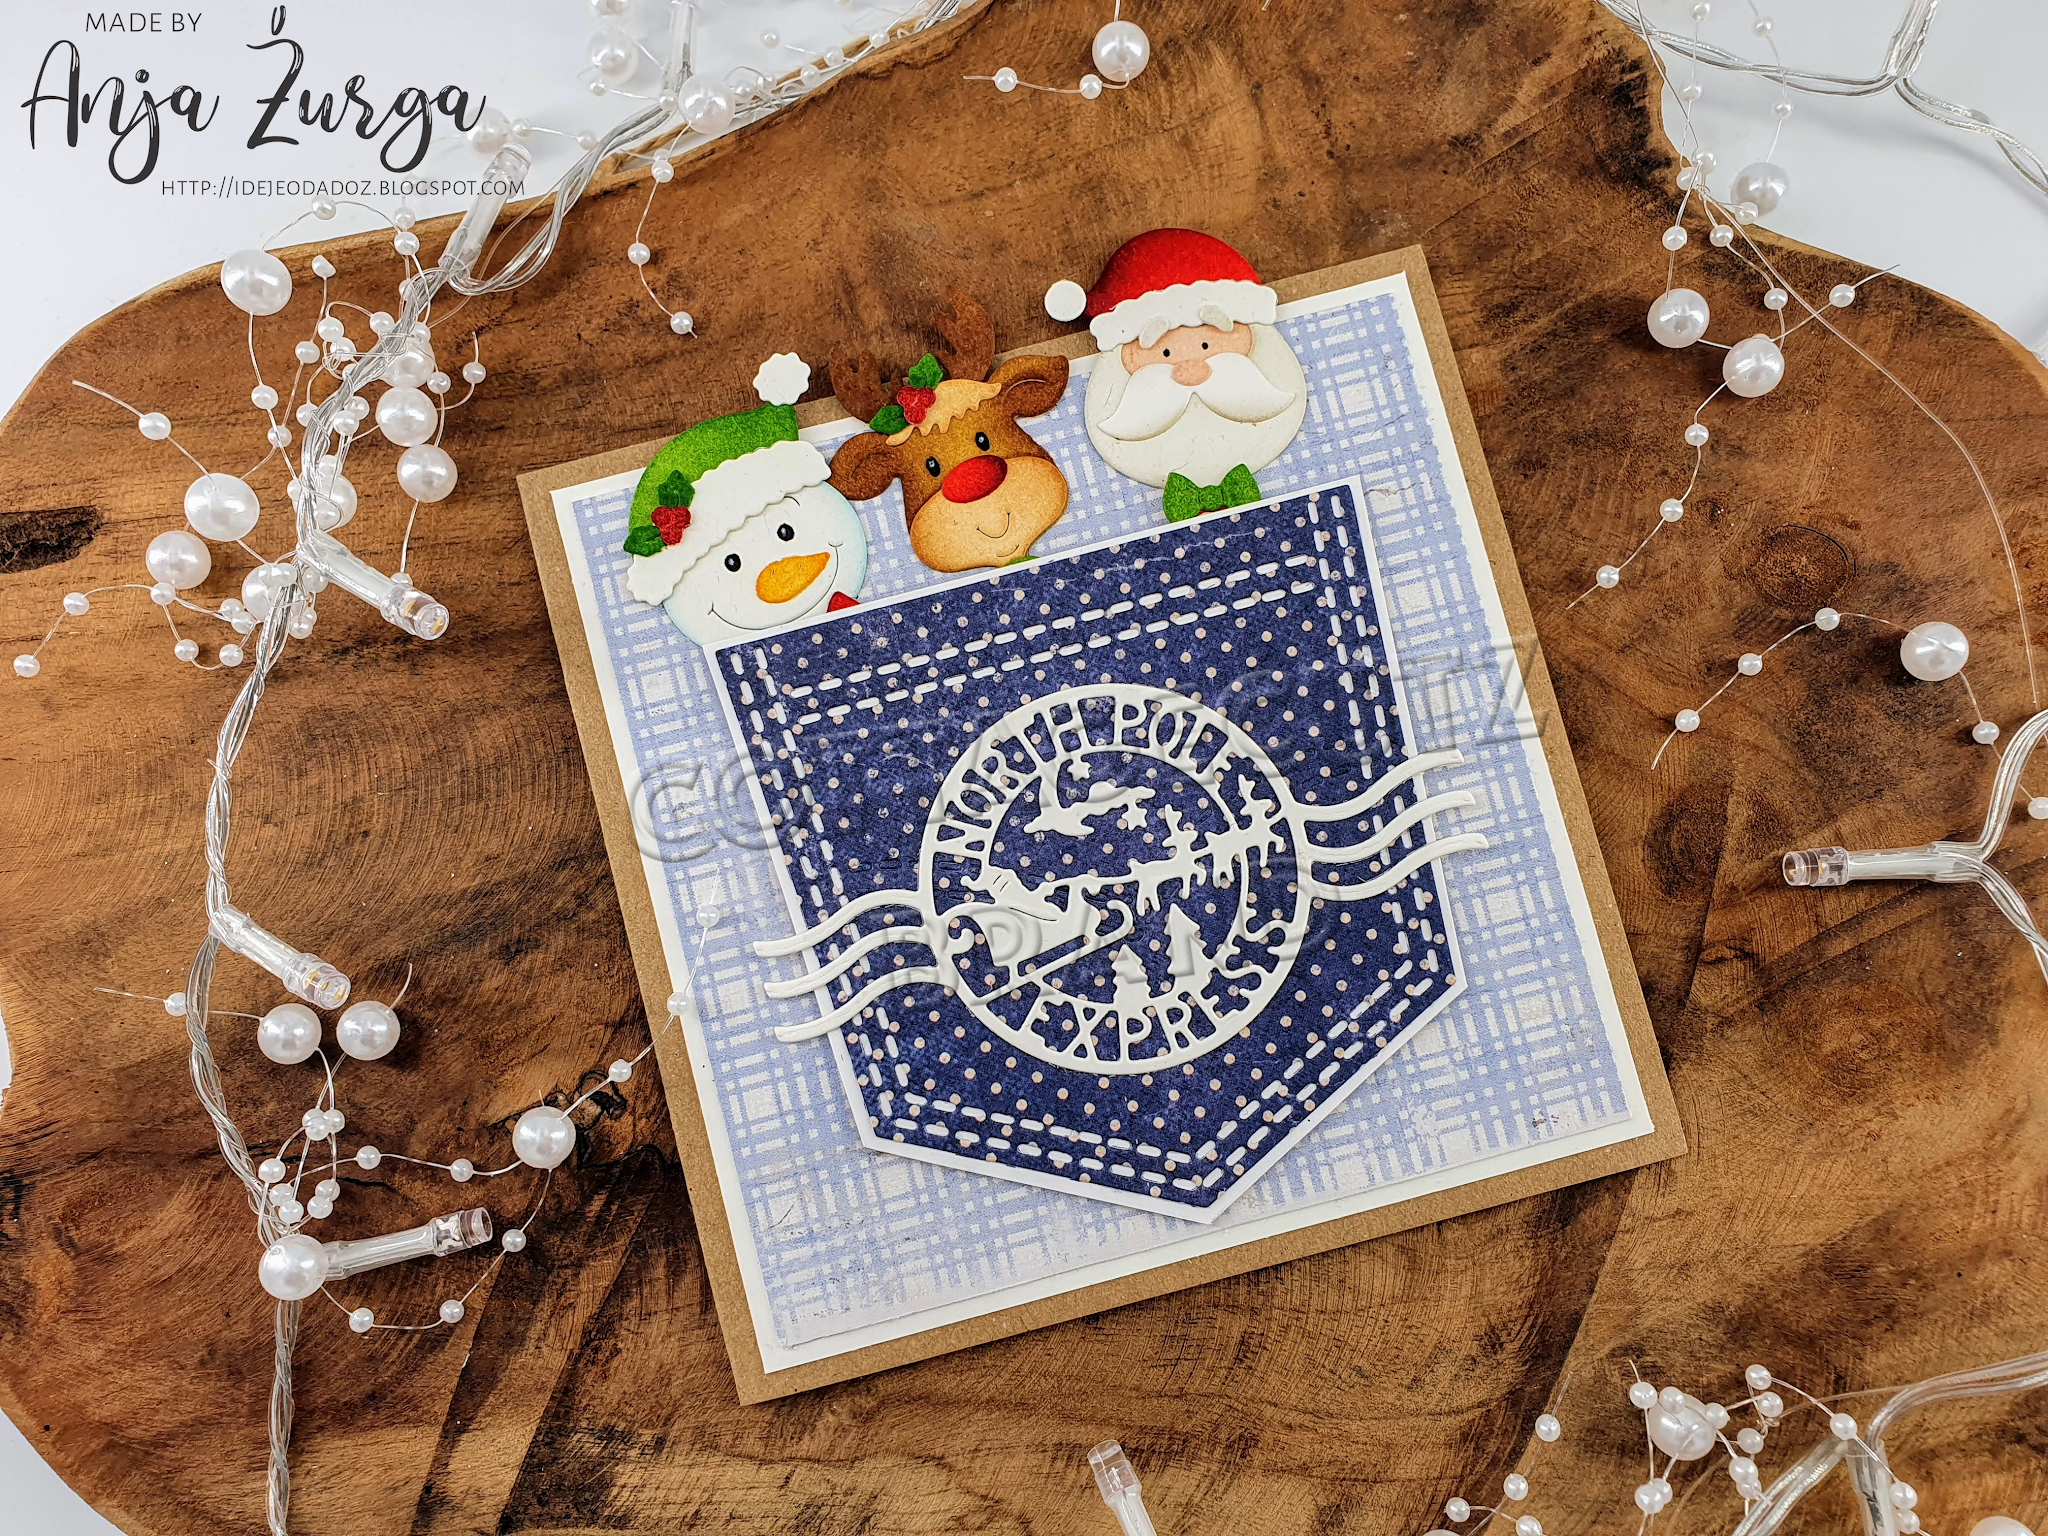
For this card I used:
- Cottage Cutz dies (Christmas Keys, North Pole Express Tag, Peeker Pocket),
- Distress Inks,
- craft card base (13x13 cm),
- white card stock for background (12x12 cm) and die cuts,
- patterned paper for background (11,5x11,5 cm) and die cuts,
- scissors,
- black pen,
- white pen,
- gold pigment ink,
- silver pigment ink,
- adhesive foam pads,
- paper glue.
After cutting and coloring all the parts for the keys I started on the background. I used a few pieces of leftover patterned papers. After I cut the pocket I placed it on white card stock and cut a few millimeters around to get a bigger pocket in white. I glued the patterned one on top and then with adhesive foam pads to the card base. That's how I got a bit more space to stick all three keys in. I decorated the pocket with North Pole Express Tag. And my card was done.

Hope you like my project for today's post. Have a nice week and see you again on Sunday.
Anja Z.
Cottage Cutz dies I used:


