Hi!
It's
Anja here. There's a baby boom going on among my friends this year. So I decided to make a few cards to welcome their babies.
For 4 cards I used:
- Cottage Cutz dies (
Flying Stork,
Fancy Bassinet,
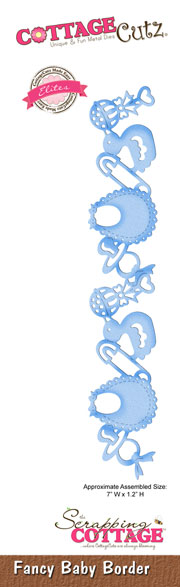
Fancy Baby Boder,
Baby),
- Distress Inks and Oxides,
- 4 white card bases (15x15 cm),
- water color paper (4 backgrounds, 14,5x14,5 cm),
- white card stock for die cuts,
- black pen,
- sentiment stamp,
- black pigment ink,
- water spritzer,
- heat gun,
- 4 envelopes,
- paper trimmer,
- paper glue.
First I cut and colored the bassinets and baby phrases.
Next I did the same with the storks.
Then I started on the backgrounds. I used Distress Oxides. I put some color on my glass surface and spritzed it with water. Then I tapped watercolor paper on top. I used a heat gun to dry the paper. I used the same technique for all for papers.
I used the same technique to color baby borders. I used the borders to decorate the envelopes.
This is all the unique backgrounds and border I got.
Then I trimmed the paper and stamped the hello sentiment on top. Next to it I glued the baby sentiment.
When all my pieces were ready I put the cards and envelopes together.
This is all from me for today. Have a nice week and see you again next Sunday.
Anja Z.
Cottage Cutz dies I used: