Thursday, June 18, 2020

Peeking Pup!

Hello My Scrapping Cottage Friends!

Today,  I have a sweet pup just peeking out of a lovely garden cart!  I decided to make it into a thank you card but it could easily be a birthday, just because or a hello card!

Background Photo by Joe Woods on Unsplash

Design Steps:

 1.  Using white card stock and the Puppy in Garden Cart die cut out all of the pieces.  I did use a piece of red polka dot DP and recut the umbrella pieces
2.  Using Tim Holtz inks and a small sponge applicator color and shade all of the pieces.  Next assemble them using a fine tip glue
 3.  Use a white A2 card base, a piece of red card stock cut 4 x 5 1/4, a piece of polka dot blue DP cut with a Stitched Scallop Square and a piece of green card stock cut with the Spring Grass die
4.  Attach the ribbon toward the bottom of the red card stock and add your sentiment
5.  Next add the grass to the bottom of the polka dot blue scallop square.  And then glue your garden card to the square as shown.  Pop the blue square to the red panel just above the ribbon and then attach to the white card base.  Lastly add the tiny black rhinestones to the pup's eyes and some tiny red rhinestones to the yellow flowers and your card is complete


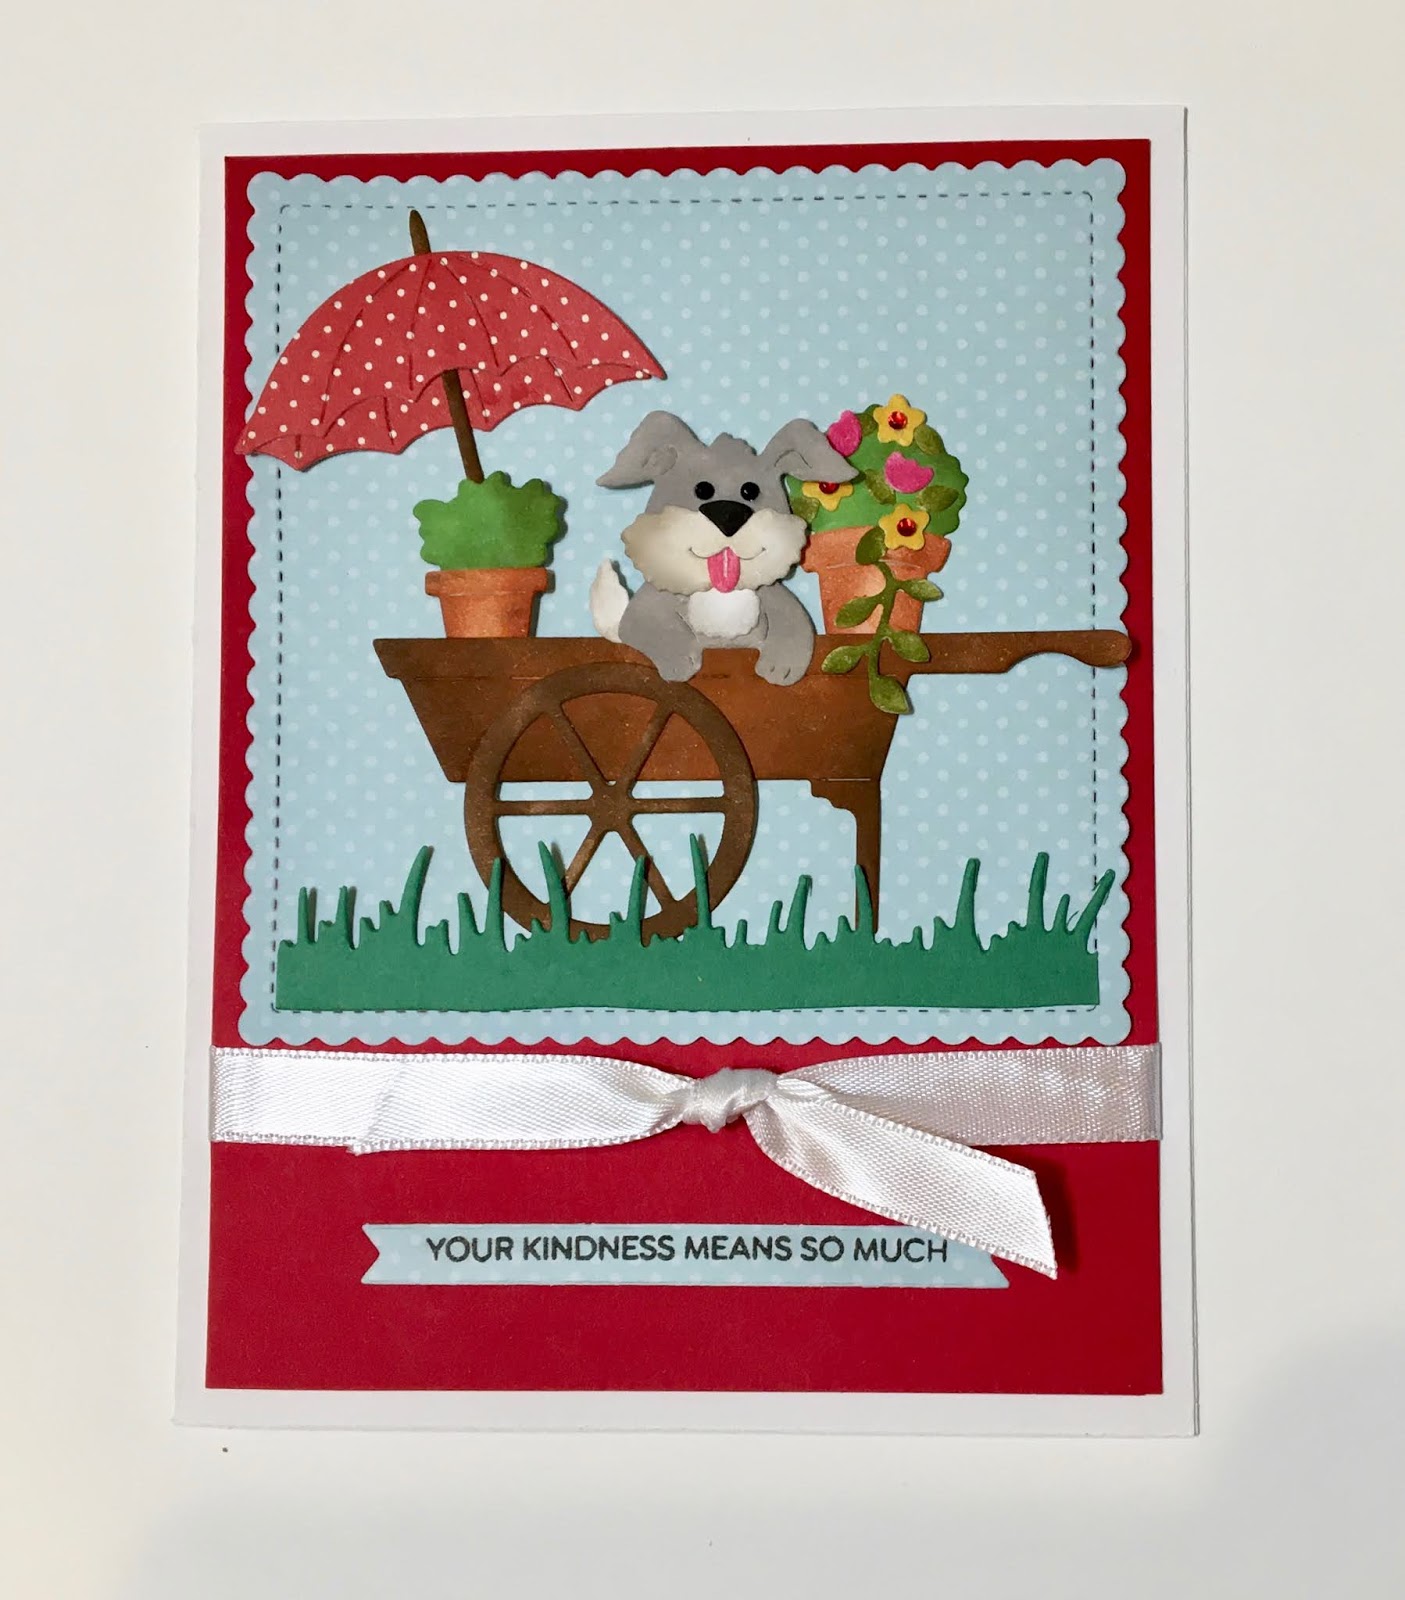
 CottageCutz Products

Thanks so much for stopping by today! And I will see you next Thursday!
Blessings
Pam


Wednesday, June 17, 2020

All Things Grow with Love

Hello!  This is Sukie and today I'm sharing this all occasion card for my design team post.  I used one of the fun dies from the Gardening die release.
My card features the Garden Ladder, the Pierced Circle Set and a little arrow from the Retro Alphabet die set.
I incorporated a couple of different patterns for my card base on a solid white card panel.  The sentiment was stamped on a strip of solid card stock.
The base of my card came together quickly with the different layers which were topped off with the circle.
The ladder was adhered to the left side of the circle.  The neutral background allows for the gardening elements to pop even in the softer colors.
The sentiment strip was adhered along the top edge of my card.  I added the arrow inside the circle as an embellishment.
Here are the die sets used on my card, available in the store:

Tuesday, June 16, 2020

Beach Huts

Hi Janja here with you. Welcome to the blog today.
In the beginning, I intended to prepare a greeting card on the topic of gardening.
However, since summer is almost here, I changed my mind and turned the garden shed into a beach hut.


- CottageCutz dies: Potting Shed, Puppy in Garden Cart (parasol), Fairytale Castle (flags), Camping Trailer (flags garland), Seagull (sand dunes)
- blank card: 5 7/8" x 5 7/8" (15 x 15 cm)
- white cardstock: 5 1/2" x 5 1/2" (14 x 14 cm)
- patterned papers
- different colors of brush markers
- different colors of ink pads
- glue, double-sided adhesive tape, self-adhesive foam pads

Cut the beach huts out of striped papers. Also cut out three parasols.


Use white cardstock for the background. Shade it with different colors of ink pads. For a sandy beach, use a stamp or simply add dots with a marker.


Now attach all the elements to the prepared background with glue and self-adhesive foam pads as shown. Attach the parasols to small sand dunes.


Thank you for stopping by.
Janja


Sunday, June 14, 2020

Gardening Time

Hi!

It's Anja here. I have another gardening card for you today. I combined this cute cat die with a mini hose.


For this card I used:
- Cottage Cutz dies (Gardening Cat, Garden Hose Mini, Circle Set),
- Distress Inks,
- white card base (15X15 CM),
- white card stock for die cuts and paper stencil,
- silver pigment ink,
- black pen,
- black Versafine pigment ink,
- sentiment stamp,
- acrylic block,
- brush,
- paper trimmer,
- paper glue.

First I cut and colored the cat and all the gardening accessories.


Next I did the same with the hose.


Then I made a paper stencil. I used the paper trimmer to cut the circle in two. I used the biggest circle die from the set.


I used the negative and the bigger part of the circle to color the ground. You could also use washi tape to set the paper for easier coloring.


Then I used the smaller part of the circle to color the sky. I used a brush for coloring.


Then I added the sentiment in upper right corner of the colored circle.


Last I added the cat and the hose and my card was done.


And this is all from me for today. Have a nice Sunday and see you again next week.

Anja Z.


Cottage Cutz dies I used for this card:


Saturday, June 13, 2020

Kitty & Hedgie Birthday Wishes


Hello Scrapping Cottage friends! Thanks for taking the time to stop and visit with us today. It's Mary Marsh here bringing you the Saturday edition of the Blog.

The 19 new designs in the Garden release are still being featured in the online store. These new dies are perfect for Father's Day, birthdays, thank you, or even a thinking of you card for the person who loves to garden.

For my card today, I am featuring the new Garden Cat w/Wagon die and created a birthday card. This little cat and hedgehog are just too cute and I thought they would make a great whimsical card. So let's get started with some details on how I created my card. 

Design Steps:

I started off by selecting my cardstock and designer paper. I had a layout in mind with several layers,  but it didn't work for these images. So I flipped the designer paper over and decided to use the striped side. My original plan was to use the side of the paper with balloons but it wasn't working for me. This is also a square card. I hadn't planned on that when I started though (lol)!! I realized this was going to be a work in progress this week.

Blue card Base: 5 3/4" Square
Striped Designer Paper: 5 1/2" square 
Next, I cut the cat in an ivory confetti cardstock and sponged fossilized amber ink for a different look.  The wagon and hedgie are cut in different shades of brown cardstocks and also sponged in the matching inks for more depth. 

I plan on giving this card to a little 5 year old boy so I didn't want to place flowers in the wagon. I thought balloons and then pulled out the Festive Birthday Greeting die. It was released in June 2019. I cut 3 for inside the wagon and then 2 additional for the cat to carry. 
Because of the bold striped background, I needed another layer to place my images on. I picked one of the colors (lemon-lime) in the designer paper and used the largest Wacky Stitched Rectangle die. Looks like it's out of stock but the Stitched Rectangle die would be a good substitute. 

I thought I would use the Happy phrase that's part of the Festive Birthday Greeting die and then stamp birthday wishes in the corner of the rectangle. I stamped with a royal blue ink. 

Now I am ready to start card assembly. I attached the images to the rectangle panel with dimensional adhesive. That always gives a nice look to the card. 
Attached the designer paper to the card base with double sided tape and then the image panel with the same adhesive. For the balloons that the cat is carrying, I used a dab of ranger multi medium matte adhesive. 
To finish off my card I added a few royal blue enamel dots. And, that completes my card for this week. I hope I have given you an idea for a way to use this new die. See you next Saturday!

dies I used to create card: