Saturday, July 07, 2018

Fishing Boat Sympathy


Hello Scrapping Cottage friends! Thanks for taking the time to stop and visit with us today. It's Mary Marsh here bringing you the Saturday edition of the Blog. We just celebrated American Independence day on July 4th and now summer is in full swing.

Since there isn't a new release of dies for July,  we have decided to have a throwback month.  The team will be featuring some of our older dies to give you some fresh ideas for using them.

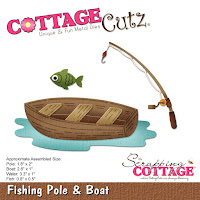
My card today is featuring the Fishing Pole & Boat die. I need a sympathy card for a friend who just lost her husband to liver cancer. He was an avid fisherman and even the remembrance pamphlet they gave at the funeral home reflected that.  It was such a beautiful tribute that I will use it for the inside of my card.
So let's get started with some details on how I created this card.

Step 1.  I sponged some clouds in my lake scene using a cloud stencil and tumbled glass distress ink. The cardstock is taped with repositionable tape to my craft mat. I do this to keep it from moving while I am stenciling. And the craft mat makes clean-up easier.
 
Once I was satisfied with the look, I stamped my background mountains with gray ink.  The stamp set I used is supposed to give the look of watercoloring. I wanted the mountains to have a misty appearance since they were in the background. I thought I achieved that.
Used marina mist ink (medium blue)for the water. I stamped off once before I stamped the water to give it that same look.   I wanted the fishing boat and die cut water pool to be the emphasis.  
 For the sun and rays, I used a sun ray stencil and daffodil ink. Taped the stencil to the corner of my scene.
I also sponged some kraft ink at the waters edge for the lake shore.
Image Panel: 4 1/8" x 5 3/8"
 
Step 2: Cut the boat and fishing pole using different shades of brown cardstocks. The water is cut with marina mist cardstock. It's the same ink I used to stamp the water.
Step 3: Time to start the card assembly. I layered the die cut pieces onto the sponged and stamped scene I created.
I adhered the image panel to a marina mist cardstock base. Once I did that I decided I didn't like the fishing lure that I used. So I cut the one that is part of the fishing pole die in red and a light gray cardstock. I thought the smaller lure looked better in my scene.
I wasn't sure about adding a sentiment on the card. But, I wanted this to be more personal for my friend so I gave in and stamped "sharing in your sorrow" to complete my card.
 
Well, that's it for me for this week. I hope I have given you a new idea if you own this die. If you don't have it, it's still available in the online store. See you next Saturday with another Throwback in July idea.
 
Die I used to create card.
http://www.scrappingcottage.com/search.aspx?find=fishing+pole


Friday, July 06, 2018

STOP! in the Name of Love

Happy Friday!  It's Jeanne posting today.  This week has me a bit mixed up and off schedule but I hope to get back to normal this weekend.  My card this week pays homage to one of my all-time favorite groups - The Supremes!  When I saw this Traffic Light die, the Supremes' signature song went through my mind.  Soooo....a card.
I started with an A2 card base and a panel of the speckled paper 5 1/2 x 4 1/4 inches.  The paper is has black, red and coral speckles which is how I picked the coral color for the banner.
I used the Traffic Light die in black, grey, red, yellow and green to cut out the elements for the light.
I drew a light line on the coral paper and stamped the sentiment.  I used a stamp set that has individual letters and erased my line after I stamped.
Next, I did the same for "stop".  I colored in the word with an R29 Copic marker and then used the largest of the Stitched Hearts die to cut it out.
The sentiment strip is cut to 7/8 x 4 1/2 inches.
I arranged the heart off center on the front of the card and then adhered the other elements.....
....and the finished card.  I'm not sure who I'll send it to, but I know they'll be a Motown fan!
http://www.scrappingcottage.com/cottagecutztrafficlight.aspx

http://www.scrappingcottage.com/cottagecutzstitchedheartsetbasics.aspx

Be sure to visit the website where for the July 4th sale!  It continues through July 6th at 9:00 pm PDT.

Thanks for stopping by and have a creative weekend!


Thursday, July 05, 2018

Red T-Bird!

Hello Scrapping Cottage Friends!

It is Pam sharing with you today on the blog.

I have really enjoyed working with the new release dies from the Just for Guys collection.  This little T-Bird reminds me of the movie American Graffiti one of my all time favorite shows!


Designer Steps:
1.  Cut out all of the pieces in white using the Vintage T-Bird die.  Color the pieces with your markers.  I used Copics. 

2.  Assemble the car using a fine tip glue for the smaller pieces
3.  Use an A2 white card base then cut the following: 5 1/4 x 4 piece of deep red card stock, 5 x 3 3/4 piece of DP, cut a white rectangle 4th from the largest using the Pierced Rectangle Set  and last cut a yellow rectangle cut 2 x 3 1/2.
4.  Glue the DP to the deep red card stock add the yellow rectangle and then the white pieced rectangle.  Last step before you glue it to the card front is to add the ribbon.  I tape it with scotch tape to the back so it lays nice and flat
5.  Cut out the pieces of the medallion using the Retro Tag Toppers.  Use deep red, white and yellow card stock.  Glue the white on top of the red and then the yellow.  Stamp the yellow with your sentiment
6.  Pop the car to the card front panel then glue the panel to the white card base.  Last add the Retro Tag to the upper left using pop dots and your card is complete
 Cottage Cutz Products


Thanks so much for stopping by!  We appreciate it!  I hope you take some time to play it is so good to have a creative outlet!
Blessings
Pam


Monday, July 02, 2018

Quick Gift Card Holder

Hi, Lois here for my Monday post.  The CottageCutz design team is going to pull out some older dies during the month of July and show them off.  I used the Filigree Daisy Envelope to make a quick gift card holder, adding one of the Expressions Plus sentiments.


I cut the envelope from a piece of purple cardstock.


The base of the card is just a 5 1/2" x 8 1/2" piece of purple cardstock and a 4" x 5 1/4" piece of patterned paper.


After folding on all of the score lines on the envelope, I added some narrow Scor-Tape to the side tabs.


I then cut the sentiment twice -- once in purple and once in shimmery white.  I had run the scraps of cardstock through my Xyron machine prior to cutting so that I could adhere them easily.


I used Scor-Tape on the back of the envelope for good adhesion to the card.


I adhered the envelope at the bottom of the card and layered the two sentiments at the top -- on an angle.


To hold the flap closed, I cut a strip of Velcro . . . 


. . . and placed it behind the daisy.  I closed the flap to place the second piece on the envelope.  I trimmed the portion that was above the opening.


I then added a few sequins and inserted the gift card.


Here again is my completed card.


I would encourage you to look through the CottageCutz website and see what you may have missed.

dies used to create card:
http://www.scrappingcottage.com/cottagecutzfiligreedaisyenvelopepre-order.aspx
 
http://www.scrappingcottage.com/cottagecutzexpressionspluscelebratephrase.aspx