Friday, July 20, 2018

Discover Shaker Card

Happy Friday Cottage Cutz fans!  It's Jeanne today and I have a fun shaker card for you!  I love interactive cards and this one uses some really cute dies.  I just love this mouse and snail.
I started with an A2 sized top fold card base.  I cut a panel from patterned paper the same size as the front (5 1/2 x 4 1/4 inches) and a slightly smaller panel from a coordinating paper for the back of the shaker.
Next I die cut all my pieces for the foliage and critters from a variety of green and neutral card stocks.
You may notice that there are a few pieces missing from this photo - that's because as I was puting this together I decided to add a few extra elements.

I cut the word discovery from a dark purple card stock that had been backed with adhesive paper.  I like doing this with fine elements.  I wait until I'm ready to stick it down before I  try to remove it from the rest of the card stock since it also removes it from the adhesive backing.
I used the third largest oval and cut an opening from my from the front panel about 1/2 inch from each side and the bottom.  Then I adhered an acetate panel to the back with "snail" tape.
On the front side I glued down  all of my elements.
When I finished I put a double layer of foam tape on the back.  Keep the tape very close to the shaker.  It does not have to touch on all sides of the opening as long as the sequins (or beads or whatever) can't escape through any holes.  I used anti-static powder to the inside of the tape so my sequins would not stick to it.
After gluing my smaller back panel to my A2 base I added about one tablespoon of sequins in the center of the card.
Then I placed the card front on top.
I hope you enjoyed this card today.  It was a lot of fun to make.

Dies used:
http://www.scrappingcottage.com/cottagecutzforestcritters.aspx


http://www.scrappingcottage.com/cottagecutzmushroomsandgreenery.aspx
http://www.scrappingcottage.com/cottagecutzexpressionsplusdiscoverphrase.aspx
http://www.scrappingcottage.com/cottagecutzstitchedovalsetbasics.aspx


Thanks for stopping by today!  I hope you have a fun and creative weekend!

Thursday, July 19, 2018

Coffee Please!

Hello Scrapping Cottage Friends,

It is Pam creating with you on the blog today! And I have made another throwback card.  Because CottageCutz isn't having a new release this month, the design team members are pulling out older dies and giving them a fresh look.  Today, I am using Mr. Snuggles, Hot Drink and Pierced Wide Rectangle Frame.

Design Steps:
 1.  Cut out all of the pieces of the bear using Mr. Snuggles die and the cup using Hot Drink Cup on white card stock
2.  Color the piece with copic markers: W0, W1 - E21, 23, 27, 29.  After coloring assemble the piece using a fine tip glue
 3.  Use a black A2 size card base, cut a slightly smaller piece of DP.  Use the Pierced Wide Rectangle  die second from the largest and cut out a black frame
 4.  Glue the frame flat to the DP and pop up the bear and the cup and sequins and your sentiment and your card is complete and ready to mail to a friend!

Cottage Cutz Products


It is time to play so pull out all of those dies and put some new twists to them!  It is so much fun to create new things with what we have!
Blessings
Pam


Wednesday, July 18, 2018

Especially for you

Hi, Janja, here again. 
For today's card I used even older die, and gave Mr. Love Bug a new look.


- CottageCutz dies: Mr. Love BugJamboree Bear, Build-A-Bow, Filigree Bow
- white card base: 4.25 x 5.5" (10,8 x 13,97 cm), folded 
- patterned paper: 3.74 x 4.96" (9,5 x 12,6 cm)
- gray cardstock: 3.85 x 5.07" (9,8 x 12,9 cm)
- white and colored cardstock
- vellum paper
- Distress ink pads: festive berries, aged mahogany, hickory smoke, black soot
- white and black pen
- Wink of Stella - clear glitter brush marker
- double-sided adhesive tape, self-adhesive pads, glue

Cut out all the pieces for Mr. Love bug and a guitar.
My pieces were cut out from colored cardstocks, and additionally colored with different ink pads. 
For wings I used vellum paper. I decorated them with a glitter.


Cut a white card base, and one rectangle from a gray cardstock and the other from a patterned paper. 
Combine both rectangles to match on two sides. 
Stamp the sentiment.
Attach the red tape with a bow in the upper right corner as shown. 
Unfortunately, the die Build-A-Bow that I used is no longer available, which I noticed when the card was finished. So I added a link to another one.


Finish the card. 


Have a nice day.


Tuesday, July 17, 2018

Welcome to the neighborhood

Hi, Janja here!
As you know, in July, the design team of CottageCutz will show some fresh ideas with older dies.


- CottageCutz dies: Hallowen Pup, Forest Peekers, Holiday Gate With Wreath, Welcome
- white card base: 5.3 x 5.3" (13,5 x 13,5 cm), folded
- patterned paper: 5.03 x 5.03" (12,8 x 12,8 cm)
- kraft cardstock: 4.76 x 4.76" (12,1 x 12,1 cm)
- white and colored cardstock
- colored ink pads
- white and black pen
- double-sided adhesive tape, self-adhesive pads, glue

To begin, cut out all the parts we need for the gate and both dogs. The gate is later embossed.


Before assembling, add color on all the pieces. I used a gray and black ink pad, and for the eyes a black and white pen.


Prepare a white card base. Cut two slightly smaller squares from kraft cardstock and patterned paper.

Add "Welcome" cutout, and stamp the rest of the sentiment. Attach the main motif with adhesive pads on the background.


Thank you for coming over. See you again tomorrow. 


Monday, July 16, 2018

Framed Lighthouse

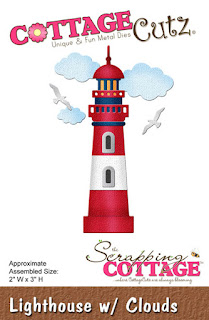
Hi, Lois here with another throwback card.  Because CottageCutz isn't having a new release this month, the design team members are pulling out older dies and giving them a fresh look.  Today I have pulled out Lighthouse w/Clouds, Rope Corner, and the Pierced Wide Rectangle Frame set to make my card.


This card is a standard A2 card which folds at the top.  I started by cutting the cardstock and patterned paper for the card base, as follows:

Turquoise - 4 1/4" x 11", scored at 5 1/2"
White - 4" x 5 1/4"
Waves patterned paper - 3 7/8" x 5 1/8"


Next I cut the middle Pierced Wide Rectangle Frame from gray cardstock and a piece of sky patterned paper 2 1/2" x 3 1/2".  I applied two layers of foam tape to the back of the frame and adhered the sky paper to the frame.


I then die cut the Lighthouse and Rope Corner pieces from white cardstock . . .


. . . colored and constructed the images.


All that was left was to place the lighthouse, seagulls, and clouds in the frame, attach the frame to the card, and add the rope and anchor appropriately -- and my card was finished.


CottageCutz dies used on this card are:

https://02f2a55.netsolstores.com/cottagecutzlighthousewclouds.aspx


https://02f2a55.netsolstores.com/cottagecutzropecorner.aspx


https://02f2a55.netsolstores.com/cottagecutzpiercedwiderectangleframesetbasics.aspx