Saturday, January 27, 2018

Spring Hot Air Balloon Hello (new die release)

Hello Scrapping Cottage friends! Thanks for taking the time to stop and visit today. It's Mary Marsh here bringing you the Saturday edition of the Blog. Hope you are staying warm during this cold snap that is currently with us.

Here is some good news that comes in the middle of winter! We have a new release of dies. There is a In-Stitches release with 12 new dies and a Spring release with 21 new designs. And, some other good news is that for a limited time, you can get the new dies at 25% off.

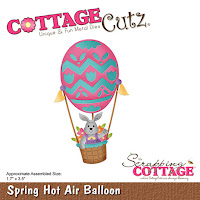
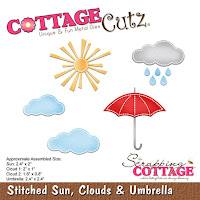
Today, I am using the Spring Hot Air Balloon die and the Stitched Sun, Clouds and Umbrella die. I thought I would create a thinking of you type card today. So let's get started with some details on how I created my card.

Step 1: With the hot air balloon die, I knew I would be creating a sky scene with some clouds and the balloon floating. I found this pattern paper in my stash from a serene scenery collection that worked well for this card.
I used a kraft cardstock as the layering panel for the patterned paper and a cardstock called island indigo for the card base.
Card Base: 4 1/4" x 5 1/2"
Kraft panel: 4 1/8" x 5 3/8"
Patterned Paper: 3 7/8" x 5 1/8"
Step 2: I cut the hot air balloon and the stitched clouds. When I cut my dies, I used different color cardstock as opposed to coloring each piece. I like how colorful the balloon turned out.
For the balloon:
kraft for the balloon basket
berry burst for the balloon
lemon-lime for the chevron and other shapes - I did an inlay technique here
light gray for bunny
pink for her outfit
Step 3: Now that the dies are cut and assembled, I started the card assembly. I adhered the base and panels with double sided tape. I did that before I stamped my sentiment. It's not how I usually like to do it but my ideas were running ahead of me this week (lol)!!
Used the stamp-a-ma-jig to get the right placement for the sentiment. I stamped with black ink since it was going right on the patterned paper.
With the stamp-a-ma-jig you first use the purple positioner and place against the plastic stamping card. You stamp your sentiment using the purple positioner as your guide. Then you take the plastic and place it over your cardstock in the area where you want to stamp. Once its straight you remove the plastic.
You again use the purple positioner as the guide for your stamping block and stamp the sentiment.

This photo is showing the plastic piece placed over the paper and the purple positioner holding it in place.
The balloon and one of the clouds was adhered with dimensional adhesive.
I felt like the card still needed something else so I scattered a few sequins. They seem to be my go to embellishment these days. I think they were a good finishing fit for my card.
Well that's it for me for this week. I hope I have given you an idea on a way to use this new die. The Design Team will have lots of samples to show over the next weeks. Lots of cute and fun ideas for Easter or Spring cards.
And remember, these days are currently 25% off the regular price for a limited time.

Dies I used to create card:
http://www.scrappingcottage.com/cottagecutzspringhotairballoon.aspx
 
http://www.scrappingcottage.com/cottagecutzstitchedsuncloudsandumbrella.aspx


Friday, January 26, 2018

Celebration!!!

Good morning!  It's Jeanne today with a birthday card.  I don't know about you, but I can never have too many birthday cards on hand.  And if they are good for either male or female, young or old that's even better.  This card is great for anyone.
I found some patterned paper that reminded me of birthday candles and got my colors from that - Bermuda Bay, Calypso Coral, Daffodil Delight and Night of Navy.  I wanted some fun bright colors.  Then, I used the Layered Cake & Stand die and cut it out of all colors so I could see what combinations I liked for the cake. (And now I have extras for other cards in complementary colors!)
I also die cut the cake stand from silver cardstock and the word "Celebrate"from the navy.  I cut an A2 card base out of white, a strip 1 x 5 1/2 inches from the pattern paper and a strip 1 1/8 x 5 1/2 inches from the navy.  I also die cut two rectangles using the second largest die from the Nested Wacky Stitched rectangles - one white and one Bermuda Bay.
I then stamped confetti on the white die cut rectangle.

I used snail adhesive to attached the pattern paper over my navy strip and then glued it to the left side of the card.  I angled the Bermuda Bay panel on the card and glued the white panel on it but just a little offset to give a "shadow".
My final step was to add the cake, the sentiment and some sequins.

Dies used:
http://www.scrappingcottage.com/cottagecutzlayeredcakeandstand3x3.aspx
http://www.scrappingcottage.com/cottagecutznestedwackystitchedrectangleset.aspx
http://www.scrappingcottage.com/cottagecutzexpressionspluscelebratephrase.aspx

I hope you enjoyed my card today.  Thanks for stopping by and have a creative weekend!


Thursday, January 25, 2018

Ouch!

Scrapping Cottage Friends!

It is Pam designing with you today! Welcome to the Blog!

My sweet sister-in-law fell on the ice while unloading groceries and broke her arm.  Luckily no extra surgery was needed and I had the perfect die to make her a get well card.


Designer Steps:
 1.  Cut out the bear using the Bear Patient die.   I cut it out several times in dark brown, light brown, yellow and white.
 2.  Use ink to shade the edges and assemble the bear.  I used a black marker to color the nose and small rhinestones for the eyes
 3.  Use an A2 white card base, cut a slightly smaller piece of blue and the another piece of DP a lightly smaller then the blue.  Cut out the scallops with a border punch and a 1/2 strip of blue

3.  Assemble the card as show then cut out the Ouch! and Feel Better Soon in white using the Ouch! with Tooth die
 4.  Cut out a rectangle second from the largest using the Pieced Rectangle die in blue.  Glue the bear and Ouch! to the rectangle and use foam to attach to the front of the card

 5.  Use the largest Pierced Rectangle die and cut out a rectangle in blue for the inside of the card.  Glue the Feel Better Soon and the can of soup which I colored with copic markers


Cottage Cutz Products


I hope this brings a smile to my sister-in-law's face! It is such a fun and cheerful card!

Blessings
Pam


Wednesday, January 24, 2018

Valentine Secret Message Slider Card!


Hello everyone! It’s Janet back with another video project for you today. With Valentine’s Day around the corner, I thought I would create a fun secret message slider card. When you pull on the tab, it reveals a heartbeat and finishes the sentiment so that the card reads, “My heart……” on the front and “Beats for You!” on the slider tab.

I had a lot of fun using foam for some of the pieces on this card including the glittered hearts from the Heartbeats die set and two bows from the Build A Bow die. These pieces add a lot of dimension and texture. I really like using foam for bows because they’ll pop back into shape after being mailed. I decorated the front using the Doily from the Tea Time Doily die and added a border at the top and bottom from the Sweet Love Border Set. As it happens, the Heartbeats die is currently 35% off and is under $6.50 right now at the store so I encourage you to check that out and the other sales currently underway.


Please visit the video showing how this card works, comes together and some other tips and tricks. Also, I have included a link to a free .pdf template in the video description. The template is a trace of the handmade card base and mechanism I created for this card. You can print it on card stock, cut it out and decorate with your favorite CottagCutz dies.


Thanks for visiting today! I’ll back again on Valentine’s Day with a sweet spring card using dies from the new release that will be coming soon!

Dies used on this project:


Tuesday, January 23, 2018

To My Love

Hi, Janja here!

This is my first post in the new year. Let's start with love.
I prepared two Valentines cards, and combined on them several dies from various releases.


Supplies:
- CottageCutz dies: Baby Dolls, Baby Doll Girl Clothes, Love Postage, Love Bow & Arrow, English Rose Corner, Square Set, Nested Stitched Scallop Square Set
- red card base: 4.25 x 5.5" (10,7 x 13,9 cm)
- white scalloped edge card base: 5 x 5" (12,7 x 12,7 cm)
- white card stock: 3.74 x 5" (9,5 x 12,6 cm)
- red card stock: 4 x 4" (10 x 10 cm)
- wite and colored card stock
- self adhesive pads, double-sided adhesive tape
- Distress ink pad - Tattered Rose
- Memento ink pad - London Fog

Prepare a red card base, and stamp an inscription on a white card stock.


Cut the word love and a couple of hearts.


With two dies cut all the pieces we need to form a girl. Use socks for the shoes, and shorten them with scissors.
When assembling, slightly change the position of arms and legs.


Spray gray dots on a white card stock, and fasten a girl with self-adhesive pads. For more depth, add a gray color with a makeup brush. These brushes are very useful for such things, especially if the subject is slightly raised from the substrate.


Completed card.


The second card is made with English Rose Corner die. Cut three times. On the backside of a white piece attach adhesive tape, and insert an individual pieces.


From a white card stock cut a square and a frame with the largest die from both sets. Add an inscription.


Complete the card.


Enjoy and have fun while creating.