Friday, June 09, 2017

Cherish Spring Card

Hello everyone,
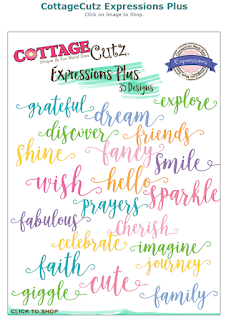
This is Anita here with another spring card with the new Expression Plus phrase dies . They are 20 of them and you can check them here .
Here is my card.


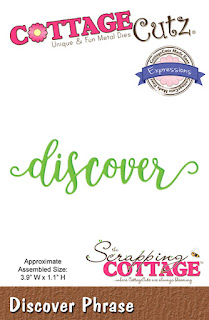
Here I have created a 3D phrase with the Expression Plus die .
To make this card ..
1. Cut a card panel 5 inches by 5 inches and apply distress inks in blue and green.
2. Score at an interval of 0.5 inches.
3. Cut four pieces of  Bella Spring time bird die and stick together . Colour with medium of your choice . 
4. Cut 5 die cuts from Expression Plus phrase Cherish and adhere 4 pieces together . Offset the fifth piece as shown and adhere on the card . 
5. Finish the card by adding a frame from pattern paper . Adhere on 6x6 card base .
CottageCutz dies used 


Thursday, June 08, 2017

Baby Carriage!

Good Morning Scrapping Cottage Fans!

It is Pam sharing with you today!  I am using one of the new release baby dies and it is so sweet! I have been to a number of baby showers this year so it is always good to have a few cards on hand.
Here are the steps to make this adorable little card!

1.  Use an A2 white card base, cut a piece of green card stock 4 x 5 1/4.  Next cut a piece of vellum slightly smaller then the green.  Next use the large Double Stitched Rectangle die and cut a piece of purple card stock.  Then run it through a heart embossing folder
2.  Use the Baby Carriage Mini die and cut out pink, white and grey card stock to form the carriage.  Before you glue the pieces together ink the edges to add depth
3.  Cut the oval Fancy Victorian Frame and ink the edges in pink

 4.  Glue the frame to the center of the purple embossed rectangle
 5.  Attach the vellum to the green card stock.  Use dimension tape and attach the purple rectangle to the vellum

 6.  Attach the green card stock to the white card base then pop up the baby carriage and add the white bow
7.  Finally use a small Double Stitched Square die and cut a piece of white card stock.  Stamp your sentiment and add the heart rhinestones to finish the card

Cottage Cutz Products


We are now on instagram check it out here

As always thanks so much for stopping by and I hope you get crafty today!

Blessings
Pam

Wednesday, June 07, 2017

Circle Die Cut Background - Gladiolus Flower


Welcome to Wednesday's blog post. It's Janet from SugarShine Designs here to share a summer card with a die cut circle background. I'm always looking for ways to get the most of my basic dies and this is one more idea for that. I hope it will inspire you to try it. Circles could work equally well on a scrapbook page don't you think? This technique adds a lot of texture, especially if you emboss them as I did here. The stitched detail on the circles really add a nice touch to the overall image too.


Here in North Carolina, we're already hitting low 90's regularly so I am totally in the mood to create summer scenes on my projects. Today's project features the Gladiolus stamp and die set which is the August flower in the Birthday Flowers release from January. I had to have this one because Glads were my Grandma's favorite garden flower and August is my birthday month. After coloring the die cut with PrismaColor pencils and a little Wink of Stella on the flower centers, I mounted it on the background with foam tape. The card also features the Discover Expression Plus die which I coated with clear heat embossing to add thickness and gloss. So pretty!

A couple weeks ago, Pam shared her gorgeous Prayers card. She used torn vellum as a background for one of the new word dies and that inspired me to do something similar. In my card, I used some glittered fiber from my stash to mount the word.


There's a lot more to share with you about this project. To find out all the details of how to make this card along with dimensions and supplies, please go to the video below.


Thanks for spending some time here at the Scrapping Cottage. Hope you'll be back tomorrow to see another project from our creative Design Team!

Did you know that CottageCutz now has an Instagram Account? 
Join us on Instagram

Dies used in this project:


Tuesday, June 06, 2017

Memories

Hi, Janja here!

I think it is a good time to show you the card, that I created some time ago. At the bottom I added the word - memories from the new Expressions Plus release.


Supplies:
- CottageCutz dies: Memories Phrase, Wildflowers 1, Wildflowers 4, Wildflowers 5, Lighthouse w/Clouds (seagulls), Under the Sea (rocks)
- white card base: 5.3 x 5.3" (13,5 x 13,5 cm)
- watercolor paper: 4.2 x 4.2" (10,7 x 10,7 cm)
- white and dark gray cardstock
- Distress inks: Spiced Marmalade, Twisted Citron, Mowed Lawn, Vintage Photo, Broken China, Faded Jeans, Stormy Sky, Hickory Smoke
- Memento ink Dandelion

To begin, cut out wildflowers, rocks and seagulls with dies. Use white and dark gray cardstock for wildflowers.
Also cut out word memories from white cardstock.


Distress white cutouts with Distress inks. Glue them together with gray cutouts, so that they are partially overlapped. Apply white and yellow pearl dots.


Draw the sea and the sky on the watercolor paper with Distress inks. Once the paper is dry, trim it to the correct size.


To complete the card, mount all the elements as shown on white card base with a wooden embossed finish.


CottageCutz now has an Instagram account
Follow us on Instagram. 

Thank you for coming over and have a lovely day. 


Monday, June 05, 2017

Under the Sea

Hi, Lois here with a fun card today.  As you may or may not know, CottageCutz recently released a whole series of word dies -- 35 in all.  Check them out in the CottageCutz store.  I had such fun making my card for today, and I used one of the word dies -- discover -- on it.  I'm a big fan of underwater scenery, and that's what I created today.


To start my card,  I cut a piece of heavyweight teal-colored cardstock 5 1/2" x 11", scored in half.  Then I cut a piece of navy cardstock 5 1/4" square and a piece of swirly bluegreen patterned paper 5 1/8" square.


Most of the die-cuts on my card come from one single die, Under the Sea -- plus the Clown Fish (which may be currently out-of-stock) die and the Seahorse die -- as well as the word die.


After cutting the pieces, I added some color shading using Copic markers.


Then I went about constructing my scene.  That was really a lot of fun.  The inset pieces on the seahorse and clown fish were cut from cardstock on which I had already applied some adhesive backing, so inlaying them into the outlines was pretty easy once I had glued down the fish and seahorse onto the card.


Here again is my completed underwater scene.


CottageCutz dies used on my card are:


http://www.scrappingcottage.com/cottagecutzunderthesea-2.aspx


http://www.scrappingcottage.com/cottagecutzseahorseelites.aspx

http://www.scrappingcottage.com/cottagecutzclownfishelites.aspx


http://www.scrappingcottage.com/cottagecutzexpressionsplusdiscoverphrase.aspx

Just a reminder that we are now on Instagram. Click here to see our Posts and also to follow us on Instagram.