Saturday, May 06, 2017

Dinosaur Birthday Kisses

Hello Scrapping Cottage friends! Thanks for taking the time to stop and visit today. It's Mary Marsh here bringing you the Saturday edition of the Blog.

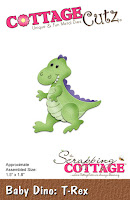
The new baby dies release is just too cute and I just can't stop making cards using these sweet dies (LOL)! And with 42 different designs, I have had lots of ideas.  So today for your viewing pleasure, I am showcasing a couple of the new baby dino dies using the Brontosaurus and T-Rex. I needed a child's birthday card and these dino's work perfectly. What little one doesn't love dinosaur's? And that's both boys and girls.

So let's get started with some details on what I did this week. I already knew I was making a birthday card so I just needed my layout. So when I saw the sketch #643 on Splitcoaststampers this week, I knew it would work for a little dinosaur scene.

Plum Card Base: 4 1/2 " x 5 3/4"
White Image Panel: 4 1/4" x 5 1/2"
I used a hinge technique to get this larger size card base. Here is a link to some instructions I provided previously on how I do this with 8 1/2" x 11" cardstock.

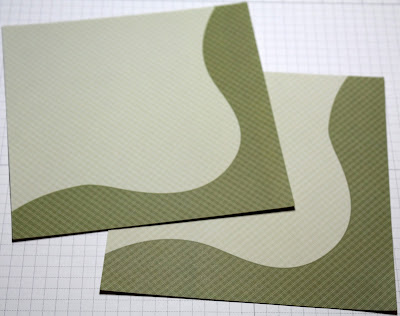
Step 1: Once I looked at this sketch, I thought I would make rolling hills as the spot to place my dino's. I was going to cut the hills but after looking through my patterned paper, I found paper that already had the shape of the hills. I just needed to measure and fussy cut. The paper even had a little pattern. It's the look I was after.

Step 2: Once the hills were cut I adhered to white card base with dimensional adhesive. I used a cloud template and sponged the top of the white cardstock with tumbled glass distress ink. The clouds are covering layer 1 of this sketch.

Step 3: I wanted 3 dino's in this scene so I cut one (1) T-Rex and two (2) from the Brontosaurus dies. On the Brontosaurus I used a peach card stock + peach patterned paper and yellow cardstock and + yellow patterned paper.
On the T-Rex I used plum and olive cardstocks + plum patterned paper. I like the variegated colors on the pattern papers I chose. It adds some interest to the dinosaurs.

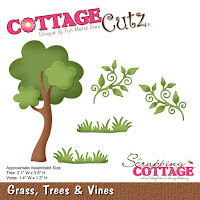
I also used the CottageCutz grass, tree and vines die for another element to this card.


Step 4: Now that all the card elements are done, I needed to think about my sentiment and the placement of it. I have a stamp set with individual sentiment words so I chose birthday & kisses. Since they are 2 separate stamps, I stamped in black ink on plum cardstock and cut them into 2 labels. Here is a card close-up.

Well, that's my card for this week. I hope I have given you some an idea for using these Baby dino stamps. Have a great weekend, Blogger friends and see you back here next time........
Dies I used to create card:
http://www.scrappingcottage.com/cottagecutzbabydino-brontosaurus.aspx

http://www.scrappingcottage.com/cottagecutzbabydino-t-rex.aspx

http://www.scrappingcottage.com/cottagecutzgrasstreeandvines.aspx


Friday, May 05, 2017

Baby Boy Explosion Box card


Hello to all !! It's Anita here with a baby boy explosion box. CottageCutz has recently released a whole new range of baby dies and they are all so adorable. You can check the whole collection here
Here is my explosion box card showing many dies and they give the whole project such a beautiful look.


Score a 6.25 x6.25 inch paper at 1" intervals on all sides and snip off the corners as shown. This makes the lid of the box. 
To make this box, Score a 12x12 inch card stock at 4" and 8" and turn the paper and score again.Cut out the four corners as shown.


 Cut pattern papers 3 x 3 and cut the cross stitched die cut. Distress with blue ink.


Cut the die cuts and assemble them together following the image on the paper pack.


Layer all the die cuts and papers together.


Make 3D flower and arrange in the centre with leaves using 3d foam tape.


the finished card

Cottage Cutz dies used


Thursday, May 04, 2017

Baby Toy!

Good Morning to all of our Scrapping Cottage Friends!

Hi it is Pam today and  I am sharing another Cottage Cutz new release baby die.  Just look at all of those sweet animals isn't it adorable!!


Here are my design steps:
1.  Using colored card stock: yellow, rust, white, black, orange, green and gray cut out all of the pieces using the Baby Animal Mobile Die then assemble
2.  After the pieces are assembled sponge the edges for more depth
 3. Using the Oval Doily & Frame cut out the frame and doily using white card stock.  Glue down the green frame for the Baby Mobile to the doily and then pop up all the hanging elements
4. Use an A2 white card base, cut a slightly smaller piece of green card stock then cut a piece of yellow designer paper 4 x 5 1/4 and glue to the green
5. Glue the frame from the Oval Doily & Frame die to the front center of the yellow designer paper.  Place pop up tape on the back of the oval and glue to the center of the frame add the green checked ribbon and you have a very sweet card!


Cottage Cutz Products


I hope you will give this sweet die a try and make a new mom very happy!!

Thanks for stopping by today!

Blessings
Pam