Friday, May 19, 2017

Marching Elephants Slider Card

 Hello to all !!
I am Anita here and it's my day to share super fun project using CottageCutz dies. The baby theme dies are all so cute and amazing that we can create many cute cards etc using them . You can check the collection here.
For today, I have a Slider card using the Elephants from the baby collection.
It is very easy to make such cards which are very popular with kids.
This is my card and below are the pictures of how I made them.


Begin by cutting the die cuts from the Elephants on Parade die. I have cut three times as I wanted to create thick die cuts .
Colour the Elephants as shown following the image on the package.
 Pass two Elephants of each size -the ones that have been coloured without shading through a sticker maker.
 Adhere the Elephants as shown and assemble the pieces together.

Cut a card stock 4 inches by 5.25 inches and adhere layers of pattern paper.
Draw a half inch parallel line in the centre and punch out two holes using a 1/4inch punch .
Cut in between the holes.
 Turn the card panel over. Double the 3d foam tape and cut into strips and adhere at the back as shown. Keep the penny in place to know where to place the tape.


Attach a blue pattern paper cut to the size of the Slider panel at the back. Add clouds using distress inks . Add some stamped butterflies .

 Adhere the Slider panel on A 2 card base. Add ribbon and sentiments.


CottageCutz die used

Do stop by the CottageCutz store for your die shopping. 
Have a nice day.


Thursday, May 18, 2017

Baby Clothesline!

Good Morning My Friends!

It is Pam today! The release of baby dies here at the Scrapping Cottage has been so much fun! The dies are just incredibly detail and oh so sweet!! The Baby Clothesline die is so so adorable!  And that is what I am showcasing today!

 Here are my design steps:
1.  Using the Baby Clothesline die cut out all of the pieces using yellow, gray, pink, purple, blue, brown and green card stock. After all of the pieces are cut shade them using a variety of inks and a small dabber
2.  After the shading is complete assemble the pieces using a fine tip glue applicator.  Add small black pearls for the eyes on the giraffe and elephant
 3.  Cut the pink frame using the Pierced Wide Rectange Frame die set.  Cut the green grass using the Spring Grass die and then cut a piece of cloud designer to put behind the pink frame
 4.  Place the grass behind the frame and glue to the frame then add the cloud designer paper to the back of the pink frame as shown.  Begin adding the animals on the sides of the frame as shown then attach the little blue clothesline
 5.  Add the clothes onto the clothesline and last add the tiny little clothespins!  Total cuteness!!!
 7.  Using a piece of green card stock the same color as the grass cut out the Congratulations and glue to the bottom of the front of the card
 8.  Add the pink frame and you have a darling card for a new mom!

Here are the Cottage Cutz Products I used:


I had so much fun creating this sweet card for you! I hope you give this sweet card a try!

Blessings

Pam

Wednesday, May 17, 2017

CottageCutz Gladiolus Flower & Hello Phrase

Hello, Scrapping Cottage Friends!  So glad you took time to stop by and enjoy my card share today. I am Beverly Polen, Guneaux Designs, and I am serving as a guest designer today.  My card share showcases one of the newly released Expression Plus Designs dies (i.e., word dies), and the beautiful CottageCutz Gladiolus Flower.


The new Expression Plus Designs dies are fantastic!  I love the script design, and the die cuts are a great size.  If you have not checked them out, you can by visiting the Scrapping Cottage On-Line Store.  For a limited time, these wonderful dies are 25% off!  Don't miss out!!

My color selections of card stock and coloring were selected to coincide with the Splitcoaststampers Color Challenge for yesterday.  These are the colors:  shades of peach/orange and dark green.


I created my card by first stamping with black ink the CottageCutz Gladiolus Flower image onto white card stock and coloring it with copics that are close to the above colors.  I used the matching die to cut out the floral image.


Afterwards, I decided I wanted to create an inlay with the image, so I used the negative of the floral image and a die from CottageCutz Cross-Stitched Rectangle Set to cut a rectangle.  Additionally, my butterfly from the same floral stamp and die set was on this panel and I wanted to include it.


My next step was to use a stencil and oxide inks to create this panel from white card stock.


I decided I wanted a piece of designer paper for a mat for the panel.  I attached the mat to the panel and adhered it to my card base.


I created a frame to go around the floral panel with two of the CottageCutz Cross-Stitched Rectangle Set dies.  I attached foam tape to the frame and added it to the card.


Then I added foam tape to the floral image inlay panel and attached it inside the frame.


To complete the card, I added one of the Expression Plus Design script dies, hello, to the upper left of my card.


I hope you draw inspiration from my card, and come back tomorrow to see the artwork we have to share.

These are the CottageCutz dies used in creating the card:


Tuesday, May 16, 2017

Hummingbird Hugs (new die)

Hello Scrapping Cottage friends! Thanks for taking the time to stop and visit today. It's Mary Marsh here bringing you the Tuesday edition of the Blog. Hope your Mother's Day celebration was a great one whatever you did.

There is another great release of new dies over in the online store. The Expressions Plus (word dies) with 35 designs are currently on  promotional pricing and are 25% off. The font is so beautiful and you will definitely want these in your collection.

For your viewing pleasure today, I am featuring one of the new dies. It's the hugs phrase along with the hummingbird die.  So let's get started with some details on this card.

I started my card this week with the card colors. I am using the colors from the Splitcoaststampers color challenge #636. They are Peach, Coral and Artichoke. Once that was decided, I started thinking about my layout. I am using the MojoMonday #497 sketch.
Peach, Coral, Artichoke
Card Sizes:
Card base: 4 3/8" x 5 5/8"
Coral Layer: 4 1/4" x 5 1/2"
Coral Patterned Paper Layer: 4 1/8" x 5 3/8"
Vanilla Rectangle Layer: 2 1/4" x 4 3/4"
Coral Flower Paper: 2 1/8" x 4 5/8"
Image Layer: 2 3/8" x 4 1/8"
Coral Layering Panel: 2 1/2" x 4 1/4"

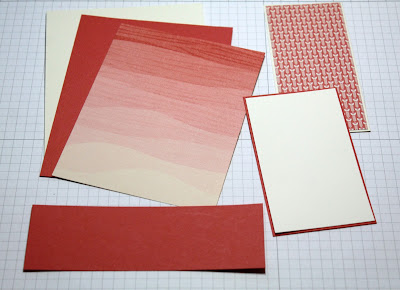
Step 1: I first figured out all the card panel sizes. Since I had the card colors, I looked through my patterned papers and found these ones in the coral shade. I decided I would go after a more monochrome look. I liked the gradient look on the background panel. I ended up putting the lighter shade at the top.
Step 2: I cut the flowers in peach and coral cardstocks and the leaves in artichoke. The hummingbird I cut in white cardstock and then sponged in coral, peach and a bit of artichoke.
Step 3:  I am now ready to start the card assembly. I wanted to show how I did my angled panel. I attached it onto the patterned paper panel at an angle with double sided tape . I used my craft knife and trimmed off the excess.


Step 4: The Hugs Phrase is cut with both artichoke and coral cardstocks. I did a slight offset for added interest. Here is a close-up shot of the hugs phrase as well as the hummingbird.
 
Well, that's it for me for this post. See you again on Saturday. The team will be showcasing some of the new Expressions Phrases so check back each day for more inspiration.

Dies I used to create card:
http://www.scrappingcottage.com/cottagecutzhummingbird4x4pre-order.aspx

http://www.scrappingcottage.com/cottagecutzexpressionsplushugsphrase.aspx