Wednesday, March 29, 2017

Scenic Jar Card with Teardrop Trailer


Hi everyone! It’s Janet with SugarShine Designs and I’m excited to share my video card creation today featuring the Teardrop Camper, Spring Grass, Stitched Circles and Double-Stitched rectangle dies! 

Be sure to take advantage of the BIG Anniversary Sale. All the dies I used for this card are 25% to 50% off through Friday. Now is the time to load up on wish list items that are on sale and share your list with family members as a hint for Mother's Day!

You can click on my video below to see how I made this cute mason jar shaped card but first let me tell you a little more about it. 


The adorable Teardrop Camper is the true star of the show! The details in this die cut are incredible, down to the tiny curtains and awning which for me is my favorite part. To create a little more texture to the die cut, I used an embossing folder to set off the bottom piece of the trailer and I also dry embossed the clouds in the background. I accented them with some white and tinsel mixed embossing powder which gives both a milky white and glittery appearance.


The base card is a 4-bar sized card and it’s created using an envelope punch board. I got the idea from many videos out there showing how to make a jar shape but I made it my own by turning it into a card with the hinge at the top. I further experimented a little and found that I could dry emboss a zig-zag pattern with 
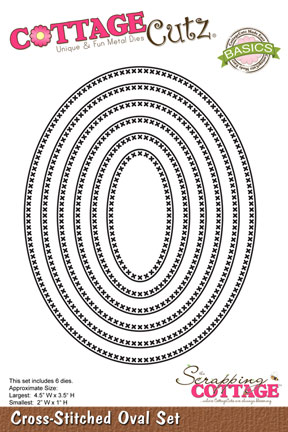
my embossing board to give the jar lid the illusion that it is screwed on. The round tags were stamped and cut out using the stitched circles dies and the interior piece was cut out with the double-stitched rectangle die. It’s these little touches that makes the card so fun.


I have included the dimensions and supplies in the description of the video so go there to get all the details to make your own scenic jar card with the Teardrop Camper or other CottageCutz dies. There are so many possibilities! Thanks for spending some time today with me at the Scrapping Cottage Blog. Have a wonderful day!
 Click to see video.


Tuesday, March 28, 2017

Easter basket

Hi everyone, Janja here!

Spring is here, and with it the upcoming Easter holidays, which offer us great opportunities for creativity.
For Easter card I used three CottageCutz dies. Two older and one from this year's release.
Let's see how it is made.


Supplies:
- CottageCutz dies: Calendar Icons (eggs), Sweet Spring Kitty (basket), Fancy Victorian Frame
- white card base: 5.3 x 5.3" (13,5 x 13,5cm), folded
- corrugated cardstock: 5 x 5" (12,7 x 12,7 cm)
- patterned paper: 4.5 x 4.5" (11,4 x 11,4 cm)
- white and colored cardstock
- Distress ink pads: Worn Lipstick, Dusty Concord, Mowed Lawn, Vintage Photo
- Memento ink pads: Dandelion, London Fog
- ColorBox Frost White

First, we prepare cutouts: basket, Easter eggs and flowers. Shadow all the elements, and shape them.


Trim corrugated cardstock. Here and there apply white paint with a sponge.


Mount patterned paper on corrugated cardstock with double-sided adhesive tape.


Cut out a part of frame that will be used for decoration in the upper right corner.


With glue and self-adhesive foam pads fasten basket on the background and arrange flowers.


Thank you for joining me today. See you again next Tuesday.


Monday, March 27, 2017

Get Well Scene

Hi, Lois here today with a card that has many small pieces.  That's what I like about the CottageCutz dies -- all the elements included on them.  I'm using another new-to-me die -- the Tree of Nature die with lots of cute elements.  I've made a get-well card with the look of spring.


Supplies used on this card are:

Tan cardstock for the base, 8 1/2" x 5 1/2" folded in half at the 4 1/4" mark
Dark brown cardstock 4" x 5 1/4"
Light blue cardstock 3 7/8" x 5"
White cardstock for the die cuts
Copic markers
Ranger Distress Mowed Lawn ink
Foam pop dots
Googlie eyes
Tape runner
Xyron X sticker maker
CottageCutz dies:  Tree of Nature, Picket Fence Border, Spring Grass


Instructions for card:

To avoid having to make many passes through my Big Shot with different colored cardstock, I cut all my pieces from white -- and colored them afterward.


As you can see there are four blossoms and four sets of leaves already on the die.  I used a variety of Copic markers, as well as a fine black pen, to color my die-cut pieces.


As you construct a scene on your card, you could decide to cut more of them.  As you can see with my colored images, I decided I needed more leaves and blossoms.  While I was at it, I also cut two strips of grass using the Spring Grass die and sponged on some green ink for texture.


Next I cut the cardstock for my card base -- tan, dark brown and pale blue.


I then constructed my scene.   I used my Xyron X sticker maker to put adhesive on the back of the smallest pieces.   I had cut two strips of grass because I wanted one strip behind the fence and one in front.   As it turned out, I actually cut four more blossoms for my tree.  Here is a close-up of the 3-D pieces (the butterfly, the bird and the owl).  I used tiny foam pop dots to create the 3-D look for the wings of the butterfly and bird -- and larger ones to adhere all three critters to the card.   I love using googlie eyes on owls, so I used them rather than the eye pieces from the die.


I then stamped the small sentiment at the top and I was finished.  Again, here is my card:


Dies used on this card are:


By the way, check out the BIG Anniversary Sale.  You could save up to 50%.


Saturday, March 25, 2017

Paper Embellishments with Layered Die cuts

Hello dear friends,

How is everyone doing!!!!! I hope you will have a super crafty Sunday today.
Have you ever wondered what a range of paper embellishments can be created with die cuts.

We are always short of tags, mini cards or even decorative embellishments and try to make quick simple ones . So here I have five creative paper embellishments that can be used as tags, cards and even for scrapbook layouts.
CottageCutz has a wide range of dies and you can play with them to create these super cute things. And the best part is you use all your paper scraps that you have been hoarding all this while. So have a look at these. Get inspired and start playing with your dies.


Aren't they super cute!!! And I had fantastic time playing with my die cuts.
I gathered all my paper  scraps and grouped them in shades of various colours. Then I picked one floral die and cut many flowers from one shade.
Similarly , If I chose a stitched die, I cut many die cuts of different colours from paper scrap. 
Cut several designs in many shades and layer them with foam tape. You can create hundreds of designs. 

Here are the dies I used for my embellishments.


You can check all the amazing collection of dies at the CottageCutz Store.
Do share your views on these pretty paper creations. Thanks for stopping by. 


Woodland Animals Masculine Birthday Card


Hello Scrapping Cottage friends! Thanks for taking the time to stop and visit today. It's Mary Marsh here bringing you the Saturday edition of the Blog.

There was a release of a really cute Woodland Animals stamp and die combo back in January. Maybe you missed it or maybe you were thinking you're not into woods or woodland themes. But, how about thinking out of the box with this stamp and matching die set.

I needed a masculine birthday card that would have a “from all of us” sentiment. So I decided to create a birthday card using these cute animals. Let's get started with some details on how I created my card.

Turquoise card base: 4 1/4" x 5 1/2"
patterned paper layer: 3 5/8" x 4 5/8"
Curry Rectangle Frame: largest in set
Step 1: Stamped the deer, raccoon and fox in Memento Tuxedo Black ink on a 120# weight white cardstock. I colored them using Prismacolor pencils and Gamsol which is an odorless mineral spirits. Since these are wax based pencils the Gamsol helps to move the color around. The heavier weight paper seems to work better for me when I use these colored pencils.

Pencil colors I used:
Deer: 1094 Sandbar brown and 948 Sepia
Fox: 1032 Pumpkin Orange, 943 Burnt Ochre and 948 Sepia
Raccoon:  French Gray 70%, French Gray 90%, 928 Blush Pink and Black

Step 2:  Looked through my cardstock and patterned papers for my color scheme. I found this festive paper that I thought would work great as a background layer for my woodland animals. The patterned paper determined my card base (turquoise), the wide rectangle layer (curry),  as well as the flag (cucumber) that I used for my sentiment.

Step 3:  I wanted my birthday sentiment stamped right on the patterned paper. So I pulled out my MISTI to get it placed where I wanted. To make the sentiment stand out against the patterned paper,  I embossed it using Versamark and Tuxedo Black ink plus clear embossing powder. I also stamped the "from all of us" sentiment on the cucumber flag panel. I didn't take a photo of this.

Step 4: Everything is prepped and ready for card assembly. I used dimensional adhesive on the pierced wide rectangle frame and on the animal images. I placed the animals on one of the scalloped banners on the patterned paper.

I hope I have inspired you to take another look at the Woodland Animals stamp & die combo.  that's it for me for this post. See you next Saturday.
Stamps & Dies I used to create card:
http://www.scrappingcottage.com/cottagecutzwoodlandanimalsstampanddie.aspx
http://www.scrappingcottage.com/cottagecutzpiercedwiderectangleframesetbasics.aspx