Hello Scrapping Cottage friends!
Thanks for taking the time to stop and visit today. This is Yuliya here). It's here share some of the new Christmas release with you!
And I will be sharing how to make this Christmas card using the CottageCutz dies.


Here is list of all supplies I usedCottageCutz Dies:
-CottageCutz Ornament Trio
Other: Sizzix machine, glue, patterned paper, cardstock, flower soft, glossy accents
Follow the pictures below for making this card step-by step
1. Size my cardstock - 30 cm*12, 7 cm. Fold it. And size my card - 15 cm*12,7 cm. Prepare patterned paper for base. Size 14, 6 cm* 12, 2 cm (2 pc).

2.

3. Add some volume with the help of chipboard.

4.

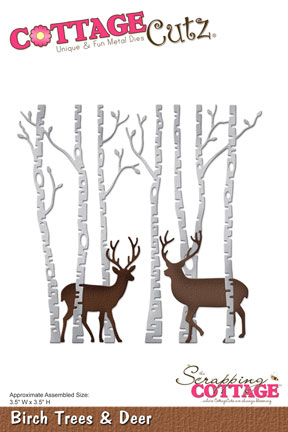
5. Prepare some die-cuts. I use CottageCutz Ornament Trio, CottageCutz Winter Cabin Border (Elites), CottageCutz Spruce Stems and CottageCutz Birch Trees & Deer


6. Assemble the card


7.


I hope you have been inspired by my card today.
Challenge #5 is going on at the blog. The theme is Birthday. So do share your entry.