Wednesday, March 16, 2016

Beach Life


Hello CottageCutz Fans! Thanks for taking the time to stop and visit with the Scrapping Cottage Blog. It's Mary Marsh here with the Wednesday edition of the Blog. Today for your viewing pleasure, I have made a pop-up card box with some great nautical dies from CottageCutz.

This type card is really easy to make and when it's decorated has a WOW factor! It also folds flat so it can be put in an envelope for mailing or hand delivery. Lets get started with some instructions.

Step 1:
Cut cardstock to 9” x 5 1/2”. Score on the long side at 2 1/8", 4 1/4”, 6 3/8", and  then at 8 1/2”. Turn the cardstock 90° and score at 2 3/4".
Step 2:
Use a paper cutter or scissors and cut the score lines to the center score. On the end ½” score line cut it off on a diagonal to create a tab.


Step 3:
For this step you need a bone folder, to fold all the score lines for a sharp crease. Once that’s done you tape the tab. Use red line tape and tape the outside of the tab. Bring the tab side over first to the middle and then bring the other half and press together. 
Step 4:
Now you have the look of the box. To add support to the outside back of the box, I used white cardstock measuring 2" x 4 7/8". You can use this panel to stamp a sentiment.  I added the lighthouse, birds (from lighthouse die) and star fish from the paddles and rope ladder die.


Step 5:
To create my layers on the box, I used red card stock cut at 2" x  2 1/4" and patterned paper cut at      1 7/8” x 2 1/8” for the 3 box flaps that are hanging down. I decorated it with the CottageCutz Crab die cut in red cardstock. On the inside back panel the red cardstock measures 2" x 4 7/8" and patterned paper measuring 1 7/8" x 4 5/8".

Step 6:
For the inside dividers, cut cardstock to 3 1/8” x 3 1/8” and score this at ½” and 2 5/8”. Cut this piece in half and fold on the score lines. Both tabs should be folded back.

You use red line on these tabs as well. Tape on the outside of each tab. Tuck the tabs on the inside of the box to create your dividers. You can slightly close the box in this step to make sure the tabs line up straight.


Step 7: Decorating the box
I decorated the inside of the box with several CottageCutz nautical dies. On the back panel I used the large sailboat die, cut in navy blue cardstock. I stamped my "beach life" sentiment and used the circle set basics to cut it out. I cut another circle in red cardstock and slightly offset it.

I also used the Pelican die cut in a white confetti cardstock. Sponged his beak with distress inks. The wood mooring he is standing on is cut in a medium brown shade and the ropes in kraft cardstock. The detail on the pelican and the wood mooring is amazing.

The lighthouse is another detailed die. I cut this one in red cardstock and used navy blue accents. There is even a small cut panel that I cut in yellow for the inside light. If I haven't said it before, I just love these dies.


Well friends, that's it for me today. I hope you enjoyed this card and will give the pop-up box technique a try. So until next time.......inky hugs!!!


Tuesday, March 15, 2016

Holiday memories

Hi everyone, Janja here.
Today I'm sharing with you a card on which I caught a few holiday memories. All dies are from new release CottageCutz - nautical. They are so gorgeous that you simply can't resist.


The folded card measures: 5.3" x 5.3" (13.5 x 13.5 cm). On base card front, I glued blue cardstock in the size of 5" x 5" (12.7 x 12.7 cm) and inserted in the middle of the frame picture on canvas.

I first gently shaded white canvas in size 3.7" x 3.7" (9.5 x 9.5 cm) with Distress ink - Broken China. I tore blue and patterned paper off with the hands and glued onto the canvas.
For a lighthouse, I used a cardstock in blue, red and white. When it was drafted, I shaded it with the Distress Ink - Pumice Stone and attached with foam pads. Just so it wouldn't hang in the air, I put it on the dunes borrowed from the seagull.
The sailboat is cut out of blue and white cardstock. From a white cutout I only used the sail, which is also shaded with Distress Ink - Pumice Stone. The sailboat is glued directly into the canvas. I added two clouds and seagulls.


Also the frame is made of canvas, which I initially impregnated with white gesso. 


As I forgot during the creation to make a photo, I made another one, from white cardstock.

Cut out 4 strips, width 0.4" (1 cm). They should be longer than the finished frame, which measures 4.75" x 4.75" (12 x 12 cm). On the reverse side they are bonded with removable adhesive tape. Turn frame and cut it in diagonal lines. 
The strips are painted with white paint. I used chalky finish white. When the paint was dry, I all the edges of the frame shadowed with Distress ink - Vintage Photo, to obtain a shabby look. 


It only remains to re-assemble the frame and truncate tip at the corners with a scissors. That the framework will really look like real, we enhance the edges. This was done with a bone folder. 
I decorated it with the die - rope corner


List of dies used: 


Enjoy and have fun.

Janja


Monday, March 14, 2016

Lisbeth Butterfly Card

Hi Everyone, Jenny here to show you how to make this sparkly 3D butterfly card. It is a fast card to make so consider making a few.

Let’s get started!

Take a 4.25 x 5.5 piece of cardstock and use this for your base. I used purple, you can use any color. Just match your decorative elements to your selection. I did a fun spray background, you could skip this part to speed up your card making but it adds another layer of texture. Take a piece of white cardstock measuring 4 x 5.25. (I used watercolor paints to match my cardstock choices, pink and purple) Take an old tooth brush and load it with some inky paint. Run your nail down the bristles and spray some color on your paper. The spray is light but noticeable. That is why I used watercolor paints, it dries light. Since I didn’t use a lot of water, the paper did not warp. Set this paper aside to dry.


 While that layer dries, select a complementary paper color and cut a circle with the Circle Set. (Use the third circle from the outer edge) Then cut a white circle with the Stitched Circle Set. (Use the fourth one from the outer edge). I used a pink outer circle with a white inner stitched circle. Attach them together with your favorite adhesive. Set aside and pick two colors for your butterfly. I chose purple and pink. Cut a base butterfly using the solid butterfly from the Butterfly, Lisbeth set. Cut a detailed butterfly from your other choice of color (I added some extra sparkle to my detailed piece with a Wink of Stella pen. This again is optional.). Don’t forget to cut a body too.  Layer them together and add liquid glue along the center piece. Do not glue down the wings. That is where we will get our 3D effect. Add the body on top of the detailed layer as shown. When the body dries, take a pencil or dowel and curl the top layer of the wings around it. This will lift the wings and also show the sparkle details.
 

 To get the dimensional wording, I used fun foam. If you don’t have fun foam you can cut the wording out several times on white cardstock and glue them together to form the base and attach the top layer with your choice of color paper. I used fun foam and cut out the words, “Thinking of you” from CottageCutz Thinking of You set. I cut a set out of pink cardstock and added some Wink of Stella again, to add some sparkle and make it coordinate with the butterfly.


Now that the main piece is dry, take some coordinating washi tape and add some strips down the front of the card as shown. This adds more dimension without adding bulk. ( If you do not have washi tape tear some strips of decorative paper and attach. Use what you have on hand. If you want you can add ribbon, twine, or leave it blank)
 

 Assemble the components as shown in the picture. Attach the white painted cardstock to your base layer.  Layer the butterfly circle piece you created with dimensional squares to give more drama. Attach the “Thinking of you” embellishment with your liquid adhesive. Then you are finished. If you would like more “sparkle” as I did, add some colored sequence randomly around the card.


Sunday, March 13, 2016

Birthday Lion with Balloon

 
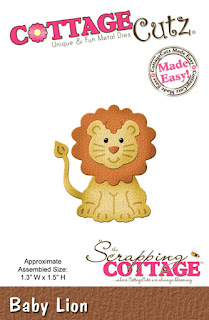
Hello CottageCutz fans! Thanks for taking the time to visit with The Scrapping Cottage Blog. It's Mary Marsh here with the Sunday edition of the Blog. For my sample card today, I am featuring the super cute baby lion die as well as the balloon round mini die. This one is out of stock right now but here is another balloon variety die that would work well.
 
Using these dies together creates a really sweet birthday card for a child. It's another way to use the lion die other than on a baby card. Let's get started with some details on how I put this one together.
 
cardstock and patterned paper sizes:
purple card base measures 4 1/4" x 11" and scored at 5 1/2"
chevron patterned paper measures 4 1/8" x 4"
mustard pattern panel measures 4 1/8" x 1 3/8"
blue circle is 4th smallest from the circle set (basics)
purple circle is the 3rd largest from the circle set (basics)
 
To assemble my card I used double sided tape, glue dots and dimensional adhesive. I taped the 2 patterned papers together and to cover the seam of where they meet, I added a mustard shade of ribbon. Secured the ribbon with glue dots on the back panel.
 
My next step was to die cut the lion. I used a lighter yellow for his body and the mane in a mustard shade. I took a mustard marker to add some definition to his legs and whiskers. Using dimensional adhesive I placed him on the blue die cut circle and attached the balloon to his tail.
 
 
Next up is the half circle I placed under the ribbon. This was cut from the circle basics set. I used the 3rd largest die and just cut it in half.
I used this circle layer for my sentiment. I have a birthday stamp with this HB2U sentiment.  Something different and perfect for a child's card. Stamped with a mustard ink and used a small circle punch and punched out the letters and placed them along the curve of the circle.  
 
Ta-Da! Card is complete and ready for the next time I need a child or even a masculine birthday card. That's it for me for today. So until next time.......inky hugs!!!
http://www.scrappingcottage.com/search.aspx?find=baby+lion

http://www.scrappingcottage.com/cottagecutzballoonroundminipre-order.aspx
 
http://www.scrappingcottage.com/cottagecutzcirclesetbasics.aspx


Saturday, March 12, 2016

WELCOME BABY CARD

Hello friends,

It's Anita Kejriwal here and today I have a new baby card for you. I  love making cards for babies especially baby girls. There are some extremely beautiful dies in baby theme at the CottageCutz store. You will really love them .


To make this card, follow these instructions.
1. Cut the card base with white cardstock to the size 10 inches by 7 inches. 
Score on the 5inch mark on the 10 inch side. Fold. 
The card size measure 7 inches by 5 inches.

2. Cut a mat layer with another white cardstock measuring 6.75 inches by 4.75 inches.
Ink the edges with Memento Angel Pink ink colour and adhere to the card front.

3. Cut a pattern paper in baby theme measuring 6.5 inches by 4.5 inches and adhere to the card.

4. Cut out a piece in white cardstock from the CottageCutz Stitched Rectangle ( basics) die and emboss it in the baby theme embossing folder.
Apply Memento Angel Pink  ink all over. 
Adhere this onto a pink cardstock  leaving approximately 4mm around the edge. 
Attach on to the card using foam tape. Add a ribbon.

5. Cut out three pieces in white cardstock from the CottageCutz Horse and Carriage die
Stick the pieces together. This gives the look of thick chipboard. 
Apply glossy accents and sprinkle Distress Clear Rock Candy Glitter on top. 
Adhere with foam tape on the card.
I have cut out a small teddy from the CottageCutz Baby Girl Clothes die and coloured it pink. 
This I stuck this teddy inside the carriage window. 
Finish the card with stamped baby sentiment and some ribbon.

There are lot of baby theme dies that are so adorable at the store.
Please do go through them.
 I do hope you liked my card. Please do leave your comments. 
Thanks for stopping by. Have a great weekend and Happy Crafting !!


Friday, March 11, 2016

Tags with Cupcakes

Hi, Vladka here! Today I have these fun and happy tags for you. It is really easy to create them. So, let's start!


For two tags you will need the following supplies:

CottageCutz Dies: Listed Below
White cardstock for tag base
Additional piece of white cardstock to cut out the die cuts
Inks: Fired Brick Distress Ink and red dye ink for stamping
Other: paper trimmer, Sizzix machine, water, sheet of acetate, some sentiment stamps and polka dot stamp or polka dot pattern paper


Let’s prepare tag bases first! 

1. With Stitched Rectangle die cut two second biggest squares (seventh from the center).
2. With Rectangle die cut two third biggest squares (sixth from the center).
3. And now my favorite "smooshing" technique again :) Add some Fired Brick Distress Ink on acrylic block and spritzed some water on it. Then take a piece of plastic acetate and gentle pressed it against the block to pick up some of the ink. Now, press the plastic to smaller square to transfer the ink. This will give you a splotchy look. Do the same with second smaller square. Let dry.

Now, let's put Cupcakes together:

With Stitched Cupcake die cut both cupcakes out of some white cardstock. With polka dot stamp and red ink, stamp on both cupcake bottoms, on the heart and cherry. If you don't have such stamp, cut all these pieces out of polka dot pattern paper. You can also find free sample on internet. All you need to do is to print it with your printer. Now put all cupcake pieces together and glue one on each of the tags. For a finishing touch, stamp some sentiments and make the small hole on the top of both tags and put some string through them.


Such tags can be part of the presents or they can be used instead of cards or if you have guests, they can be part of the decoration.

Have fun creating!