Monday, September 05, 2011

Trick or Treat!


With Halloween quickly approaching, I thought it would be fun to make a treat box. I used the Window Box tutorial from the Scor-Pal website. I did change the dimensions of the box, however, to make it a little bigger. (See the end of the post for details).

I loved playing with the new dies from Cottage Cutz - and actually, the Witch's Castle Door inspired the whole project.....because, the really cool thing is that you can make the door open!

So, I used the Halloween Fun stamp from Crafty Secrets to stamp my sweet little trick-or-treater, and glued her to a piece of acetate in the door opening. I glued some Autumn Flower Soft around her feet to look like leaves blowing in. She looks so shy coming to the door for a little candy. I added accessories from the Castle Door die, as well as the Lantern Mini and Owl Mini dies, to complete the scene. The Happy Halloween on the side of the box is from the Haunted House Border.


To make this box, please refer to the tutorial at the Scor-Pal website, but instead of cutting your cardstock 9 x 6 3/4, cut it 12" x 8 3/4". Your score lines will be 1", 5 1/2", 6 1/2", 11". After you turn the paper, you will score at 3/4" and 7 3/4".

Sunday, September 04, 2011

How Many Dies Can You Use?


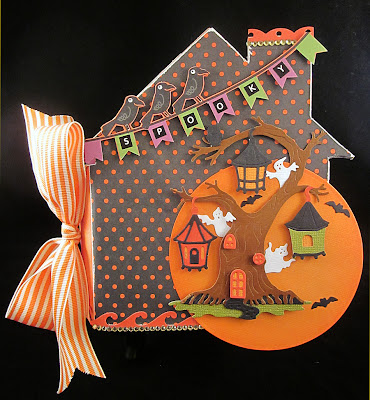
Hi Everyone, Lori here with a little project I created that just kept on going.  I started making a mini book the other night with some of our new dies.  I planned on doing just a couple of dies, but I was enjoying myself so much I just kept going.  When all was said and done I used eight dies and it was so much fun. 

I also used the new Halloween Collection from My Little ShoeBox and it was the perfect compliment to the new die collection.  Below are all the photos of the pages and at the end you'll find a recipe with all the dies used. 


Hugs,


Saturday, September 03, 2011

Witchy Wishes

Good Morning Cottage Cutz fans! Angelica here, and I'm so glad you could stop by this morning - have you SEEN the new Halloween dies? Oh my goodness, they arrived in my mailbox this week and I couldn't wait to start creating! 


Pre-order these adorable dies HERE!

Of course, loving Halloween, when I recently traveled to Milwaukee and visited the Miller Brewery, I couldn't help but think their famous "Girl in the Moon" High Life logo resembled a witch.When I saw the "Elegant Witch Legs" die, it totally reminded me of the colors in the High Life logo. 


Luckily, I still had some of my favorite Basic Grey Halloween pattern paper ("Freak" in the Eerie Collection), so using that as my color inspiration, I created this card! I used some olive, cream and orange cardstock to piece my witch legs, and glitter to dress up the stars on her skirt. I cut extra stars and used those to accent the frame. VersaMagic chalk ink in "Hint of Pesto", "Pumpkin Spice" and "Sahara Sand" really brought everything to life. I used just a bit of Distress Stickles in "Peeled Paint" on her boots, and some rustic cream twine for that peek-a-boo bow. I finished the card off with a sentiment from "Lisa Jean Halloween" (Peachy Keen Stamps).


I hope you like it, I'm totally in the mood for Halloween now! By the way, have you joined our Cottage Challenge yet for August? You still have until next weekend to join in the fun and be in the running for a $25 Gift Certificate to the Scrapping Cottage!! I know there's at least one of these new dies that you just have to have!! 


Friday, September 02, 2011

Happy Halloween

Hello everyone I'm SUPER EXCITED about the new Halloween Release, there are sooo many DARLING Cottage Cutz in the Halloween Release and you are going to LOVE them all! I know I do! 
Today I'm sharing with you a card I did using Trick or Treat Puppy 4 x 4 Cottage Cutz, LOVE THESE little ones!!! 
I've also added a 2 part video 
1 on the puppy, and 1 for dusting the pumpkin. I really had a lot of fun using this technique and hope you enjoy my video's :)

I also used the Haunted House Border 4 x6  and the wording from this cottage cutz too :) LOVE them all!!! My design paper is from My Little Shoebox.com. The polka dots is from the Trick or Treat -Scaredy Cat, and the orange print is from the Playtime-Daydreams collections. Lastly ive added some sewing and ribbons.


Below ive added 2 youtube video's for you to see using the new Halloween Cottage Cutz!
Trick or Treat Puppy 4 x 4 Video #1 on the Puppy
Trick or Treat Puppy Video #2 for the Pumpkin


*********************************
Another card I wanted to share today using the Airplane /Banner and sign
The design paper I used is from My Little Shoebox and its the Sew Cute Collection
I do have another video for this one on Youtube if you click my video's above you can view it :) I didnt want to make todays post to long :) heheheheh

Hugs to all,
Cheryl

Thursday, September 01, 2011

Booyah !


Hello again from Sunny Singapore , everyone ! 
Have you seen our September Halloween release yet ? 
So many fun & adorable designs to choose from !!! 


I was so inspired by our latest Halloween release
I ,too, brought out our My Little ShoeBox designed Spooky Treats die 
and had a go at my first proper Halloween card evah ! ;) 


I only used the My Little Shoebox Trick or Treat papers for the entire card - including
the witch's hat , pumpkin and sweet diecuts . 
I also tried for the first time using Black Soot distress ink to add some shading to the pumpkin and hat diecuts and realised how very easy it is ! Love the effect !  I also added some foam pads for additional dimension with the hat . 

Here's my second ever created Halloween layout that 
I made recently for the My Little Shoebox  Trick or Treat Blog hop. 


Again , using only the My Little Shoebox Trick or Treat papers , 
I diecut the raven and some sweets to add to the layout. 

I do not celebrate Halloween over here in little Singapore , 
but even I got really excited by the delightful designs in this latest release. 


I spy some rather versatile designs which we should be able to use beyond Halloween projects - like the Gothic frame, Lampost with Sign  & the adorable Trick or Treat Puppy !  
Check out our pre-order bundle offer today ! 


Wednesday, August 31, 2011

Key to My Heart

Good Morning Everyone!  My name is Tanya and I'm very excited to be posting today at the Scrapping Cottage as a Guest Designer.

My card today uses Layered Flowers and for someone who doesn't usually make their own flowers, this die is a must have!!  I loved how easy it was to use and how nice they are when they are assembled!  I hope you enjoy my card today as much as I did creating it all for you.


Hugs,
Tanya


Tuesday, August 30, 2011

Will Hoot for Loot

 Will Hoot for Loot. . . This weeks card is an adult Halloween card. Less fright night and less cotton candy. I wanted a card that was Halloween themed but decorative. The face edge of the card is cut randomly with a large flower style punch. Than a strip of green polka dot card stock down the center. I wanted a stark contrast of the owl against a bright color. I used the Cottage Cutz Stylized Owl die from last years but made a chance to his eyes. The back of the card card stock is peach, so when the card is closed . . peach shows around the lacy flowers.
 As you can see. . this owl has those sad puppy dog eyes that are beggin' for candy. Rather than make the complete owl in shades of orange. . I made the chest in white. . than I used a swirl style clear stamp, added a few swirls and used a sponge to add a dab of orange ink, than colored the vine in green Copic. Added Copic dots in green and orange, than micro black dots with a 03 Prismacolor pen. You can also see that I used the swirls several other places on the card, that way the card background matched the owl.
 Ok. . the saddddd eyes. . .I used the base circle from the die and cut the two white base eye. Than cut the same two base circles in peach . . stacked the two base peach eyes on top of each other and than cut them in half to make the eye lids. I know you are asking. . WHY did you cut two peach . . .why not cut one peach circle and cut it in half  for both eye lids. Well because I know I can't cut a circle that small exactly in half, so I just stack two and cut the best I can and I know that both eye lids will be perfectly the same even if they are not perfectly in half. The black portion of the eye is a standard hole punch with a third cut off and glued under the edge of the eye lids. The last part of the eye is the two micro dots off the die. Also notice the micro dots added to the sides of the eyes with the Prismacolor pen. If you glue the eyes on where the eye lids are straight. . he will not looks so sad. I cut the eye lids in a lighter color card stock than the head, than used Copic orange to bent the eye lids back into the head. This way they stood out. 

On this photo you will see the white circle under the owl . This is how you do the lettering with an arch (a templete of sorts ). Decide the space that you need around the owl. . in this case 3 1/2", cut a scrap paper and arrange the circle on the card with the owl in the center in the correct location where the owl will be (temp glue with runner). . . glue your letters above and below. Remove the circle than glue your owl down.

 I also used the Cottage Cutz new Alphabet die called Splish Splash. It is a 4" x 8" die with both upper case and lower case alphabets. . including numbers. The size alphabet was perfect for this card.
This is a another sample of the front of the owl. I cut the paper with the die, than stamped and colored before popping the shape out of the die. .

Thanks Barry

Monday, August 29, 2011

I'm Ready for Fall!


I'm so glad the seasons change. I can't imagine it being hot or cold all year round. I am so ready for fall and here in Utah the only signs of fall is the kids are back in school. We've had plenty of hot temps here but that doesn't stop me from starting my fall cards.
Today I used the tree from MLS Summertime Fun die. I grabbed some fall paper from my stash and some matching cardstock for my trees and went to town. I also used the Raking the Leaves die from last years release and cut out 2 of the small leaves to add by the sentiment.


The twine I used was brown and white. The white stood out too much against my cream background so I took some Antique Linen distress ink and inked the twine a bit to subdue the white.


We love to hear comments from our followers so leave us a note and let us know what you like. Have a great week!

Saturday, August 27, 2011

Spooky Treats Card

I absolutely love Halloween. Have since I was a little girl and nothing has changed. The costumes, the candy and the decorations are simply "Boo"tiful!!! Hi everyone, Erika Taylor here today to share with you a little Halloween card I created. If you haven't seen Spooky Treats before, you just have to take a look.

For this card I used the tombstone from the Spooky Treats die set. First I cut it out in black card stock. then a second one was cut out using white card stock. I applied Versamark to the white tombstone and embossed with a great Antique Pewter embossing powder to give it a more realistic feel. I love that the Cottage Cutz dies can be altered using embossing powders. Here she is...


Just so the tombstone wasn't floating, I added some fringed grass to anchor it. The little R.I.P letters are also a part of the Spooky Treats die, which I added a little Stickles to so they would POP. If you want to see a larger photo, just click on the photo itself to see the details.

Speaking of Halloween, have you seen the new Halloween dies that have just been released? Holy Doodles BATMAN!!!! I'm gonna need one of everything. Over the next while, I think I'm going to create some more Halloween goodies for all of you, so if there is something in particular you'd like to see, just leave a comment and let me know.

Until next time
Toodles
Erika Taylor


MLS Halloween

Hello friends!  Here is a card I made using the My Little Shoebox, Spooky Treats.  Sorry for the poor quality photo.

 
I also wanted to show you a few assembled carnival pieces.  The Ferris Wheel and Game Booth.


Have you had a chance to look at the new Halloween release?  It is so cool!  Also don't forget about Angelica's challenge.  You may click here to read all about it.  Hope you will join in the fun!  Have a great day!

Hugs and smiles,
Janice