Friday, October 02, 2009


My Blog Post today is a double page layout using some beach photos that were taken a few years ago on a Day Trip out to the Great Barrier Reef. It was so magical out there that no photos seem to capture the true beauty of this amazing wonder of the world.
I have been waiting for the perfect opportunity to use my COTTAGECUTZ ‘UNDER THE SEA’ dies and thought these would be the perfect photos to use with them.


On my layout I have used the following COTTAGECUTZ dies & products-
COTTAGECUTZ Sea Weed Forest CC4x4-068
COTTAGECUTZ Peek-a-Boo Clam CC2x2-010-D
COTTAGECUTZ Octopus CC4x4-057
COTTAGECUTZ Sea Turtle CC4x4-061
COTTAGECUTZ Shark CC4x4-060
COTTAGECUTZ Mermaid CC4x4-062
KAISERCRAFT Self Adhesive Pearls
TIM HOLZ Distress Inks

Don’t forget that COTTAGECUTZ DIES are sold exclusively at THE SCRAPPING COTTAGE. They work exactly the same way as your Quickutz dies do and the only difference is that the COTTAGECUTZ DIES are now pink and they have more detail to them – which I L-O-V-E.


I also used the following Quickutz dies-
QUICKUTZ 2x2 Crab RS-0020
QUICKUTZ 2x2 Rocks KS-0439
QUICKUTZ 2x2 Skeleton KS-0186
QUICKUTZ 2x2 Monkey & Barrel KS-0232
QUICKUTZ 2x2 Treasure Chest KS-0782
QUICKUTZ 2x2 Anchor RS-0033
QUICKUTZ 4x4 Pirate Ship Rev-0081
QUICUTZ 4x4 Chalkboard Rev-0045 (for the small photo frame)
QUICKUTZ Clouds Border Die CC-BDR-032
QUICKUTZ Limited Edition EXOTIC ISLAND Alphabet

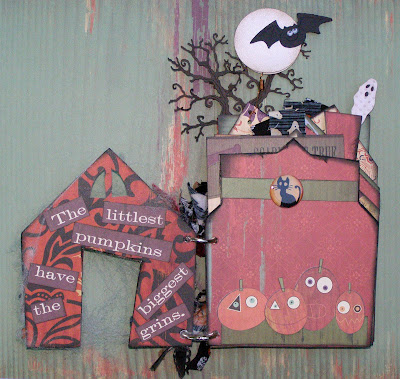
Trick or Treat!!

Happy, Happy Halloween!!

In our neighborhood we have a tradition
of "BOO"ing each other's houses during
the month of October before Halloween!
To "BOO" a neighbor, is to surprise them
with a special treat of some kind. Our
family always puts a gift on a neighbor's
doorstep, then we ring their doorbell,
and then we RUN!! lol It is a fun way of
showing neighborly love and it is a great
surprise for all of the people who are
"BOO"ed!


This year, I made a few of these fun
little treat bags to "BOO" around the
neigborhood, with the help of
The Scrapping Cottage.


CottageCutz
Trick or Treat Phrase
Witch Legs

Thursday, October 01, 2009

I think one of my favorite dies from each Cottage Cutz release has to be the different "house-type" designs. So far we have had the cute Two-Story House and Flower Shop from the April release, then the Tree House in June, the Surf Shack in August, the Haunted House from September's Halloween release, and of course the latest September Autumn-themed release that has that fantastic Old Red Barn plus the Chicken Coop! I am having so much fun collecting all these different shapes and even more fun putting them together on my layouts and other crafting projects.

Right now though, it is all about the Haunted House for me! As promised, here is page two of my Disney Haunted Mansion layout from last week. There are lots of different ways to create two-page layouts. One method to use when doing a two page layout is that you can put a lot of focus on one page as a sort of "title" page and then use the second page to house lots of pictures.
On my second page, I used a grid pattern to include lots of pictures. I broke up the rows by using different shaped pictures and also by adding a square of patterned paper and then the square containing my Haunted Mansion using the Cottage Cutz Haunted House die. I love how it really resembles the actual Disney Mansion!
It is amazing how different the house can look by using different papers and leaving off some of the different embellishments that this die has. I can't wait to use this Haunted House on a fun Halloween card, too!! Oops! Did I just give away my next post?! ;)

Wednesday, September 30, 2009

Whoooooo Loves Halloween?


Sharing another card for you today that features the CottageCutz Owl. This little fellow is not only extremely cute but he is also versatile. Thought it would be fun to make a witch's hat and use him for a Halloween card. He is roosting on a felt spider's web. :) This die is in several pieces but is SO easy to put together. You can have your owl creation finished in a few minutes. :) Be sure to check out all the great CottageCutz dies at Scrapping Cottage.

This is my last post for Scrapping Cottage. I hope you have enjoyed seeing my work as much as I have enjoyed designing it for you. :) Come see my newest creations at my new blog: http://bevscreativepath.blogspot.com/ May you have a wonderful and creative day. :)

Tuesday, September 29, 2009

CottageCutz Stacked Pumpkins and Ghost dies

I have to say that this CottageCutz Halloween release has got to be my favorite so far. This CottageCutz Pumpkins Stacked die was so simple to put together and I love the detail. This 2x2 ghost die is a must have because he can be added to just about any Halloween card or layout and he's so cute and simple. I just cut him out of white and then put a tiny piece of black behind the eyes and have him some cheeks and he's done.
I love how the background, foreground, leaves, eyes, teeth and stem are all so you can do all your cuts once and not have to run it through your machine over and over again to get all your leaves etc.

It's not even October yet so be sure to order your Halloween CottageCutz dies so you can use these great dies all month long!


Monday, September 28, 2009

CottageCutz Owl


Today's project features the CottageCutz Owl on a birthday card. Since this is a birthday card, I wanted it to be bright and festive. I used two different shades of pink for the owl. Whooooo says owls have to be brown? :) Be sure to check out all the great CottageCutz dies and other products at Scrapping Cottage.

Friday, September 25, 2009

Happy Halloween!

Spooks and goblins, ghosts and pumpkins are
haunting the Scrapping Cottage tonight!


I made this fun little Haunted House with all of its
tricks and trim for my children. I want them to
remember the fun they had trick or treating!


CottageCutz
Spooky Tree
Creepy Night Frame
Witch Hat
Spider Web


Thursday, September 24, 2009

Fun with the new Halloween Dies!!

As soon as my new Halloween Cottage Cutz dies arrived in my mailbox, I couldn't wait to get them open so I could start playing!! I just LOVE Halloween products! Every year they just keep getting cuter and cuter and this year is no exception. Something I always enjoy is figuring out how to re-purpose my dies so that I am able to get more use out of them. As soon as I saw the Halloween Cottage Cutz release, I immediately identified several dies that would look GREAT on some Disney layouts!

My layout for today of the Haunted Mansion at Walt Disney World. It is actually a two-page layout, so you have to keep checking back for when I post the second page ;)

I thought the Cottage Cutz Candelabra would make a great and maybe unexpected addition to a Disney Haunted Mansion page! Remember during the ride where you see the floating candelabra?! I also used my silhouette to cut out my title from the font Old English which is equivalent to the QK Haunted alpha. I wanted to make sure that my layout looked spooky without looking Halloweeny.

Be sure to check back later for my second page - lets just say, you might see the Cottage Cutz Haunted House because what would a Haunted Mansion layout be without a haunted mansion embellishment!!

Wednesday, September 23, 2009

WATCH FOR IT WEDNESDAY #28

Things are getting a little "STICKY" around here.....
Today I wanted to talk about adhesives. I'm always asked "what is your favorite kind of adhesive?" My answer is that there is no one adhesive that is great for everything.
These are the adhesives I like the best and why:
Scotch ATG714 - This is a big adhesive gun but you know what? It's easy to use and I love how it applies adhesive quickly and easy and hold larger rolls of adhesive. You can get regular or acid-free refills.
I use this for adhering my photos to cardstock and all of my bigger jobs.
The Glue Glider Pro is very similar, but came out after I bought my Scotch ATG. This gun is cheaper but the refills are a bit more expensive.
The next adhesive is my Hermafix dispensers. One is the square tabs and the other is tiny dots. These are great for adhering the medium to small items that the ATG is too big for. I also like to cut the squares and apply them to larger letters etc.
Then there is Glue Dots - these are great for buttons, flowers, ribbons, gems and trinkets. They stick super well and are tiny enough for all your little objects.
The last two are the Tombow Mono Adhesives. The purple label is great for metal objects. I use this on the back side of ribbon, metallic cardstock and findings.
The blue label is a life-saver for my diecuts. It has two tips and I always use the small tip as pictured below. This is great for applying diecut letters & putting diecuts together. I use this glue every time I scrap and wouldn't ever want to be without it. It dries clear and lasts for a long time. The only time I ever have problems with this clogging is if I've left the cap off for a long time. If this happens I simply stick a pin down there and it clears out quickly.


Close up of Tombow Mono Adhesive and Glue Dots.
The adhesives I've shown above are very similar to other products on the market, these just happen to be the ones I've used and like the best. I take ease of use and cost when I consider an adhesive. I don't recommend glue sticks because they lose their stickiness after a few years and then your projects start falling apart. I avoid them completely from experience.

Tuesday, September 22, 2009

Happy Halloween Window


I love Halloween! It's such a fun time of the year for parties, decorations, crafts and fun food.
I took the CottageCutz Window w/canopy and transformed it into a Halloween window for my card.

I cut out my window in black and purple and layered them for dimension. I shaded around the purple layer. I backed it with some gray cardstock and added some little window markings with my black Zig pen. I also used the pumpkin from the Quickutz Cornacopia die and the ghost die. The little ghost is from the Treat bag die.

I love to add mounting tape to my diecuts to add dimension. The first picture shows the dimension of the card. (I was having difficulties getting the picture where I wanted it to be this morning.....)

Monday, September 21, 2009

Sizzix Decorative Strips


It's the time of year to start thinking about Halloween, Thanksgiving and Christmas.
Wow, this year has gone by fast! :) Today's card features one of my favorite
Sizzix Decorative Strips. I've always loved to use ric-rac on my cards and this one
has a "faux" ric rac plus two other great designs. You won't have to stress about not having the right shade of ric rac with this die. :) Be sure to check out all
the Sizzix products at Scrapping Cottage.

Saturday, September 19, 2009

New Autumn Cottage Cutz Dies!!!!!!!


The latest release of Cottage Cutz Dies is now available for pre-order!!! Don't miss out on your chance to save up to 25% with introductory pricing good through Sept 28th!! Plus, with any order from the new Autumn Cottage Cutz dies, you get your choice of one of the adorable new Cottage Cutz Autumn Minis! Don't delay!!

Friday, September 18, 2009

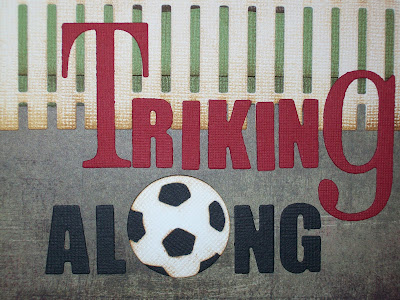
TRIKING ALONG


It has been a little while since I last posted a project to the Cottage Blog, and I am very excited to be able to share my work with you all once again.

Today I would like to share a 12x12 page layout I did of my son Jacob playing in our back yard. He just loves this Trike his daddy bought him at a garage sale a few months ago, and would love it even more If only his little legs would actually reach the peddles.


For my layout I have used the following dies:-
COTTAGECUTZ TRIKE SC-CC4x4-042,
COTTAGECUTZ LAMP POST SC-CC4x4-023,
COTTAGECUTZ TREEHOUSE SC-CC4x4-041,
QUICKUTZ SUN RS-0934,
QUICKUTZ SOCCER BALL RS-0140,
QUICKUTZ CLOUDS BORDER DIE CC-BDR-032,
QUICKUTZ PICKET FENCE BORDER DIE CC-BDR-039,

For the smaller font, I used the inside of the QUICKUTZ DISCO 4X8 FONT,
and the larger letters are from the QUICKUTZ BLOSSOM GRAND ALPHABET.


I used Tim Holtz Distress Ink to ink all my dies cuts before assembling them to give them a much nicer 3D look. I have got so used to inking and Love it, as It’s just so quick and easy and the finished product looks Great :-)


Spooky, Kooky, Creepy, and Fun!!

Halloween is the time of ghosts, witches, and
scary black cats. Of spooks and spirits and
silly-fun tricks! And candy corn,
jack-o-lanterns, haunted houses, and bats!


I created this "Halloween" box to sit on our
kitchen table for the season. I will keep it
filled with fun, tasty treats for all of us to
enjoy.


It would have been impossible to make such an
animated piece without the awesome designs of
CottageCutz and some fun QuicKutz shapes.

CottageCutz
Build-a-Jack
Broomstick
Ghost
Bat
Witch Hat
Spooky Tree
Black Cat
Ghost with Legs


Quickutz
House and Tree
Spooky Scroll
Halloween

Thursday, September 17, 2009

Ghouls Rule :)

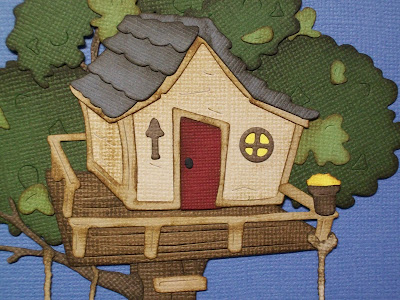
Ever since The Scrapping Cottage previewed the Sept. Halloween Cottage Cutz release, I have been chopping at the bit to get my hands on these adorable Halloween dies!! Finally, I just couldn't wait any longer to make a Halloween layout. (I know, it is only Sept - what can I say - I love scrapping Halloween pics!!!) So, as I was thumbing through my Cottage Cutz dies looking for some inspiration, it hit me - how about a Haunted Tree House!! So I went about turning the already adorable Tree House Cottage Cutz die into a spooky Haunted Tree House.
I had so much fun putting this tree house together! And everything you see came from the Tree House die except the little ghost swinging on the tire swing. He comes with the Haunted House die from the Sept Halloween release. It is hard to tell, but I actually painted my little ghost with glow-in-the-dark paint! I can't wait to see if it really works!!

If you haven't already purchased your Cottage Cutz Halloween dies yet, you had better get your order in fast!! Well over half of the first shipment has already sold out so you want to be sure to get your name on the waiting list for the second round!!

Happy Haunting :)

Wednesday, September 16, 2009

Watch for it Wednesday #27

This week's Watch for it Wednesday features...
Tissue Paper!!!

Tissue paper can be a very valuable asset to
every scrapbooker! It is a wonderful and
inexpensive way to highlight, enhance, and
give dimension to all of your paper crafting
projects!! There are a multitude of colors to
choose from as well!! Today I chose to use a
scrap of white tissue paper, as well as, a
scrap of white cardstock.


First, I ran the white cardstock through my die
cutting machine to create a die of this sweet
little ghost. After that I took the piece of tissue
paper and crumpled it up into a ball to give
it a wrinkled look. I smoothed it out, just a
little, and ran it through my machine.


I lined the die cut tissue paper up with the die cut
cardstock and glued it on. After, I took a few more
scraps of the tissue paper and crumpled them up.
I then smoothed them out, ever so slightly, and
glued them onto the ghost. The tissue paper adds
dimension and also gives the ghost more of a
flowing, transparent look.

Fun, Fun Fun!!!

Check back on Friday to see
how
I used this little guy!!

Tuesday, September 15, 2009

Anyone Having a Bird-day today?

Today's card is made from the CottageCutz Tropical Bird #1 which is a 3x3 die. I really wanted to create a card with this cute bird that you could give a guy. I Googled tropical birds and was amazed at how many different colors real tropical birds come in. I found one that was this gorgeous blue and tried to copy it.

I added 2 extra tail feathers and some gems for the eyes to give him a different look than the sample picture on the die. Remember to think outside the box when it comes to using your dies.
I placed some mounting tape on a few tropical leaves to give him some dimension.

I'm anxious to make a girly card next with this cute little bird.


Monday, September 14, 2009

CottageCutz Penquin


I have a fun card for you today using the CottageCutz Penguin. He is a super easy one to cut out and put together. On this card there are a couple of different patterned papers plus black and white cardstock. There is a little zig zag stitching
at the top and bottom. The letters are foam thickers by American Crafts and I used
some circle punches for the "snowballs." Just think of all the fun things you could do with the CottageCutz Penquin! :) Be sure to check out all the great CottageCutz dies at Scrapping Cottage.