Monday, July 03, 2023

Flip Fold Eagle Card

Hey there crafty peeps!

It's Kris sharing with you today a fun Flip Fold Card featuring this cute Patriotic Eagle w/ Top Hat and more from our Patriotic Release ~ All the individual dies from this release are still 30% off!!  But before I get to my card, I've got some more GREAT NEWS....

We're currently having a huge 4th of July SALE!!  

Shop early for best selection
SALE ENDS FRIDAY, JULY 7th at 9pm PDT

And now back to our regularly scheduled tutorial ☺

How CUTE is this li'l guy?!!!  Such a fun die set and perfect for celebrating our Independence Day!


Our very own Mary Marsh is hosting this week's color challenge at Splitcoast Stampers with the following colors:

Real Red
White
Blueberry Bushel

I decided to make an easy flip fold card!  I started with a side folding A2 card (8-1/2" x 5-1/2"- scored the 8-1/2" side at 4-1/4")

Design Steps:

1)  Cut 2 strips of [star-like] patterned paper:  one is cut a 5-1/4" x 2", and the other at 5-1/4" x 1-7/8"


2)  Attach the 5-1/4" x 2" piece to the left side of card so that there's 1/8" white border around the top, left and bottom edges.  (see below)

3)  Take the largest of the Pierced Ovals set and line it up so that the middle of the oval is exactly on the right edge of your patterned paper and centered top to bottom as shown.  Tape with light tac tape.


4)  Put it on your cutting platform/plate and line up the TOP plate with the right edge of your patterned paper.  Be sure not to go over as we only want to cut half of the oval.  You may need to hold it there while cranking it thru until it grasps it tightly.  


5)  Score from the top and bottom JUST TO WHERE THE OVAL STARTS TO CUT along that right edge of patterned paper.  Here's a look at the backside as it's easier to see...


6)  Fold your card in half and then fold that front (patterned paper) piece back on itself.

7)  This step is optional, but I found it REALLY helped to lightly draw a pencil line around the right half of my oval onto my inside layer so that I don't have diecuts (or writing) showing from the front of card when it's closed.

8)  With the largest Pierced Ovals set , cut a solid red oval, and a patterned paper oval.

9)  With the 2nd largest Pierced Ovals set , cut a patterned paper oval.  Attach to center of larger solid red oval.


10)  Die cut Patriotic Eagle w/ Top Hat, USA Flag, and Statue of Liberty, assemble and attach to ovals as shown below...


11)  Attach oval w/ eagle to FRONT of card, lining up the right edge of ovals.


12)  Attach the 5-1/4" x 1-7/8" star strip in the section to the right of your patterned paper that's already attached, centering it between the score lines as shown below.  

13)  Attach your Liberty Flag oval to the oval that's there, lining up the left edges.  


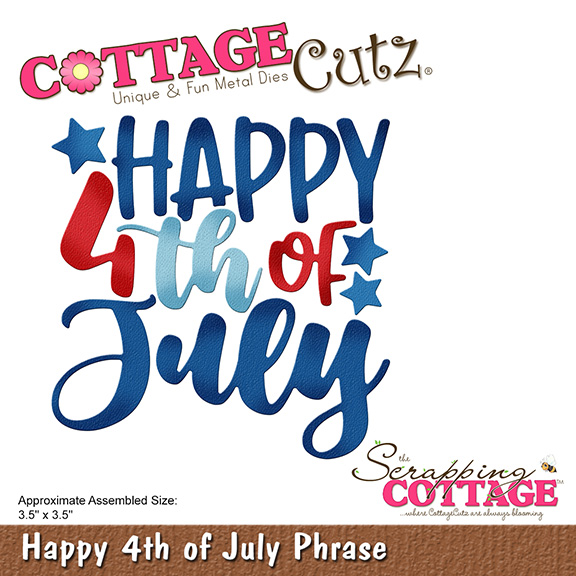
14)  Die cut the Happy 4th of July Phrase and stars from same set.  I did add in some of the stars from the Firecrackers set because I really like the open stars ☺


15)  Using my pencil line as a guide, I glued down the right edges of my sentiment first to make sure I didn't go beyond that pencil line!  Then worked backwards, gluing in the rest. 

***TIP:  Before you go crazy with the stars, it helps to close the front of your card every now and then so you can see what will show when the card is closed! 


DONE!  


Because of that tip I shared, only the 3 stars in upper right corner show from the front when it's in closed position!  The rest is a surprise when they open the card ☺


Wishing you all a blessed and safe holiday!!
- Kristine

Sunday, July 02, 2023

July 4 - God Bless America

Hello CottageCutz friends! Thanks for taking the time to stop and visit with us today. It's Mary Marsh here bringing you the Sunday edition of the Blog.

We have a brand-new release in the online store. It's our Patriotic 4th of July release with 12 amazing patriotic designs. You can still pick up the individual dies at 30% off

If you love making patriotic cards to honor a veteran, to celebrate the 4th of July or to display your love for America, we have you covered with this new release. And don't forget about scrapbooking the photos you took at your July 4th celebrations. 

There is also a 4th of July sale going on right now in the online store. It runs through July 7th with savings of up to 70%. 

My card for today is featuring the Statue of Liberty die in a diagonal joy fold design. Here is a link to another card I made in this design with a complete tutorial. 

I looked at photos online of the Statue of Liberty to get an idea of the color. Over the years it took on a green patina with copper underneath. So, I attempted to recreate that color by using distress inks in salvaged patina and hickory smoke. 

For the background on this image panel, I used prized ribbon, salvaged patina and villainous potion distress inks for the ink blending. My buildings are cut from the City Skyline Slimline die and I added a few glittery stars to this panel. 

On the diagonal panel I used designer paper and I cut my July 4 phrase from the Stitched Alphabet and Stitched Numbers die. We have a new die in the Patriotic release - Happy 4th of July but I couldn't get it to fit on my diagonal panel. The red swirl is part of the USA Flag die that I had left over from another card. 
This is a photo of the card closed.
And here is the card inside. I used the Fireworks die.
Well, that's it for me for this post. Happy 4th of July and see you again on Saturday!


Saturday, July 01, 2023

America....Land That I Love

Hello CottageCutz friends! Thanks for taking the time to stop and visit with us today. It's Mary Marsh here bringing you the Saturday edition of the Blog. It's the 4th of July weekend, and I am sending patriotic wishes to all. 

We have a brand-new release in the online store. It's our Patriotic 4th of July release with 12 amazing patriotic designs. You can pick up the individual dies at 30% off . If you love making patriotic cards to honor a veteran, to celebrate the 4th of July or to display your love for America, we have you covered with this new release.

There is also a 4th of July sale going on right now in the online store. It runs through July 7th with savings of up to 70%.

My card for today is featuring the USA Flag and the Patriotic Rainbow dies in a slimline design. I love making patriotic cards and mail them out for the 4th of July celebration. So, let's get started on some details on how I created my card.


Design Steps: 

The inspiration for my card came from a red truck that I saw driving by me recently. I loved the flag furling in the wind from the back of his truck. So, my card idea was born.

I cut my flag in red, white and blue. I love how the detail in this die that gives the impression that it is waving in the wind. 
Next, I cut my truck. I used an older CottageCutz die - Flatbed Truck w/Accessories. It is still available in the online store. 
I stenciled some clouds in broken china distress ink and added a 1/2" section of black cardstock with small white lines down the middle as a road for the truck. 
My card elements are ready and I can start card assembly. I attached the truck and the flag with dimensional adhesive. The America Phrase was secured with clear drying glue. 
To finish off my card, I stamped my sentiment and scattered a few stars. 
That's it for me for this week. See you next Saturday. 


Thursday, June 29, 2023

Firecrackers for the 4th

 Hello Friends

It is Pam sharing with you today.

This is my last minute card for 4th of July!  It is from our release called Patriotic and the collections has 12 wonderful designs all perfect for our Nation's birthday! Check out this release HERE!

I am using 2 of the new dies Patriotic Rainbow and Firecrackers.   I decided to use a slimline design to accommodate all the fun pieces.  


Design Steps:

1.  Using Firecrackers and the Patriotic Rainbow dies cut all the pieces in the following card stock colors: red, light blue, navy, yellow and white.  Glue the rainbow and the firecrackers together with a fine tip glue
2.  For the card base use a white piece of card stock measuring 3 3/4 x 8 3/4 folded.  Cut a pieces of red dotted DP 3 1/2 x 8 1/2 and cut a piece of white card stock with the Circle Window Slimline die
3.  Glue the red dotted paper to the card base and then add the window circle slimline piece
4.  Start to decorate the front by beginning in the center with the Patriotic Rainbow and the words America
5.  Finish up the card with the Firecrackers and stars.  And just to add a little more dimension I add white accent lines and yellow stickles on the end of the firecrackers


We have more inspiration on our YouTube Channel check it out HERE

Thanks so much for stopping by!  And I will see you next Thursday.

Blessings and Take Care


Wednesday, June 28, 2023

Happy 4th of July


It's Marla back with another card featuring the "Patriotic" release available now in the Scrapping Cottage store.  I love the larger size of the "Patriotic Eagle w/Top Hat" which paired beautifully with the "U.S.A Flag".  I wanted to include the "Happy 4th of July Phrase" for my sentiment, so I went with a slimline card, which balanced out all the amazing dies well.

I am giving one of these new dies away in my YouTube video on the CottageCutz YouTube Channel.  I hope you'll join me.  Until next time.... Marla