Monday, June 13, 2022

Happy 4th

Hi everyone Happy Monday with Simply Monica!❤️  Today my card touches on the Fourth of July a touch.  I had this paper from Doodlebug forever and saw one of the images had ice cream cones so I thought how cool a Fourth full of creamy you scream I scream we all scream for ice cream!

I diecut a couple of the cones from Build an Icecream Cone in a variety of shades
Then I used distress ink in a variety of colors and sponged on some color in fun ice cream shades or at least color I felt resembles ice cream…
Then I used a sheet from the set that had text blocks and added the ice cream cones to each panel and glue them on my card front I thought it was a unique way to showcase the dies
I hope everyone enjoyed my post amd thanks for stopping by 


Product Used


Sunday, June 12, 2022

Ice Cream Truck Slider

Hello Scrapping Cottage Friends!  

Kris here with my debut as Guest Designer!  With the arrival of summer, I'm excited to be working with this new Sweet Treats release as there are so many occasions for these dies!  

I made a super easy Pull Tab Slider card using Ice Cream Truck.  


You find the list of products I used linked to the store at the end of my post.  But for ease sake I'll list them here along with some other tools needed for this project:

Products:                                            
•  Ice Cream Truck die                         
•  Sweet w/ shadow die                        
•  Happy Birthday w/ shadow die     
•  Wishes w/ shadow die                      
•  Clouds Slimline die                                                
•  Hills Slimline die
•  Pierced Circle Frames die
Other:
•  stamps of your choice  
•  patterned paper                  
•  ruler                                              
•  paper trimmer
•  foam strips/tape
•  low-tac tape     

As always... if you need to see my photos up closer, just click on them for a larger size.

Design Steps:  
  • We all know it's more fun to eat our dessert first.... so I started this project with the FUN stuff!  That is... cutting and piecing together my Ice Cream Truck!  I had this fun paper with blue and pink ice cream trucks, so I matched it.  
  • Next, I cut my main pieces of cardstock.  
    • Card base (grey) is cut at 6" x 12" and scored at 6"
    • Another piece in the same color as base cut at 4-1/2" x 5-3/4"
    • and a dark pink cut at 6" x 6" 
  • To make the frame on the front, I measured in 1/2" on every edge (near the corners) and placed a light pencil mark.  You'll end up with 4 "X"s  near each corner.  (if you don't have an "X" then you might need to extend your 1/2" marks/lines a bit until they intersect with the one parallel.)  I then used my paper trimmer to CUT between each of those "X"s to end up with a frame.  
    • Erase mark lines or turn it over to the other side ☺
  • I cut a piece of white to 2" x 5-3/4" and cut the very bottom using one of the Clouds Slimline dies.
  • I then cut (2) pieces of coordinating designer papers at 2" x 5-3/4" and cut the very top of each with one of the Hills Slimline dies.
  • You want to add glue to the (front) sides and top (NOT the bottom)  of your cloud border and attach BEHIND your frame at the top as shown below.
  • Next, we need to cut a notch out of our frame for our pull tab. (You could do this step before attaching your clouds - I just forgot to do it prior).   I used a small circle from the Pierced Wide Circle Frame Set to cut a PARTIAL CIRCLE from the LEFT edge of your frame as shown below.  It's important that you cut from the left side because it you do it on the right, your truck will be driving backwards!  ☺ 
  • Now we need to cut the same notch out of our card base in the exact spot we cut the frame.  SO... you want to lay your notched frame on top of your CARD BASE making sure everything lines up and fold is at the top, then lightly draw the outline of your notch onto the card base and cut the notch using the same circle die as we did in the previous step.
  • I then taped my 2 pieces of patterned paper together and added adhesive to the (front) sides and bottom (NOT the top!), then placed BEHIND my frame at the bottom ***NOTE:  lay your truck in the middle first so you know how far down to attach your patterned papers.  
  • Next, I placed my 4-1/2" x 5-3/4" grey slider piece behind my frame, but FLUSH with the left hand side and centered between the top and bottom.  You can write or stamp "PULL" where the tab dips down, OR draw an arrow going to the left to let your recipient know to pull.  
  • Now remove your slider piece and set it aside.
  • Reminder - our frame is just sitting on our card base - it is not attached yet!  
  • Decide what you want to have revealed when the truck is being pulled!   I stamped a "YUMMILICIOUS" sentiment and some confetti .  To find the placement, I laid my truck onto my card and off to the left - see photo below for placement.  Now you can see how much space you have and decide what you want to fill that space with!  ***It's best not to have too much dimension as it may prevent the truck from sliding back into place.  Flat stamped images are best!

  • Now we can add our foam tape to the back.  Again, line up the slider (from the front) so that your arrow or "PULL" is lined up in the center of your notch and the edge of slider is flush with edge of frame... and the whole piece is centered between the top and bottom edges of card on the back.  To keep it in place, I added some purple low-tac tape.
  • To the BACK of your frame, add foam tape to the 3 sides close to your slider, but not TOO close or it won't slide well.  (Don't tape the edge where your notch is cut out.)  
  • And now we can add our truck!  You'll want to pop it up with foam strips/tape so it goes over our frame on the edge.  Start your strips in a li'l ways as shown below so that our truck will go over the frame a li'l bit.  That way we know it will reveal our whole stamped image.
  • Attach your truck to the far RIGHT of your card but make sure your foam strips/tape does not go onto the frame! I added some fairly flat sprinkles to fill the space on front and added my "Sweet Birthday Wishes" using the words with shadow dies (linked below).

Here are the products I used on my card today:


Click the pic below to shop the whole release!


I hope my card inspires you to create your own interactive card or something else using the fun new release!   I'll be back next week with a simple-but-cute card :)  
Have a CRAFT-astic day!

~Kristine

Saturday, June 11, 2022

Father's Day Ice Cream

Hello CottageCutz friends! Thanks for taking the time to stop and visit with us today. It's Mary Marsh here bringing you the Saturday edition of the Blog.

It's new release time!!! We have new dies in the online store. It's our Sweet Treats release with 13 new designs. They are so perfect for any card making occasion you may have. The individual dies are currently 30% off.

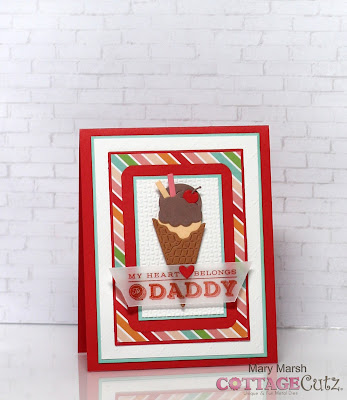
Today for your viewing pleasure, I have created a Father's Day card using the Build An Ice Cream Cone die. This one I made for the little girl next door to give to her Daddy for Father's Day. He likes ice cream so this one is a perfect for for him.

So, let's get started with some details of how I created my card.

Design Steps:
I started by selecting my designer paper. I looked for something that had more of a masculine vibe to it. Stripes always work so I went that way. I cut the papers in the following sizes.

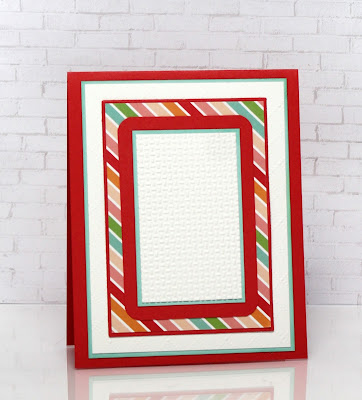
Red Card Base: 4 1/4" x 5 1/2"
Blue Layering Panel: 3 7/8" x 5 1/8" 
Large White Embossed panel: 3 3/4" x 5"
Designer paper Layer: 4 1/4" x 3"
Red Scalloped Layer: 
Blue Laying Panel: 3 1/4" x2
Small white panel embossed: 3 1/8" x 1 7/8"
My ice cream cone is cut in colors that complement the designer paper. 
All my card elements are cut and ready for assembly. The layers are all attached with double sided tape. My largest white layer is an embossed panel, but it just isn't showing up well in the photo. 
Next, I attached the assembled cone image using dimensional adhesive. I stamped my sentiment in poppy red ink on vellum. I added a die cut heart to the center. 
I finished off the inside of my card by stamping a couple of sentiments and adding a strip of the designer paper and a couple of hearts.  
Well, that's it for me for this week. See you next Saturday!

Reminder: Our YouTube Channel has a new video from Linh Van. There is a giveaway for being a subscriber, liking the video and leaving a comment. Click here.

die I used to create card:

Friday, June 10, 2022

Summer is Here!


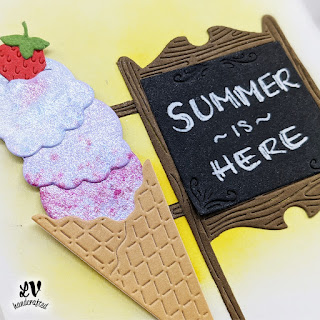
Hi everyone! My name is Linh and I'm honored and excited to be here as a guest designer. I have a new video up on the CottageCutz YouTube Channel. In this video, I combined the Easel, Build an Ice Cream Cone, and Ice Cream Truck die sets from the Sweet Treats Collection. Where's the ice cream truck, you ask? My initial design plan for this card didn't quite come together the way I saw it in my head. Then I remembered... there's a beautiful white canvas on the inside of the card! And voila -- the perfect spot for a fun surprise when you open the card!


Thursday, June 09, 2022

Yum!

 Hello Scrapping Cottage Friends

The design team is continuing to give you some great ideas for our new release Sweet Treats!  There are 13 different designs and everyone of them can be used for a variety of occasions especially Birthdays!! The individual dies are 30% off.  This sale price won't last long so click HERE to hop on over to the store!

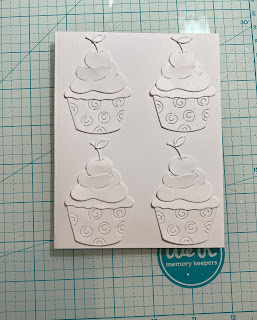
Today, I am using the sweet Cupcake w/Cherry.  I thought it would be fun to create a background with the same cupcake so this is what I came up with!
Design Steps:
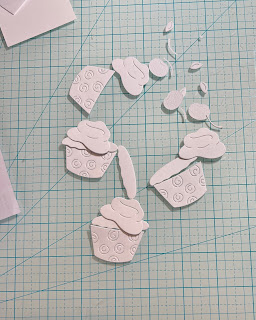
1.  Using the Cupcake w/Cherry cut out 4 cupcakes on white card stock
2.  Assemble the cupcakes and glue them to the front of a white A2 card base as shown above 
3.  Cut out one cupcake using the following colors of card stock: turquoise, tan, brown, red and green.  Assemble the cupcake with a fine tip glue
4.  Place dimensional squares or dots on the back of the cupcake 
5.  Pop the cupcake to the middle of the card as shown above.  Stamp the word yum and tuck it under the icing as shown
CottageCutz Products

We have more inspiration on our YouTube Channel check it out HERE
Thanks so much for stopping by!  And I will see you next Thursday.

Blessings and Take Care


Wednesday, June 08, 2022

A Rainbow of Flavors & GIVEAWAY


   One of my fondest memories as a kid was going to Thrifty's for an ice cream cone.  I can't tell you how many times I ordered Rainbow Sherbert.  The swirls of color and touch of tang always made me happy.

It's what inspired my card today, which I am sharing over on the CottageCutz YouTube Channel. For my video, I am featuring the "Build an Ice Cream Cone" die and bonus, I am also giving it away.  This die is filled with several styles of ice cream cones so you can build the cone of your dreams.  An ice cream card is a great way to send a note to let someone know you're thinking of them and would pair perfectly with a gift card to someone's favorite ice cream shop.  Who wouldn't love this sweet surprise in their mailbox?

I hope you'll head over to watch and don't forget to check if you are the winner of the "Candy Cart" die I gave away in my last video.

Thanks for joining me.  Until next time.... Marla