Tuesday, March 21, 2017

Happy Easter

Hi, Janja here!

Today I share with you two Easter cards created with Spring CottageCutz collection of dies.


Supplies:
- CottageCutz dies: Easter bunny & chicks, spring bunny with flowers, build an Easter egg, stitched circle set
- white cardstock for card base
- patterned paper
- white and colored cardstock
- Distress ink pad Spiced Marmalade
- Color Box pigment ink pad Frost White

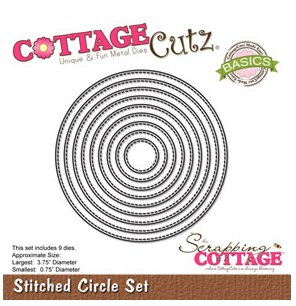
Cut a circle with the largest die from the stitched circle set.
For card base, fold cardstock in half. Mount the die on cardstock, so that the upper part is slightly sticking out over the edge and cut. Glue circles to each other to obtain an easel card base.


From patterned paper also cut out two circles. Use eighth die in a row from the middle of the set. Stamp sentiment Happy Easter.


Cut out Easter bunny with chicks. Shadow all elements and compose them.


Attach patterned paper on white card base. To finish the card, attach all the elements as shown to a card base using foam pads.


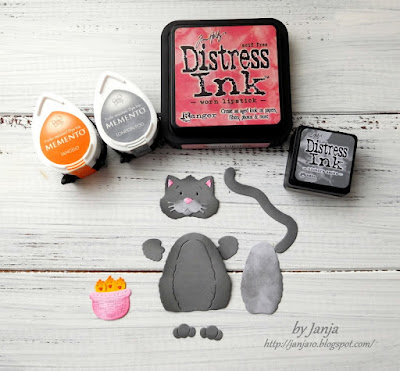
On another card with kitty I added some Easter eggs. 


Supplies:
- white card base: 4.25 x 5.5" (10,8 x 14 cm), folded
- patterned paper: 4 x 5 " (10,2 x 13,2 cm) 
- white and colored cardstock 

Shadow cutouts. 


Completed card.


Thank you for coming over. Have a nice day.


Monday, March 20, 2017

Framed Hummingbird

Lois here with a very simple card for you today.  I just got a few new-to-me CottageCutz dies and was anxious to play with them.   I was intrigued by the Pierced Wide Frames and wanted to give them a try -- today I used the Ovals -- along with a sweet Hummingbird die.

Supplies used on this card are:

Heavyweight white cardstock 8 1/2" x 5 1/2", folded in half, and a piece 4 1/4" x 5 1/2" to cut the frame
Colored cardstock - Blue, Green, Pale Plum, Yellow, Pale Blue
Patterned paper - Shades of Plum
Ink - Memento Tuxedo Black; Ranger Distress Tumbled Glass, Mowed Lawn, Victorian Violet
Copic marker
Black ink pen
Liquid glue
Roll of foam adhesive tape
Sponge daubers

To start my card I cut out the various pieces of cardstock for the hummingbird and frame.


I then added some depth to the pieces by sponging on some ink to the bird and flower pieces and added a bit of color to the bird's beak with a dark yellow marker.  Using the black ink pen I emphasized the eye of the hummingbird (not shown in photo).


I cut a strip of foam adhesive tape, cut it into narrower strips, and adhered it in pieces to the back of the oval frame.


To make the background for my "picture," I cut an oval from the pale blue cardstock.  You could use any oval die which would fit -- I used the double-stitched oval because it was close at hand.  The stitches were not going to show, so it didn't really matter.


I then constructed my card using the die-cut pieces and stamped the sentiment.   Here it is again.


CottageCutz dies used on this card are:


Sunday, March 19, 2017

100% Country Scrapbook Page


Hi! It's Janet with SugarShine Designs here to share with you my very first post as a video designer for CottageCutz. I'm so happy to be given the opportunity to share projects with you. You will see a variety of projects from me including scrapbook pages, cards and other dimensional projects.

Today's project is a scrapbook page featuring the adorable stamp and die set, Farm Animals. This set is so cute! I couldn't help but use them in a page about my family's visit to a ranch in Arizona a few years ago. This set has so many applications that I'm sure you'll see these animals show up in some of my future projects.


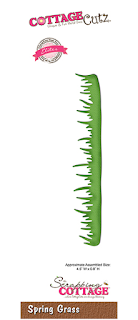
For the photo mats, I used three stitched die cut shape sets including the circle, oval and square sets. I also used the double-stitched rectangle set which adds a unique look. The Spring Grass die is used in the page's title.


Click the video link below to see how the page was made using all these great dies. Thanks for stopping by and have a great week!


Dies Used in Today's Project:

 Farm Animals Set
 Spring Grass Die


 Double-Stitched Rectangle Set

 Stitched Circle Set

 Stitched Oval Set

 Stitched Square Set

Saturday, March 18, 2017

Easter Bunny


Hello Scrapping Cottage friends! Thanks for taking the time to stop and visit today. It's Mary Marsh here bringing you the Saturday edition of the Blog.

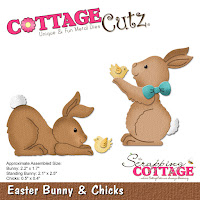
There are some fabulous new Spring dies in the store. Today for your viewing pleasure, I am featuring the Easter Bunny & Chicks die. This die has two cute bunnies and 2 chicks.

This week I decided to make an Easter or spring card. So I selected my die and some bright patterned paper and cardstock. The whimsical pattern on the designer paper will fit well with the Easter bunny. I also thought this sketch would keep my layout more simple and still allow the patterned paper to be seen.  Let's get started with some details on how I created this card.
coral card base: 4 1/4" x 5 1/2"
patterned paper layer: 4 1/8" x 5 3/8"
white image panel: 2 7/8" x 3 1/2"
green layering panel: 3" x 3 5/8"
The bunny is cut in a cantaloupe shade of cardstock and his little bow in a medium green. The chick in a bright yellow and I shaded his wing with the same color of ink to give a bit of dimension.  Did some shading with cantaloupe ink around the bunny to add depth.


For the image panel, I sponged the bottom with a medium green ink for grass and also to ground the bunny image. I used a cloud template and added a few clouds with a light blue ink.
I wanted the sentiment in the corner of the card and the "some" word to be placed on an angle. I pulled out my stamp positioner to accomplish this. I taped off the 2nd line of the sentiment and stamped my first line. Then I taped off the "some" word and stamped my 2nd line.
 
All the preliminary work is done and I am ready for card assembly. For the long rectangle panel on the sketch I decided to use a flag. And I added enamel dots that matched the green cardstock to complete the card.
 
I hope I have given you some inspiration to create either an Easter card or a Spring card to send to someone special. That's it for me for this week. See you next Saturday!
 
 
Dies I used to create card:
http://www.scrappingcottage.com/cottagecutzeasterbunnyandchicks.aspx


Friday, March 17, 2017

Watercolour on Diecuts-floral card


Hello dear friends

Happy Friday to all !!!
Spring is in full bloom and flowers are spreading their beauty all over. It's Anita once again, sharing with you the beauty of spring flowers.

Many times we are all short of time and also some people are not fond of making 3D flowers . They want quick beautiful cards .
So here is a cool technique where colouring die cuts with water colour can really make them look beautiful and layering them together gives a lovely floral card like this.


To make this card,
Cut all the die cuts with white card stock and emboss a card panel 6" x 4"


Using distress inks , colour all the die cuts. Use the negative of the wild flower to create subtle stamping on the oval label. Distress ink names are mentioned below.


Layer the ovals like this and adhere on the embossed panel as shown.

Adhere all the die cuts layering them together like this.
Add a sentiment.

Adhere the card panel on card base measuring 7" x 5".

CottageCutz products used.

Wildflowers 2

Springtime Bluebell flowers


Cross-stitched Oval set

Distress inks used -- Peeled Paint, Mowed Lawn, Chipped Sapphire, Candied Apple, Fossilised Amber, Carved Pumpkin
I hope you will try this technique. Do share your work. I hope you have a good crafty weekend.