Showing posts with label double-stitched rectangle set. Show all posts

Sunday, March 19, 2017

100% Country Scrapbook Page


Hi! It's Janet with SugarShine Designs here to share with you my very first post as a video designer for CottageCutz. I'm so happy to be given the opportunity to share projects with you. You will see a variety of projects from me including scrapbook pages, cards and other dimensional projects.

Today's project is a scrapbook page featuring the adorable stamp and die set, Farm Animals. This set is so cute! I couldn't help but use them in a page about my family's visit to a ranch in Arizona a few years ago. This set has so many applications that I'm sure you'll see these animals show up in some of my future projects.


For the photo mats, I used three stitched die cut shape sets including the circle, oval and square sets. I also used the double-stitched rectangle set which adds a unique look. The Spring Grass die is used in the page's title.


Click the video link below to see how the page was made using all these great dies. Thanks for stopping by and have a great week!


Dies Used in Today's Project:

 Farm Animals Set
 Spring Grass Die


 Double-Stitched Rectangle Set

 Stitched Circle Set

 Stitched Oval Set

 Stitched Square Set

Monday, November 07, 2016

In the Forest - Squirrel and Log


Hi, Lois here.  I'm so glad to say that I've been invited to join the CottageCutz design team.  This is my first blog post as part of the team . . . and just in time for their new Fall release, In the Forest.  I have a friend whose daughter is just in love with squirrels, and I was thinking of her during the entire time I was making this card.  Isn't that squirrel just the cutest thing peeking behind that log?


For this card I used:

Chocolate card base 8 1/2" x 5 1/2", folded in half
Cream cardstock 4" x 5 1/4" embossed
Chocolate cardstock 4 1/2" x 3 1/2"
Cream cardstock approx. 4 1/2" x 3 1/2" (to be cut with die)
Gray, green, brown cardstock
Distress ink - Peeled Paint, Walnut Stain, Tumbled Glass
Copic markers - Black, Pink
White gel pen
Sponge applicators
Embossing folder
Narrow washi tape
Double-sided adhesive sheet

Cut all the images with the dies.


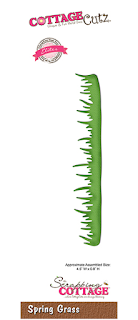
You'll notice that I cut the leaves on a small scrap of green cardstock which I had backed with a piece of double-sided adhesive sheet.  Those leaves are quite small, and I thought it would be easier to finally adhere them to the card if they had the adhesive cut at the same time.  Next time I may cut all the smaller pieces from cardstock backed with an adhesive sheet.   When I cut the grass pieces, I wanted the cattails on only one of the pieces, so I trimmed back the second die-cut to remove the cattails.

Sponge some ink onto the die-cut pieces to give them some dimension.


After I sponged the squirrel pieces with the dark gray ink, I used a white gel pen to color the inside of his ears.  After the ink had dried, I went over the white with some pink marker.  The eyes and nose were colored with the black marker.

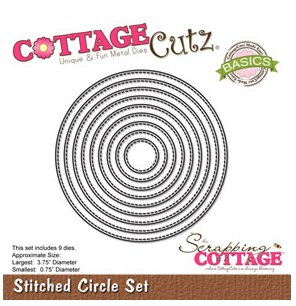
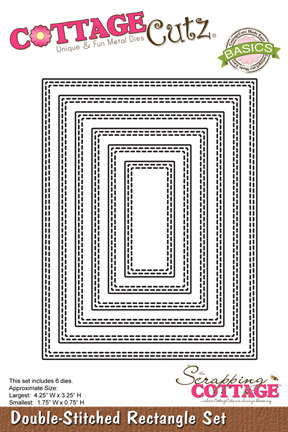
Three of the base pieces were cut with a paper trimmer.  The fourth, smallest piece was cut using the largest Double-stitched Rectangle die.


Emboss the larger cream panel.  Run a narrow strip of washi tape around the edges of the die-cut panel, covering the stitched lines.  Then sponge the grass and sky around the edges.


Remove the washi tape and assemble the card.  I ran many of the die-cut pieces through a Xyron machine; and, as noted above, next time I may cut all the pieces from a piece of cardstock that has been backed with an adhesive strip.

Completed card.


Dies used on this card:


Saturday, October 22, 2016

CHRISTMAS FLOWERS IN AN ENVELOPE

Hello everyone.
It's Anita here .Christmas preparations are in full swing everywhere. I am busy with making cards as there is long list of friends and relatives who long for my handmade cards.
My card today has a Christmas feel but its not a regular Christmas card.
I have added my favourite flowers in red and put them all in the beautiful envelope die cut as if its gift of flowers.
So do have a look.


Instructions

The finished card measures 7 inches by 5 inches.
Emboss the card front in an embossing folder.
Distress lightly with shabby shutters distress ink and Memento Angel Pink ink. Distress the edges with Abandoned Coral Distress ink.
Cut a die cut from Dual Stitched Rectangle Die and adhere on to the card front.
Cut a die cut from the Envelope die . Fold and stick in the middle of the rectangle die.
Add some hay fillers inside the envelope and add the flowers and leaves.
To make the flowers, Cut them using the 3D flower die and colour with Abandoned Coral Distress ink. Apply Crackle Medium on the flowers and apply glass glitter. Layer them when dry.
The leaves and green flower are cut from the pattern paper from my stash and then spray green mist on them . Use them when dry.
Arrange all the flowers and leaves as shown. Add a double layer of bow after colouring it with Abandoned Coral Distress ink.
Add a Sentiment.

CottageCutz dies used.


You still have time to enter in the Fall theme challenge here

I hope you liked my card. Do leave your feedback.


Wednesday, June 29, 2016

Hello

Hello everyone,

It is Donna here, have you seen the June release of the CottageCutz dies, you will find houses, trees, cars, trucks, clouds, furniture, vintage phone and tv and so much more!  Wow what a release.  I am using the "Vintage TV & Phone" die to make my card.  

My card is an A2 card, I cut my first layer 4 1/4 x 5 1/2.  I cut the blue layer from the double-stitched Rectangle set.  I then cut a tag out from the Mail Tag Set twice and used just the top part of the top layer of the tag.  I the die cut the phone out of black and grey, there are three parts to this phone.  I popped up the phone with foam tape and added some stripe to the back of "hello" to give it some dimension.  I finished off the card with ribbon and twine.


Closer look at the phone and hello.


I hope you will take the time and check out the new release. Also, there is time to play along with the CottageCutz challenge. The theme is POCKET. You can linked your project here. And please, use only Scrapping Cottage dies.

List of dies used: