Showing posts with label double stitched rectangle set. Show all posts

Monday, September 23, 2019

May the Joys of the Season Be With You

Hello!  This is Sukie and today I have another card to share featuring the new Christmas dies.  This sweet winter scene was created with the Polar Bears w/Birch Trees die set.
I kept all of my die cuts very basic using white card stock with a pop of colors on the polar bears. The frame is from Nested Stitched Scallop Rectangle set.  I gave the die cuts a bit of inking on the edges to keep them from blending into the background.
I used a polka dotted pattern my card base and inked the white rectangle frame with some Oxide Ink.
The Winter scene was pulled together inside the frame with the polar bears at the focal point.  I trimmed the snow mounds so they would fit perfectly in the rectangle.  The tiny heart was adhered on one of the birch trees.
The sentiment is from the Scrappy Moms (retired) Merry Kissmas stamp set.  The sentiment was accented with a small twine bow created with some Totally White Trendy Twine.
Here are the dies used on my card, available in the shop:

Wednesday, September 11, 2019

Scarecrow Card

Hello!  This is Sukie and today I have a fall card to share.  I'm excited for fall which is just around the corner.  It is definitely my favorite time of year and I absolutely love crafting for the holidays!
When I selected the papers for my card, I wasn't sure how well they would work together even though they were in the same paper stack. However, with the coordinating die cuts, everything pulled together perfectly for a cheerful fall theme.
I used the Harvest Scarecrow, Double Stitched Rectangle Set and the Circle Set dies to cut out all of the elements for my card.  I inked the circle with some Fossilized Amber Oxide Ink.  Each of the die cuts were also inked on the edges for added dimension.
I built my card base by layering the rectangle frame at an angle.  The inked circle was placed over the rectangle to break up the pattern.
The scarecrow was centered on my card base and surrounded by the large sunflowers.  All of the details in this die set created the perfect fall scene.
The plump pumpkins were the finishing accents.  I opted not to add a sentiment on my card so as to not distract from all of the details on my card.
Here are the dies used on my card, available in the shop:

Monday, April 23, 2018

Friendly Llamas

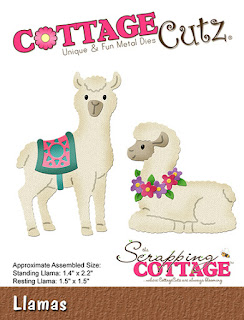
Hi, Lois here today with another card using one of the CottageCutz Llamas and Botanicals dies.  You might want to check them out while they're still 25% off.  I used the die with two llamas for my card.  Again, I used one of Splitcoaststampers old sketch challenge layouts as my starting point . . .


. . . rotating it for my card.


To begin, I cut all the elements of the Llamas die from white cardstock.


I then colored the pieces with my Copic markers and "built" my llamas.


Then I cut my cardstock as follows:

Turquoise cardstock - 8 1/2" x 5 1/2", scored at 4 1/4"
                                    3 1/2" x 2 1/2"
White cardstock - 4" x 4" and 3 1/2" x 4"
Dark patterned paper - 3 1/4" square
Light patterned paper - 3 3/8" x 2 3/8"

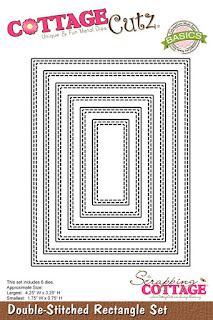
From the two small white pieces of cardstock, I cut the largest Double-stitched Square and the 2nd largest Double-stitched Rectangle.


I then constructed my card following the sketch.


After stamping the small sentiment at the top right-hand corner of the yellow panel, I placed foam pop-dots behind the two llamas and placed them on the card, adding a bit of shadowing beneath them with a gray marker.  My card was complete.


CottageCutz dies used on this card are:

http://www.scrappingcottage.com/cottagecutzllamas.aspx

http://www.scrappingcottage.com/cottagecutzdouble-stitchedsquaresetbasics.aspx


http://www.scrappingcottage.com/cottagecutzdouble-stitchedrectanglesetbasics.aspx


Wednesday, February 28, 2018

One Die Used Five Ways - Spring Tree of Life

Hello! I hope today finds you happy and in a creative spirit.

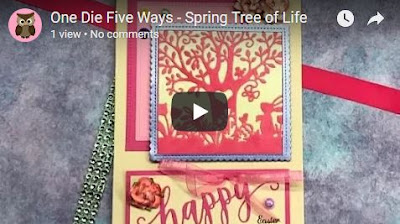
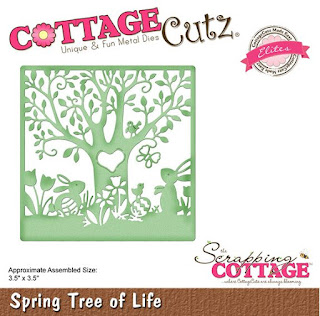
In today's video, I've demonstrated five different cards using the same new spring 2018 die, Spring Tree of Life. I really love CottageCutz's single pass dies and when I saw this one in the new release, I couldn't wait to use it.

Why do I love this style so much? Let me count the ways. First, they are super quick to cut. Just one pass through your machine and they're ready to use on your project. Second, they have such amazing detail! The art is always exquisite. Third, you can use them in so many ways and get so many different presentations out of them. How many? A lot. The video today shows five but I'm sure you can think of even more. The photo below shows my favorite of the set. I flocked the die cut for a soft and unique look. The others are different styles and size and include a few other spring dies as well.


Click on the thumbnail below or on this link to access the video.


I hope you get some great ideas to inspire you in your creative journey. Have a fantastic day!

Janet
SugarShine Designs

Dies Used In Today's Video:


Friday, January 12, 2018

Bouquet of Hugs

Happy Friday! It's Jeanne posting today.  I wanted to bring some sunshine to winter so I thought a bouquet of flowers would be nice.
Like many of my cards, I have a general idea of what I want to do but pick colors based upon one element.  In this case I knew I wanted to use this paper, so I picked the flower colors based on that.
The card base is A2 in size and I cut a panel of the floral paper to 4 1/4 x 5 1/2 inches.  I used the largest of the Double Stitched Rectangle dies for my top panel.
I measured the washi tape for the side (it was 1/2 inch) and trimmed almost that much from the floral panel.  I stuck the washi tape down to the side of the card and then glued the floral panel on top.  I overlapped the washi tape just a very little bit.
Next I die cut the flowers, foliage and vase out of various colors  of card stock and vellum.
I used Distress Oxide inks to color the edges and centers of the greenery and flowers.  I also used the Antique Linen on the sides of the stitched panel.
I used washi tape to temporarily hold down the vase while I glued the stems underneath.  Then I used Ranger Multi Medium Matte to glue down the vellum over the stems.  I used a VERY small amount.  This is the only glue I have found that doesn't show through the vellum.
I removed the washi tape and added the foliage and flowers.  I used an adhesive sheet on the back of the gold card stock before I cut it with the sentiment.  When I placed the sentiment on the card I overlapped the vellum vase and this helped hold that down.  The flowers on the top did the same thing to the top of the vase.

I adhered all layers together and used a few sequins for a bit of sparkle.
http://www.scrappingcottage.com/cottagecutzflowerbouquetjar4x4.aspx

http://www.scrappingcottage.com/cottagecutzdouble-stitchedrectanglesetbasics.aspx

http://www.scrappingcottage.com/cottagecutzexpressionsplushugsphrase.aspx

Thanks for stopping by - I hope you find time to do something creative this weekend!