Showing posts with label box card. Show all posts

Sunday, September 04, 2022

Labor Day SALE and a Bday Box Card

Happy Labor Day Weekend friends!  Kris here with a Birthday Box Card that I made for my daughter who loves cows and she was so excited to get this!  Before I get to it, I want to remind y'all of the BIG LABOR DAY SALE!! Up to 65% OFF so many dies -  Sale ends Thursday, September 8, 2022 at 9:00 PM Pacific Time so HURRY OVER and save!!!  

Also - be sure to check out our NEW CHRISTMAS RELEASE which is also on SALE!

I purchased these adorable Country Farm Cows at last year's Labor Day Sale & right now ALL of the dies I have used on my card today are 40-60% OFF (except the balloon on the back as it's retired.)  I have listed and linked all the products I've used on my card at the end of this post! ☺


This next one is of the BACK of my card - empty space to write a personal message.

And yes it does fold flat to fit into an envelope! 


Design Steps:

1.  I cut a white rectangle using the largest die from the Nested Wacky Stitched Rectangles - then stenciled some clouds with Tumbled Glass Distress Oxide ink.  *Optional:  I then cut off 5/8" from the bottom of my rectangle to fit the size card I was wanting to make, but it's not necessary.


2.  I cut a piece of blue cardstock at 3-1/4" x 4-7/8" and mounted my cloud layer on top.  *If you didn't want to cut the bottom off of your cloud layer in step #1, then you would cut your blue piece at 3-3/4" x 4-7/8" ☺


3.  I cut (2) pieces of green at 2-1/2" x 1-1/4" - then scored 1/2" from each end and mitered the top of flaps.  These are my side pieces.

4.  I cut a piece of green for the front of box at 1-1/4" x 5"


5.  I cut a couple different colors of green (can be all one shade) into strips at 5-3/4" x 1-1/2" and scored 3/8" in from each end.  These are the inside "shelves" that we will attach our cows to later. 


6.  I then used various dies from the Hills Slimline set to cut the very tops off of each shelf piece.  


7.  I then cut the side flaps down along the score line as shown below:


8.  Next, with my 2 side pieces, I glued the left flap to the bottom left edge of my cloud piece, and the right flap to the bottom right edge of same piece as shown below.


* For the next few steps, we're not going to do anything with that right flap.  Just going to work on the left side.

9.  I added glue to the left flap of my side piece and attached the left side of my front piece.


10.  Decide which hill you want to be furthest back and add glue just to the left flap and bump it up to the score line of your side piece as shown below, making sure the flap is below the top edge of your side piece.


11.  Fold that hill over to the right and add glue to just the left flap of your middle hill.  Then attach it up to the scored line of the back hill as shown below.


12.  Fold that hill over to the right and repeat for the front hill.


13.  Add glue to ALL 3 tabs on the hills fold your right side piece over onto them.

14.  Add glue to the flap of your right side piece and attach your front panel onto it.


15. Die cut a fence using the Farm Fence Slimline die.  Add glue to the back leaving the top horizontal beam w/out glue as it will be sticking above your green front piece a li'l bit.  Attach to the front panel. 


16.  Die cut, color and piece together Savanna trees, Country Farm Cows, and Happy Birthday w/ Shadow.


17.  I added glue just to the lower portion of my sentiment and attached it to the top of my card base as shown below.

18.  I attached my die cuts to the various hills as shown.


19.  For the back of card, I cut a white piece as in step 1, cutting off 5/8" from bottom.  Then I cut a piece of green cardstock cutting the top with a Hills die and the bottom portion with the same Nested Wacky Stitched Rectangle die.  I also cut a cute balloon and done!

Here are the Products I Used:


THANK YOU for taking time to visit today!  I hope I inspired you to make a box card with your favorite CotageCutz dies!  

I'll be back tomorrow with a card from the NEW CHRISTMAS RELEASE!

~Kristine

Sunday, July 03, 2022

Berry Sweet Box Card

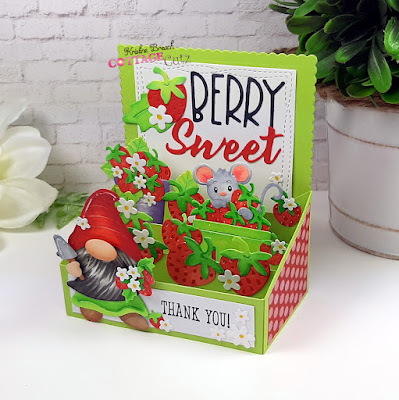
Hello and happy Sunday!  Kris here to share a "Berry Sweet" and easier-than-it-looks box card with you showcasing the NEW Strawberries & Bees release!  

Before I get to my project, I just want to say.... NOW is the perfect time to go shopping as this whole release is 50% off for a limited time.... individual dies in this release are 30% off.... and the store is having a huge 4th of July sale going on with up to 70% off other dies! Run, run -it won't last long ☺

Okay, onto my card...


CUTTING & SCORING

I began with the fun stuff first ... die-cut all my cute images and sentiments from white cardstock, colored with alcohol markers and pieced together.  Next, onto making the box!

BACK: 
Green cardstock:
•  Die-cut (1) using largest die from the Nested Scalloped Rectangles - then, trim off 1/4" from the bottom 

White cardstock:
•  Die-cut (1) using the 2nd from largest Wacky Stitched Rectangles

SIDES:
Green Cardstock:
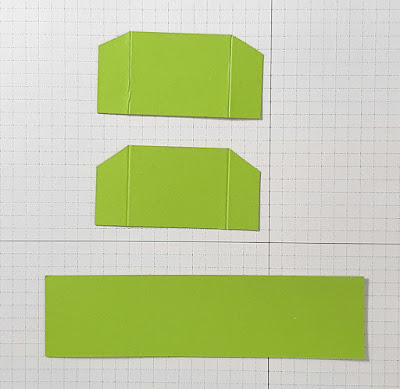
•  With paper trimmer, cut (2) 2-3/8" x 2" and score at 3/8" on just one of the 2-3/8" sides.  One of the sides will have the score line on the LEFT, and the other one will be on the RIGHT (see photo below). Then, measure down 1" on the opposite side from the score line and place a pencil mark.  Cut from the TOP of the score line diagonally down to the mark.  Repeat on other piece.

From patterned paper:
•  Cut (2) 1-3/4" squares.  On one side, measure down 7/8" and place a mark.  Cut from top of the opposite corner down to the mark. *On other piece, you'll cut from the other corner.  (See photo below)

FRONT:
Green Cardstock:
•  Cut (1) 4-1/4" x 1" and score 3/8" from each end

White Cardstock:
•  Cut (1) 3-1/4" x 3/4"

MIDDLE SHELVES:
Green Cardstock:
•  Cut (3) 4-1/4" x 3/4" - and score at 3/8" from each end.  Miter the top only of each of the 2 scored flaps on each shelf.  (see photo below)


ASSEMBLY:

1.  Glue your patterned papers onto the side pieces.  Add glue to the flaps and adhere to the front lower sides of scalloped piece so that they both angle down towards the center of card.  The scored line of flap is FLUSH with the scallops, and the bottom edges are aligned.


2.  Adhere white Nested Wacky Stitched Rectangle to the front center, paying attention to the top and side borders for placement - not the bottom as remember we cut off 1/4" ;)


3.  Stamp on the front white piece if desired, and  adhere to FRONT green piece.  

4.  Add glue only to the LEFT flap of your FRONT piece and adhere the left side piece so that it bumps up to the score line, not over it.  


5.  Open that side & front piece to the left while we work on the middle shelves. 

6.  Add glue to just the left flap of one shelf, then bump it up to the score line (of the side piece), making sure that the top of your shelf is below the edge of the side piece.  You can click on the pic to enlarge if needed.


7.  Fold that first shelf over to the right and leave it there.  Do not attach the other end - we'll do that after all our shelves are in. 

8.  Add glue to the next shelf, and place it according to the photo below, again, making sure the top of the shelf is lower than the edge of your side piece.


9.  Fold that shelf to the right as shown and continue with the 3rd shelf. 

10.  Fold all shelves and front piece to the right and add glue to the remaining flaps.


11.  Fold your right side piece over flaps, aligning that front piece, and rub to adhere.


12.  For the very BACK of my card, I die-cut another Nested Scallop Rectangle, in red this time, and another Nested Wacky Stitched Rectangle (same size as the front back piece), stamped it and adhered, lining up the scallops.


13.  And lastly, add your decorative die-cut elements for a BERRY SWEET box card that folds flat to mail in a regular A2 sized envelope!


I hope I've inspired you to try this or your own creation using our new

~Kristine

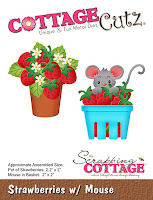
Here are the products I used today:


Thursday, March 23, 2017

Woodland Box Card

Good Morning Scrapping Cottage Fans!

It is Pam sharing with you today!  I really love the Cottage Cutz dies. They are extremely detailed and make such sharp wonderful cuts!  I love to create little scenes so I am sharing a A2 size box card with you today.

Here are my design steps:
Start with a 5 1/2 x 9 inch piece of kraft card stock.  Score with paper placed horizontally on the scoreboard at 2 1/8, 4 1/4, 6 3/8, and 8 1/2.  Then flip card stock vertically on the scoreboard and score at 2 3/4
 On the top half of the card cut down to the center line and stop. On the bottom half on the 1/2 inch score line make a diagonal cut all the way to the top and remove that piece as shown
Green mats (2 Pieces) 2 x 5 3/8 glue the mats to the card closest to the 1/2 flap on the front and the back. These pieces of the box will not bend

Cut the green mats for the rest of the box (9 pieces) 2 x 2 5/8. Glue the green mats to the outside of the box as shown below
 Glue the rest of the green mats to the inside of the box as shown below. The bottom that is not covered is the inside of the box which will not be seen
 Cut one piece with white card stock 1 7/8 x 5 1/4 for the outside of the box and glue down.  This is where you will stamp your sentiment and sign your name. You should do your stamping and signing now because it is much easy at this point
 Cut one piece of designer paper 1 7/8 x 5 1/4 for the inside of the box and glue down
 Cut designer paper (3 pieces) 1 7/8 x 2 1/2 glue to the inside of the box
 Cut different designer paper (6 pieces) 1 7/8 x 2 1/2 glue to the outside of the box
 Using a sturdy tape place several pieces of tape to the small flap and close up the box.  Make sure that you have the side of all the rectangles covered with designer paper on the outside of the box


 Cut (2 pieces) of kraft card stock 3 x 1 score them on each end 1/2.  Fold them and add sturdy tape to each folded end as shown below
 Place the first brace toward the front of the box as show making sure to really press down the tape
 Place the second brace about an 1 1/4 behind the first brace as shown
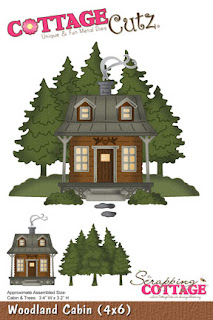
Using the following dies: Rustic Sign and Trees for the big darker green tree and bunny, Woodland Cabin for the ground, trees in the background, Garden Accessories for the fence, vines, and flowers, -Seasons Greetings for the deer, Thanks for the sentiment.  I inked many of the pieces for some added depth.

 To begin assembling I glued down 4 pieces of ground for all of the braces and the front and back, then the background trees, added the dark green tree and the deer to the back brace, next I added the fence to the front brace, the bunny and all of the yellow tulips and last I added the vine with the red flowers.


For the final touch I added the Thanks and the raffia bow!


I hope you enjoyed looking at this little woodland scene!  It was really fun to create. Give it to someone special. They will love receiving this awesome surprise!

Blessings
Pam