Showing posts with label Winter Window. Show all posts

Thursday, December 10, 2020

Santa and Reindeer

Hello Scrapping Cottage Friends

It is Pam on the blog today.

I am continuing to make a few more Christmas cards for friends and family.  Believe it or not I am almost finished.  My family all live back east so I need to get them in the mail very soon.   I am using a few new dies today to create this fun flip/swing card. There is also a cute surprise on the inside!

Design Steps:
1.  Use the Santa Reading to His Reindeer die and cut out all the pieces.  I used mainly Kraft and white card stock then colored the different pieces as needed
2.  Shade the pieces and then assemble with a fine tip glue
3.  Create the base of the flip card.  There are a number of great videos on YouTube to create the base.  Just type in flip card or swing card.  I used designer paper to create the layer of snowflakes and glitter paper for the snow on the bottom.  Glue the DP to the flaps and the snow to the bottom

4.  On the right side I popped up two deer as shown
5.  On the left side I popped up the largest deer and I cut a circle for the center using the snowflake DP and the Cross Stitched Circle die.  I also cut white glitter card stock using the Santa's Express Tag and glued it to the cross stitched circle
6.  When you flip open the card you will see Santa.  I colored him with copic makeres and nudged him a little off center so the card would flip.  For the Ho Ho Ho I used part of the Hot Cocoa Tag and just cut away the HO cutting it three times. Add a few snowflakes cut from the Winter Window die.  Stamp the Merry Christmas and your card is complete

CottageCutz Products


This was a fun card to create.  I will probably send it off to one of my fellow card makers! Thanks so much for stopping by.  I really appreciate it!

Blessing
Pam


Friday, November 15, 2019

Holiday Hedgehog

Happy Friday!  It's Jeanne today with a CAS card using the adorable Holiday Hedgehog die.  This die is perfect for the holidays, winter or anytime (just remove his hat and scarf!)
I started by cutting all the pieces from white card stock using the Holiday Hedgehog and Winter Window dies.

I colored the hedgehog using Distress Oxide inks.
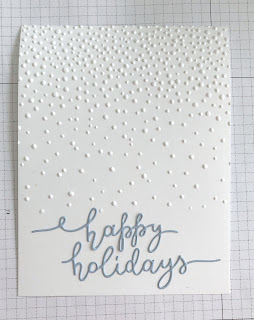
For the background, I wanted to use an embossing folder that reminds me of falling snow, but I didn't want the embossing to go all the way to the bottom.  So I partial embossed a 4.25 x 5.5 inch panel.
I laid out my sentiment (but did not adhere it) and marked where I wanted the embossing to end...
then I ran the panel and folder through my die cutter with the embossing mat over just a part of the folder.
This kept the bottom from being embossed so I could glue down my sentiment.
This card is also for a sketch challenge at CAS Colours & Sketches and they asked that the angular feature be kept.  This is actually fairly simple.  Just lightly draw a cross with the intersection at the mid point of each line then cut from point to point.
You can get a diamond shape of any size doing this.  (If it weren't for the challenge I would have used an oval die for the background of the hedgehog.)
The hedgehog panel is popped off the card using foam dots and  the snowflakes are covered in covered in Wink of Stella.

Dies:
http://www.scrappingcottage.com/cottagecutzholidayhedgehog.aspx
http://www.scrappingcottage.com/cottagecutzhappyholidayspolarbears.aspx
http://www.scrappingcottage.com/cottagecutzwinterwindow.aspx

Thanks for stopping by.  I hope you have a fun and creative weekend!

Monday, November 11, 2019

Group Post Samples


Hello Scrapping Cottage friends! Thanks for taking the time to stop and visit today. We are sampling DT cards for the next 6 Mondays using dies from the Christmas Part 2 release.

There are 34 new designs in this release. This release has something for everyone. So if you prefer a more religious tone to your cards- we have you covered. If you like a more whimsical design featuring Santa, reindeer, gnomes, moose or even a hot chocolate theme you will find some really cute dies.
  
We thought you might like to have some new and creative ideas for your Christmas cards using the Part 2 dies. So let's get started with the cards for today.

Card 1:  Our first sample is from Sukie Dhillon. She used the Let's Bake Cookies die and combined it with the Winter Window die to create this festive card. The embossed brick background serves as the backdrop for the bake shop window.  The cookie bowls are stacked with the adorable reindeer nestled inside.  The utensils and shaped cookies make for the most adorable embellishments.  The tiny tag is the perfect finishing touch on a card designed for the baker friend or family member.
 
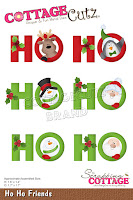
Card 2: Our next sample is from Anja Zurga. She used the new Ho Ho Friends die and combined it with the Happy Holidays Polar Bears to create this fun and cheerful Christmas card. This die is perfect for a long and thin card and it will fit in a #10 business envelope. The Ho Ho phrase is colored with distress inks. The polar bears are a cute addition to the "o" part of the phrase. She added a few snowflakes with gemstone centers to complete her card.
Card 3: The last sample for today is one that I (Mary Marsh) created using the Holiday Hedgehog die. I chose my card colors based on the Splitcoaststampers color challenge #763. Our own Jeanne was the hostess for the challenge. I placed the hedgehog on a circle die that I sponged with a cloud stencil, added some ribbon where the designer paper panels meet and stamped a sentiment to complete this whimsical card.
Well that's our samples for today. I hope the team has given you some fresh ideas for a way to use these new dies. 


dies used to create cards:


Thursday, October 17, 2019

Santa with the Naughty and Nice List!

Hi Friends!

It is Pam on the blog creating with you today.

Part 2 of the new Christmas release is OUT and ready for you to take a peek.  Just go to our online store to check it out.  It is fantastic and I can't wait to start to play with all the new dies.  Be looking for the Design Team inspiration coming soon.

For today,  I am using one of the dies from the Part 1 new Christmas release.  It features Santa and his reindeer with the naughty and nice Christmas list.  Hope you are on the nice list!! Hee Hee


Design Steps:
1.  Cut your pieces out using the Santa w/List and Reindeer.  I used tan, red and white card stock.  And with some of the pieces I just colored them with my copics markers such as the green and black pieces
 2.  Shade your pieces using inks and copic markers then assemble
 3.  Using the Winter Window die cut out the window in tan card stock and the curtains in a checked DP
 4.  Darken the window the ink, cut a piece of pale yellow to back the window and glue it to the back.  Glue on your curtains
 5.  Use a white A2 card base cut a piece of brick DP 4 x 5 1/4 and a snow bank for the bottom
 6.  Glue the snow to the bottom of the brick DP and then glue down the window
7.  Use dimension tape to attach Santa and the reindeer.  Stamp your sentiment in the snow and add the snowflakes.  Your card is finished

CottageCutz Products


We are super excited about all of the new Christmas dies!  I hope you get the chance to own a few of them.  They are adorable and make Christmas cards that will be treasured by those on the receiving end!!  Thanks for stopping by today!
Blessings
Pam


Monday, October 14, 2019

Peeking Reindeer Shaker Card

Hello Cottage Cutz fans!  It's Jeanne today with an extra post for me this week.  I have a fun shaker card using the Silly Holiday Reindeer die and Winter Window along with a new die from The Christmas Release Part 2.
I colored all the pieces using Distress Oxide inks. 
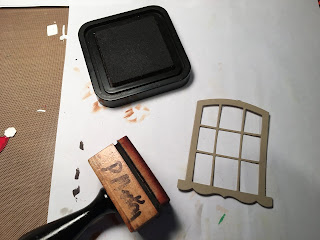
For the blue sky behind the reindeer I used the negative piece created by cutting the window as a stencil.
I lightly traced the outline of the window in pencil and glued the reindeer and snowflakes within that area.
I did have to cut off the bottom of his scarf so it wouldn't be seen under the window.
To create the shaker window I cut seven windows - one from white and colored with the DO inks and the others from a brown card stock.  I layered these brown pieces and cut out the panes.  Then I placed a piece of acetate between the top window and the stacked layers.
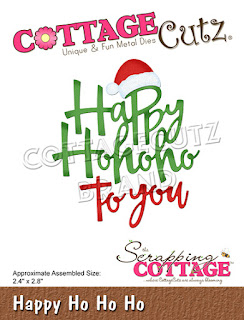
 The rest of the card went quickly.  I used the Happy Ho Ho Ho die for the sentiment and some matching green striped paper down each side.  I think it just goes perfectly for this crazy little deer peeking in the window!

Dies:
http://www.scrappingcottage.com/cottagecutzsillyholidayreindeer.aspx
http://www.scrappingcottage.com/cottagecutzwinterwindow.aspx
http://www.scrappingcottage.com/cottagecutzhappyhohoho.aspx


Thanks for stopping by.  Have a great week and I'll see you Friday!