Showing posts with label Wedding Chapel. Show all posts

Monday, July 31, 2017

A Love Story

Hi, Lois here today with a card using some of the new CottageCutz dies.  As you may know, there is another great release of new dies over in the online store. The Nested Shapes with 17 designs as well as a Wedding Release with 20 designs. Janet (CottageCutz's video artist) has put together a video showcasing all the new nested shapes dies. Just click on the photo below to be taken to the CottageCutz YouTube channel.

https://www.youtube.com/watch?v=2LOQcFflcIE&feature=youtu.be


I'm showing off several of the new wedding dies  today.  I saw a fold-out card on Pinterest a couple of weeks ago that I thought I could create -- depicting a little love story.  The card I saw on Pinterest was a birthday card; mine is a wedding card, using the following CottageCutz dies:

Pair of Doves
Wedding Chapel
Garden Bride and Groom
Mr and Mrs with Hearts
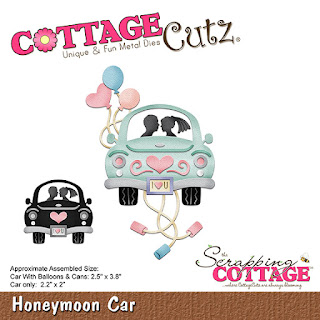
Honeymoon Car


There are many panels of cardstock on my card:

White - 5 1/2" x 11 1/2", 2 3/4" x 4 1/4", 3 3/4" x 5", 3" x 4 1/2" (2), 2 1/4" x 3 3/4" (2)
Blue - 4" x 5 1/4", 3 1/4" x 4 3/4" (2), 2 1/2" x 4" (2)
Patterned Paper - 3 5/8" x 2 1/4", 2 7/8" x 1 1/2" (2), 2 1/8" x 1 1/4" (2)


Cut the various die-cut pieces from white, blue, gray, pink, and black cardstock, as shown.


Score the 5 1/2" x 11 1/2" piece of white cardstock at 1/4", 3 3/4", and 7 1/4".


Rotate the cardstock  and, with the 1/4" scored side at the top, place it at the 5/8" mark of your paper cutter and cut down to the last score line.  Cut out the 5/8" section, as shown.


Place a strip of 1/8" Scor-tape on one side of the 2 3/4" x 4 1/4" piece of white cardstock and adhere to the 1/4" section.  Trim the excess 1/4" strip at the top, as shown.


Adhere the various pieces of patterned paper to the remaining white panels and run a piece of narrow blue ribbon around the top of the patterned paper, adhering at the back.  Add some color to the die cuts using Copic markers to give some dimension and construct the die-cuts on the white panels. (As I was constructing the chapel, I decided that I needed a couple of yellow pieces for the windows.)  Then adhere the white panels to the blue panels.


Stamp the small sentiments to several of the panels and adhere to the card base.  Add some pearls throughout.


CottageCutz dies  used on my card are:

http://www.scrappingcottage.com/cottagecutzpairofdoves.aspx

http://www.scrappingcottage.com/cottagecutzweddingchapel.aspx

http://www.scrappingcottage.com/cottagecutzgardenbrideandgroomelites.aspx

http://www.scrappingcottage.com/cottagecutzmrandmrswithhearts.aspx

http://www.scrappingcottage.com/cottagecutzhoneymooncar.aspx


Thursday, February 21, 2013

Wedding Chapel


Happy Thursday everyone!

Kathy with you today!  For my project, I have a center step card I made using two of CottageCutz's Dies, Wedding Chapel and Blossom Branch.   I just love these dies, they are so much fun to work with!


I cut out all the pieces with white cardstock and colored them with inks using sponges and make-up applicators. Some of the pieces were shaped a little with a molding mat and stylus. Here's a close-up of the die pieces. I love how the flowers came out with the blue ink and liquid pearls.


These are the CottageCutz Dies that I used.


I hope you like my project and it give you a little inspiration for using these dies!