Showing posts with label Under the Sea. Show all posts

Thursday, June 29, 2017

Beautiful Sea!

Good Morning!

It is Pam sharing with you today! I hope you are having a fantastic summer.  I live in the Hilton Head area so we have a good number of tourist coming to visit.  And the biggest draw is the beautiful Atlantic Ocean!  So I thought I would do an ocean themed card inspired by our beautiful sea!


Here are the design steps:

1.  Use inks on watercolor paper direct to paper then use water and a stipple brush to move the ink around on the paper
2.  Distress the edges of the paper and use distress ink on the edges
3.  Use a stencil and translucent embossing paste to create the bubbles
4.  Glue Prills to the bottom of the card to create the sand
 5.  Use Kraft card stock and cut out the Cottage Cutz Sand Dollar and Sea Horse
 6.  Ink the Sand Dollar and Sea Horse then splatter with a dark brown ink

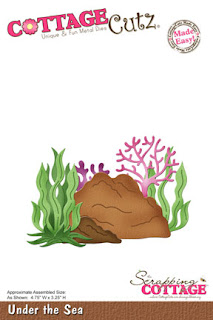
7.  Cut seaweed using the Under the Sea die and ink the seaweed.  Attach a piece of cheese cloth that has been lightly inked to the center of the card. Then attach all of the dies.  Last splatter the entire card with dark brown ink


I hope you take a walk outside and let nature inspire you!

Blessings
Pam


Monday, June 19, 2017

Under the Sea Joy Fold Card

Hi, Lois here again with my Monday card.  Last week  I saw a card which was a variation of the Joy Fold card.  Instead of a horizontal opening, it had a vertical opening.  I haven't made a Joy Fold card in a while, so I decided to make one for today, using this vertical opening technique.  I used a bunch of "under the sea" dies from CottageCutz, along with one of the new Expressions Plus dies -- "imagine."


To start my card I cut two pieces of teal cardstock, one piece 8 1/2" x 5 1/2", scored at 5 1/2"; the other one 4" x 8", scored at 4".  I also cut three pieces of swirly blue-green paper:  5 1/4" x 5 1/4", 5 1/4" x 2 3/4", and 4" x 4"; and three pieces of "sand" paper 5 1/4" x 2 3/4", 5 1/4" x 2 1/4", 3 3/4" x 1 1/2".  I also cut one 3 3/4" x 3 3/4" white cardstock.


I tore across the top of the three pieces of "sand" paper and adhered them to the three pieces of blue-green paper.


Next I cut my die-cut images.  You will see that I cut two pieces each of the mermaid, the sentiment, and the waves.  You will understand this duplication as the card is constructed.


I adhered the patterned paper and one of the "imagine" die-cuts to my card pieces.


Next, I lined up the sand on the 4" x 4" card with the sand on the bottom panel of the card base and glued it down.  I did put some Scor-Tape on the back of the 4" x 4" card at the top to make sure of a good adhesion over the sentiment.


Here is where you discover why I cut two "imagine" sentiments.  Lining up the word with the one already on the card, I adhered it onto the smaller card and cut off the excess.  I will admit that this looked better in my head than what actually occurred.


Then, using  Copic markers,  I colored the mermaids, the shells and the seaweed . . .


. . . and adhered them to the front of the card.   As you can see, I poked out the pieces of the mermaid tail and hair and inserted the lighter blue and darker hair pieces into the other one.


The wave die-cut was not quite long enough to span the full 5 1/2", so I had cut another shorter piece of that wave to make up the difference.  After getting the size correct by overlapping and trimming the smaller piece, I adhered the wave across the fold-up panel on the front.


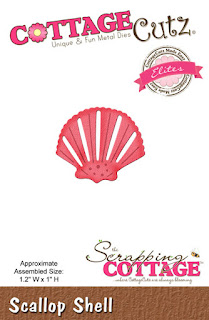
I had run  two of the shells through my Xyron X sticker maker so they would adhere well.  The third one (the scallop shell) was adhered with a medium glue dot.  This one is used as the "closure" on the left side of the 4" x 4" panel.

I then adhered the white panel inside the 4" x 4" section and stamped a sentiment and shell border.


And that completed my card.


CottageCutz dies used on this card are:

http://www.scrappingcottage.com/cottagecutzexpressionsplusimaginephrase.aspx


http://www.scrappingcottage.com/cottagecutzmermaidelites.aspx


http://www.scrappingcottage.com/cottagecutzconchshellelites.aspx


http://www.scrappingcottage.com/cottagecutztrumpetshellelites.aspx


http://www.scrappingcottage.com/cottagecutzscallopshellelites.aspx


http://www.scrappingcottage.com/cottagecutzunderthesea-2.aspx

http://www.scrappingcottage.com/cottagecutzwaveborderelites.aspx


I hope you liked my card today.

Tuesday, June 06, 2017

Memories

Hi, Janja here!

I think it is a good time to show you the card, that I created some time ago. At the bottom I added the word - memories from the new Expressions Plus release.


Supplies:
- CottageCutz dies: Memories Phrase, Wildflowers 1, Wildflowers 4, Wildflowers 5, Lighthouse w/Clouds (seagulls), Under the Sea (rocks)
- white card base: 5.3 x 5.3" (13,5 x 13,5 cm)
- watercolor paper: 4.2 x 4.2" (10,7 x 10,7 cm)
- white and dark gray cardstock
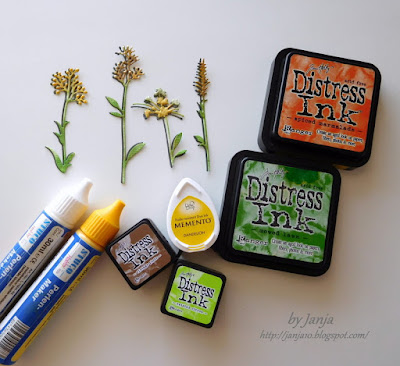
- Distress inks: Spiced Marmalade, Twisted Citron, Mowed Lawn, Vintage Photo, Broken China, Faded Jeans, Stormy Sky, Hickory Smoke
- Memento ink Dandelion

To begin, cut out wildflowers, rocks and seagulls with dies. Use white and dark gray cardstock for wildflowers.
Also cut out word memories from white cardstock.


Distress white cutouts with Distress inks. Glue them together with gray cutouts, so that they are partially overlapped. Apply white and yellow pearl dots.


Draw the sea and the sky on the watercolor paper with Distress inks. Once the paper is dry, trim it to the correct size.


To complete the card, mount all the elements as shown on white card base with a wooden embossed finish.


CottageCutz now has an Instagram account
Follow us on Instagram. 

Thank you for coming over and have a lovely day.