Showing posts with label Tropical Bouquet. Show all posts

Friday, August 21, 2020

Sunshine and Pink

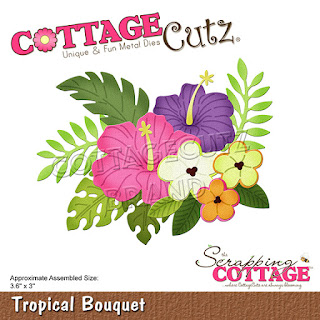
Happy Friday!  It's Jeanne today with another tropical card.  I love the sentiment on this card - probably because I love the sun and I love the color pink!  I used the Flamingo with Hibiscus and the Tropical Bouquet dies from the new release. Tropical Bouquet is one of my all time favorites!  It features two flowers I love; hibiscus and plumeria.  On today's card I used the plumeria.  They are gorgeous, easy to create and add a special touch to any card!
To start I cut the flamingo using Flirty Flamingo cardstock, as well as a light pink and grey.  For the black pieces, I colored the light pink pieces with black Copic marker.
For my flowers I went into my scrap box and got several colors of pink making sure I had a variety of tones.  The plumeria have two layers - a larger bottom layer and a smaller top layer.   After gluing these two together, I used pink ink to brush the edges and added the black centers.  Super simple and very elegant.  I used the DO ink to edge my flamingo.
I cut a panel 5 1/2 x 4 1/4 inches that will be adhered to an A2 card base, and three other panels.  A white one 5 1/2 x 2 5/8 inches, a pink 5 1/2  x 2 3/4 inches and a yellow dot 5 1/2 x 2 inches.
Using a stencil and yellow ink, I created a sun for under the flamingo on the narrow white panel.
I stamped my sentiment and assembled the layers.
I added my flamingo, flowers and a few sequins.  Super easy card and perfect for anyone who loves pink, flamingos, flowers or sunshine!

Be sure to visit the online store where the new release is on sale for a limited time!

Dies:
http://www.scrappingcottage.com/cottagecutzflamingowhibiscus.aspx

http://www.scrappingcottage.com/cottagecutztropicalbouquet.aspx

Thanks for visiting today.  I hope you have a fun and creative weekend!


Monday, August 10, 2020

Tropical Birthday Bouquet


Hello Scrapping Cottage friends! Thanks for taking the time to stop and visit with us today. It's Mary Marsh here bringing you the Monday edition of the Blog.

For my card today, I am featuring the new Hibiscus Flower & Tropical Bouquet dies to create a birthday card.  There are 14 new designs in this release and they are all Tropical and Beach themed. I am finding them so easy to use for cards for my beaching loving friends and family. 

My colors for today's card were determined by the color challenge #803 on Splitcoaststampers. 
whisper white, real red, crumb cake
I love hibiscus flowers in a vibrant red color. For this challenge you can use a dark green as a neutral shade. So using these new dies to create this card was a win-win for me. I started off by stenciling an oval using the crumb cake ink. From there I layered the hibiscus and leaves around the oval. 

The sentiment is stamped in the same dark green ink as the leaves. I added some crumb cake ribbon and a few red glitter enamel dots to complete my card. That's it for me for this post. See you again on Saturday.

Just a reminder that the dies are on sale at 25% off for a limited time. 

dies I used to create card:


Wednesday, August 05, 2020

Sending You Sunny Smiles

Hello!  This is Sukie and today I'm sharing this card for my design team day.  There is a brand new release of Beach & Tropical dies which compliment the Pirates & Sea Creatures from the last die release.  Both of the die sets are currently on sale and also showcased on my card!
I cut out the pieces from the Treasure Chest Island, inked up all of my die cuts and put everything together.  I also cut out a tiny flower from the Tropical Bouquet die set.  The oval base and frame are from the Oval  and Pierced Wide Oval Frame sets.
I found this fun paper in my stash and trimmed it to fit my card base, it reminded me of a sandy beach.  I inked the edges for extra dimension.  I also stamped a sentiment on some coordinating card stock.
The oval frame was layered over the oval base and the die cut piecing was affixed to the framed set.
Next, I adhered the tropical scene on my card base.  The sentiment tag was added at the bottom of my card.
The finishing accent on this card was the gorgeous flower which was used to embellish the sentiment tag. All of the little details are amazing on this little flower!
Here are the dies that I used on my card, available in the store:

Saturday, August 01, 2020

Flamingo w/ Hibiscus (new die)

Hello Scrapping Cottage friends! Thanks for taking the time to stop and visit with us today. It's Mary Marsh here bringing you the Saturday edition of the Blog.

We have a brand new release of Beach & Tropical dies in the online store. We have 14 new designs in this release and they are currently on sale for a limited time at 25% off. They are so perfect for creating beach themed birthday cards, thanks you, thinking of you etc. Let your imagination soar! The Design Team will be giving you many ideas in the coming weeks to help spark your creativity. 

For today I am using the Flamingo w/ Hibiscus and Tropical Bouquet dies and created a birthday card. I have plenty of friends who love the beach so one of them will be receiving this card.  Let's get started on some details of how I created my card. 

Design Steps:
I decided to start with my die cuts this week because I wasn't sure of where I was going with my background. This was a work in progress. I cut my Flamingo in a medium shade of pink for her body and a darker shade for her legs. 
Then I cut some flowers in magenta and grape and the leaves in a couple of shades of green. I used the packaging photo as a guide. 
I thought I might do some ink blending and make a sky, water and sand background and then that changed direction. I decided to use this soft seafoam designer paper as the background. I cut a frame in the same shade of cardstock and the card base in a magenta shade that coordinates with the hibiscus flowers. 

Magenta card base: 4 1/4" x 5 1/2"
Soft Seafoam Frame Exterior: 4 1/8" x 5 3/8"
Frame Interior: 4" 3/8" x 4 5/8"
Designer Paper: 4" x 5 1/4"

Attached the designer paper to my frame with double sided tape. Before I stamped the sentiment I attached the leaves and flowers to the corners. I needed those in place so I could get a good placement for my sentiment. I used double sided tape and Ranger multi matte medium. 
The sentiment is stamped in a moss green ink. This shade matched the darker colors of my leaves. I also used my MISTI tool for placement and in case I needed to do a double inking. And in this case it did require 2 inkings.

I attached the flamingo image with dimensional adhesive. I wanted her lifted slightly off the background. 

To finish off my card, I scattered a few magenta enamel dots and attached the image frame to the card base. And, that's it for me for this week. I hope I have given you an idea for a fun way to use these new dies. See you next Saturday!

dies I used to create card: