Showing posts with label Thanks. Show all posts

Friday, March 03, 2023


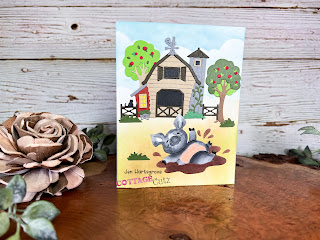
Hey Krafty Friends, Jen from Katahin Krafts, back with another CottageCutz YouTube video on the CottageCutz Channel.  I created this adorable card using the "Playful Piggies" and the "Country Farm Barn" dies. 


We have two pet piggies, Petunia and Peach.  I thought it would be fun to make the upcoming pig sitter a thank you card!  Peach is on the front of the card, and Petunia is saying thanks inside.


You can find all the card details plus, photos of the piggies over on the YouTube Channel!

While over on the channel, make sure you like and comment for a chance to win the "Playful Piggies" die!

The winner of the "Little Flowers" die from my last video is Margaret D, the details for collecting your giveaway prize are over on YouTube!  

Thanks for stopping in, and happy krafting!


Monday, May 29, 2017

Bluebell Shadows

Hi, Lois here again with another card using one of the new Expressions Plus dies.   In case you haven't seen them, be sure to check all 35 of the words in the CottageCutz store.   And by the way, there is a Memorial Day sale going on until Wednesday.  You can save up to 40%.   My card today uses one of the new Expressions Plus dies - thanks, as well as a couple of other dies.


To start my card, I cut a panel of heavyweight white cardstock 8 1/2" x 5 1/2" and scored it at 4 1/4".  Then I cut a piece of navy cardstock 4" x 5 1/4" and a piece of patterned paper 3 7/8" x 5 1/8".


I learned  a little trick on Facebook several weeks ago.  If you are cutting a sentiment die-cut, just run a strip of your cardstock through your Xyron sticker maker . . .


. . . and then cut your sentiment.  It will now have glue on the back of it and be much easier to adhere to your card.


I then cut all the rest of my die-cuts for the card.  I planned to make a shadow for my CottageCutz Springtime Bluebell Flowers, so I cut two of them -- one in pale blue and one in navy.


I took  the inner oval from the CottageCutz Oval Doily and Frame die and sponged on some pale blue ink.  This gave a little more dimension to the center section.


Then I was ready to construct my card.  I glued down the doily pieces and adhered the sentiment at the top.  I then glued down the navy bluebells and offset the pale blue ones on top, creating a "shadow" effect.


CottageCutz dies used on this card are:


http://www.scrappingcottage.com/cottagecutzovaldoilyandframe4x6.aspx

http://www.scrappingcottage.com/cottagecutzspringtimebluebellflowerselites.aspx


http://www.scrappingcottage.com/cottagecutzexpressionsplusthanksphrase.aspx

Another bit of news,  just to let you all know, we are now on Instagram. Click here to see our Posts and also to follow us on Instagram.

Thursday, March 30, 2017

Larkspur Beauty!

Good Morning to All of Our Sweet Scrapping Cottage Friends!

It is Pam today excited to share a mixed media card with you today!
At the Cottage Cutz store you will find some wonderful stamps that represent all the flowers for each month of the year!  The stamps are beautiful and have a sweet whimsical quality!

Today,  I used the Larkspur stamp which I am partial too because my birthday is in July!

1.  Started with an A2 white card base and a slightly smaller piece of deep purple card stock.  I glued the purple card stock to the front of the white card base and set aside


2.  Using a 4 x 5 1/4 piece of notebook designer paper I decided to do a bit of a mixed media background. Use TH distressed inks and sponged them onto the designer paper.  The two colors used are Peeled Paint and Seedless Preserves
3.  Continuing the process by using a stenciling and Tumbled Glass ink

4.  After the sponging to soften the look use a white acyrlic wash over the top.  Mix the white paint with a lot of water and apply one coat over the whole background
5.  Let dry then added some of the Seedless Preserves splatters.  Do this by smearing some of the ink on a plastic sheet and added water.  Then pick up the ink with a brush and tap it on your finger above the paper in different spots
6.  Let the background dry and while it was drying  color the Larkspur and Dragonfly with copic markers: Y13, 15 - V000, 01, 04, 06, 09 - YG03, 63, 67 - G21, 40, 94, 99 - E23 - B02 - C02
7.  Using the coordinating dies cut out the Larkspur and Dragonfly. Add a purple ribbon to the Mixed Media background paper then mount flat to the card front.  Add a silver cord by just taping it down. Then Using the Double Stitched Rectangle die cut a light purple piece of card stock.  Pop it to the front of the card over the silver cording
8.  Pop up the Larkspur and Dragonfly onto the die cut rectangle.  Using the same deep purple card stock cut out Thanks and glue it just above the on the right side

Here is the finished card!

Cottage Cutz Products Used in this project:


I hope you try one of our lovely flower stamp sets soon! And as always thanks so very much for taking the time to stop by today! We really appreciate it!

Blessings
Pam


Thursday, March 23, 2017

Woodland Box Card

Good Morning Scrapping Cottage Fans!

It is Pam sharing with you today!  I really love the Cottage Cutz dies. They are extremely detailed and make such sharp wonderful cuts!  I love to create little scenes so I am sharing a A2 size box card with you today.

Here are my design steps:
Start with a 5 1/2 x 9 inch piece of kraft card stock.  Score with paper placed horizontally on the scoreboard at 2 1/8, 4 1/4, 6 3/8, and 8 1/2.  Then flip card stock vertically on the scoreboard and score at 2 3/4
 On the top half of the card cut down to the center line and stop. On the bottom half on the 1/2 inch score line make a diagonal cut all the way to the top and remove that piece as shown
Green mats (2 Pieces) 2 x 5 3/8 glue the mats to the card closest to the 1/2 flap on the front and the back. These pieces of the box will not bend

Cut the green mats for the rest of the box (9 pieces) 2 x 2 5/8. Glue the green mats to the outside of the box as shown below
 Glue the rest of the green mats to the inside of the box as shown below. The bottom that is not covered is the inside of the box which will not be seen
 Cut one piece with white card stock 1 7/8 x 5 1/4 for the outside of the box and glue down.  This is where you will stamp your sentiment and sign your name. You should do your stamping and signing now because it is much easy at this point
 Cut one piece of designer paper 1 7/8 x 5 1/4 for the inside of the box and glue down
 Cut designer paper (3 pieces) 1 7/8 x 2 1/2 glue to the inside of the box
 Cut different designer paper (6 pieces) 1 7/8 x 2 1/2 glue to the outside of the box
 Using a sturdy tape place several pieces of tape to the small flap and close up the box.  Make sure that you have the side of all the rectangles covered with designer paper on the outside of the box


 Cut (2 pieces) of kraft card stock 3 x 1 score them on each end 1/2.  Fold them and add sturdy tape to each folded end as shown below
 Place the first brace toward the front of the box as show making sure to really press down the tape
 Place the second brace about an 1 1/4 behind the first brace as shown
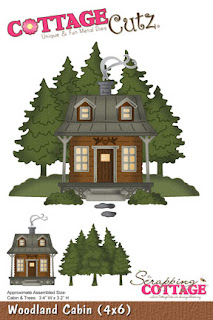
Using the following dies: Rustic Sign and Trees for the big darker green tree and bunny, Woodland Cabin for the ground, trees in the background, Garden Accessories for the fence, vines, and flowers, -Seasons Greetings for the deer, Thanks for the sentiment.  I inked many of the pieces for some added depth.

 To begin assembling I glued down 4 pieces of ground for all of the braces and the front and back, then the background trees, added the dark green tree and the deer to the back brace, next I added the fence to the front brace, the bunny and all of the yellow tulips and last I added the vine with the red flowers.


For the final touch I added the Thanks and the raffia bow!


I hope you enjoyed looking at this little woodland scene!  It was really fun to create. Give it to someone special. They will love receiving this awesome surprise!

Blessings
Pam