Showing posts with label Stitched Oval Set. Show all posts

Saturday, October 27, 2018

Stitched Snowman

Hello Scrapping Cottage friends! Thanks for taking the time to stop and visit with us today. It's Mary Marsh here bringing you the Saturday edition of the Blog. 
We have a new release of dies over at the online store. Our Autumn 2018 dies are here with 10 new designs. They are currently 25% off for a limited time.

Today's card is from the Christmas Release Part 3. There are 14 new designs in this release and any of them would be so perfect for your Christmas card making. I used the Stitched Snowman die to create a Christmas card. So let's get started with some details on my card.
Step 1: I wanted to make a card that would be easy to recreate for multiple cards. With that in mind, I kept the layout relatively simple and not as many layers as I like to use. I also wanted traditional Christmas red and green. I chose my patterned paper with these colors in mind. 

red card base: 4 1/4" x 5 1/2"
patterned paper layer: 3 7/8" x 5 1/8"
green stitched oval: used the 2nd largest die from the stitched oval set.
white oval: used the 2nd largest die from the oval set

Step 2: In keeping with my traditional colors, I used green cardstock for the snowman's ear muffs and gloves and red for the heart. Sponged a bit of soft blue around the snowman and snowbank.
I wanted the sentiment on the image panel so I stamped it with the help of my MISTI.
Then I used a snowfall embossing folder to add some background snow.
Step 3: Now that all my elements are ready, I started card assembly. I decided I wanted to add some ribbon to my card. I like using it on Christmas cards. But you could certainly skip this step to make mailing easier.
Attached my snowman image to the oval panels using dimensional adhesive. The slight lift off the background creates nice depth.

Attached this image panel to the card base. Again I used dimensional adhesive. My intent was to add a bow but I didn't like the look of a bow with this particular ribbon.
To finish off my card I added a few sequins. This was just for more of a festive look. Well that's my card for this week. I hope I have given you an idea for a way to use this super cute Stitched Snowman die. See you next Saturday.
Next week the DT will be showcasing the exclusive Dakota the Husky die in our posts. So hope you will come back and take a look at the different ways to use this new die.

Dies I used to create card:


http://www.scrappingcottage.com/cottagecutzstitchedsnowman.aspx
http://www.scrappingcottage.com/cottagecutzstitchedovalsetbasics.aspx

http://www.scrappingcottage.com/cottagecutzovalsetbasics.aspx


Friday, August 10, 2018

Christmas Cardinal

The new Christmas Dies Part 1 are in and they are FANTASTIC!  For a limited time they are 25% off as well.  Head on over the the website and check them out (after reading this post of course - LOL).  My card today features two of the new dies.
I started this card by die cutting the pieces in red, green, black and a metallic gold card stock.
I cut a panel for the front 5 1/2 x 4 1/4 inches (A2) and heat embossed my sentiment in gold.  I felt this sentiment was perfect for the cardinal.
Next I sponged the edges of the bird body and wing with the matching red ink.  This added just a little shading to him.
I assembled him and glued him to the fourth smallest oval in the Stitched Oval set.
For the flourishes in the background I cut them so that I could separate them under the oval.  Originally I was going to use all of the gold sprigs but decided that was a bit too much gold so I just snipped off the portions I wanted to use.
I glued those to the card and then die cut three more ovals from red card stock.
The ovals are stacked and glued together.
This gives just a little peek of red underneath the cardinal.  I then glued the panel to an A2 card base.

These new dies are so much fun - I'm looking forward to seeing what the design team creates!

 Dies used:

http://www.scrappingcottage.com/cottagecutzcardinalwflourish.aspx

http://www.scrappingcottage.com/cottagecutzchristmasfloral2.aspx

http://www.scrappingcottage.com/cottagecutzstitchedovalsetbasics.aspx

 Thanks for stopping by.  I hope you have a fun and creative weekend!


Saturday, May 19, 2018

Get Well Bouquet

Hello Scrapping Cottage friends! Thanks for taking the time to stop and visit with us today. It's Mary Marsh here bringing you the Saturday edition of the Blog. We are still showcasing the beautiful dies from the Mother's Day release. They are so versatile and can be used for cards other than Mother's Day.

Also, want to let you know that there is a big sale going on at the online store. You can save up to 70% on dies. Lots to choose from so make your way over there to look around. You just might find something that you can add to your collection.

For today's card, I am featuring the Mom's Garden Bouquet die and I created a get well card. I never seem to have any of this type of card on hand when I need one. And, this die has such pretty flowers that it will brighten anyone's day.  So let's get started with some details on how I created my project.

Step 1: I started my card by choosing my layout. This sketch is an older one from Splitcoaststampers. I thought it would work well to show off the floral image, allow me to use  patterned paper and possibly some ribbon.
Step 2: Once the layout was decided on, I chose my card colors. I found this floral patterned paper in my stash and that determined my card colors. 
Vanilla Card Base: 4 1/4" x 5 1/2"
Baja Breeze Layer 1: 4 1/8" x 5 3/8"
Patterned Paper Layer 2: 3 7/8" x 2 1/2"
Vanilla Embossed Layer 3: 2 7/8" x 4 1/8"
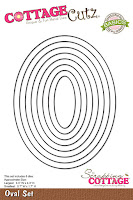
Artichoke Green Oval Layer 4: 4th largest oval die
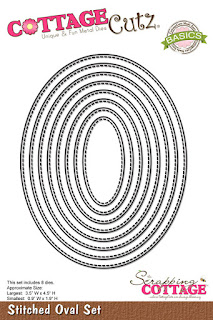
Vanilla Oval Layer 5: 4th largest stitched oval die
Step 3: I cut the pieces in the garden bouquet. Used a rose red, saffron (light yellow) and sugarplum cardstocks for my flowers. Used Ranger multi medium matte to secure.
I assembled the bouquet in the pitcher according to the packaging photo.
Then attached it to the oval using dimensional adhesive.
Step 4: Now that all the elements of my card are cut, I am ready to start card assembly.
 Attached the panels using double sided tape.
I decided to go with ribbon and used this baja breeze pleated ribbon.
Attached the oval panel using dimensional adhesive on the top and bottom of the oval. This way it will sit evenly on the ribbon.
For my sentiment, I decided to use the "feel better" phrase from the "Ouch with Tooth" die. I cut it in rose red cardstock 2x to give it a bit more dimension. Used the multi medium matte to attach to bottom of card. To complete I cut a few of the flower centers and added to the top of my card. 
 
And, that's it for me for this post. I hope I have given you some additional ideas on ways to use these dies for other card giving occasions. See you next Saturday.
 
dies I used to create card:
http://www.scrappingcottage.com/cottagecutzmomsgardenbouquet.aspx
http://www.scrappingcottage.com/cottagecutzouchwithtooth.aspx
 
  
http://www.scrappingcottage.com/cottagecutzovalsetbasics.aspx

http://www.scrappingcottage.com/cottagecutzstitchedovalsetbasics.aspx
 

Wednesday, April 25, 2018

Love Ya Mom! Botanical Mother's Day


Hello everyone! It's Janet here with a delicate botanical mother's day card. I like the mix of hard black and white with all the soft pastels that frame the Mom tag sentiment. Perhaps I should have chosen a slightly more muted yellow ribbon but in person it isn't as bright as the photo shows here.

Speaking of MotherÅ› Day, 22 new dies have just been released to celebrate the occasion. The dies are currently on sale so go check them out and take advantage of the discount. The link can be found HERE.

My flowers and greenery are all from the new Botanical Garden 1 die that is part of the Llamas and Botanicals release. Rather than color the flowers with markers, I used white panels that I first covered in blended distressed oxide inks, splattered with water to create additional texture, and then sprayed with gold glimmer spray. These panels of color created a really special array of flowers for the card. I raised the card front with the wide black frame up on foam tape to create a window which was a perfect base to arrange all the individual flower die cuts. I used the versatile Mail Tag die to use as the sentiment to tell Mom just how much she's loved.

The video shows how I created the panels, how the individual flowers go together and how I created the card front with the framed and raised front panel. You can watch the video by clicking HERE or clicking on the thumbnail below.


Thanks for spending some time with us here today. See you again soon!

Hugs,
Janet

DIES USED IN THIS CARD: