Good Morning Everyone!
It is
Pam creating with you today on the blog
I live near the beach and in the summer that is the place to be here in South Carolina! I was already to move cross country as some of you may have read in my earlier post a couple of months ago. But our house sale fell through so we are still in SC. It really is a nice place to live! But the summers are pretty steamy!! Anyway the beach is what inspired my card today. (This card was also inspired by the wonderful card maker Michelle Zindorf)
Design Steps:
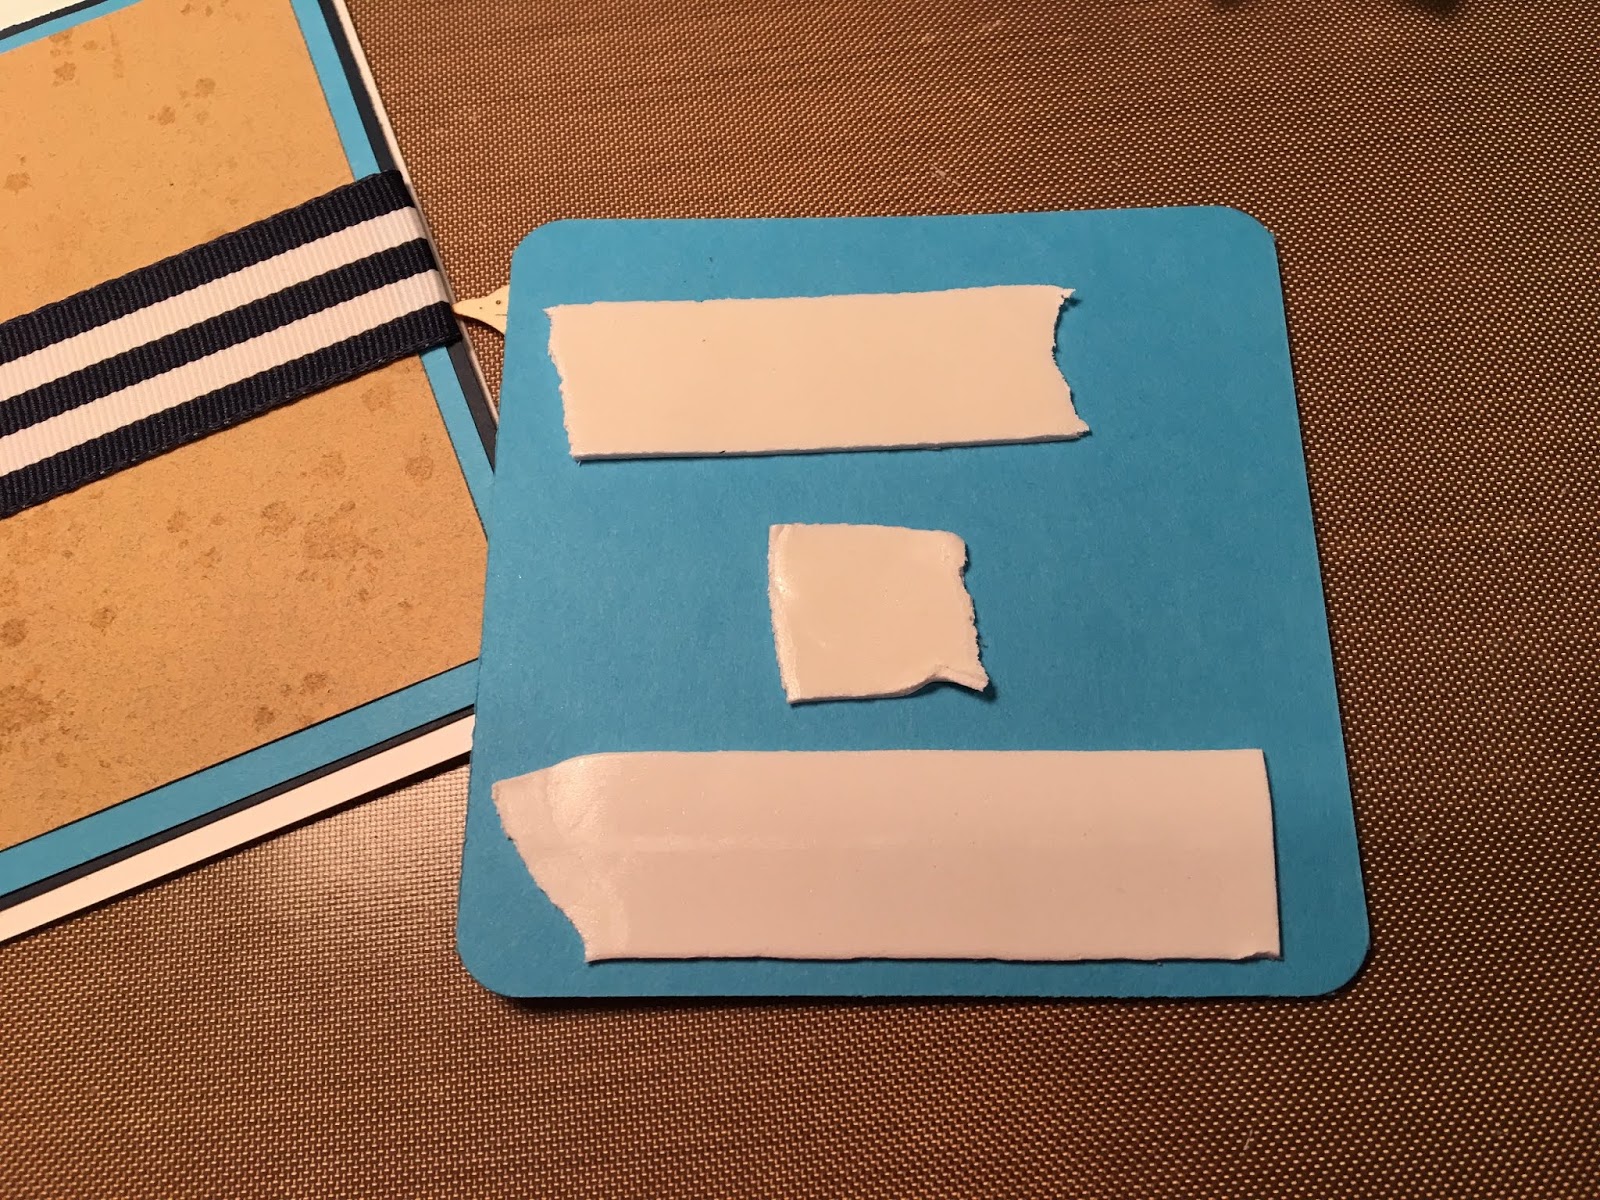
1. You will need a white A2 card base, a slightly smaller piece of navy, then a slightly smaller piece then the navy of blue, then a piece of sand card stock 3 3/4 x 5. You will also need a 3 1/4 x 3 1/4 blue square, 3 1/8 x 3 1/8 navy square and a 3 x 3 white square.
2. Stamp the sand color card stock with a bunch of splashes using Versa Mark ink
3. Glue the blue to the navy then add the sand card stock on top of the blue. Add the strip of striped navy ribbon using double sided tape
4. Attach the panel to the front of the card and set aside
5. Round the corners of all of the squares. And on the white square use blue ink spray to create a watery look
6. Stamp the sentiment with black ink. I used a positioning took to stamp it twice to get a nice dark black
7. Cut out the shells on tan card stock using the
Sand Dollar and
Trumpet Shell die. Cut the sea grass using the
Spring Meadow die and green card stock. Use TH vintage ink for the shells and grass then add a little coral ink to the Trumpet Shell
8. I then sprayed the shells with some Walnut ink
9. Glue the layers of square together and add the sea grass first then the shells
10. Pop the shell panel to the front of the card
11. For the inside I added a
Scallop Shell which I inked in the corner. Next layered the sentiment on blue and glued it to the card. Glue the panel to the inside of the card
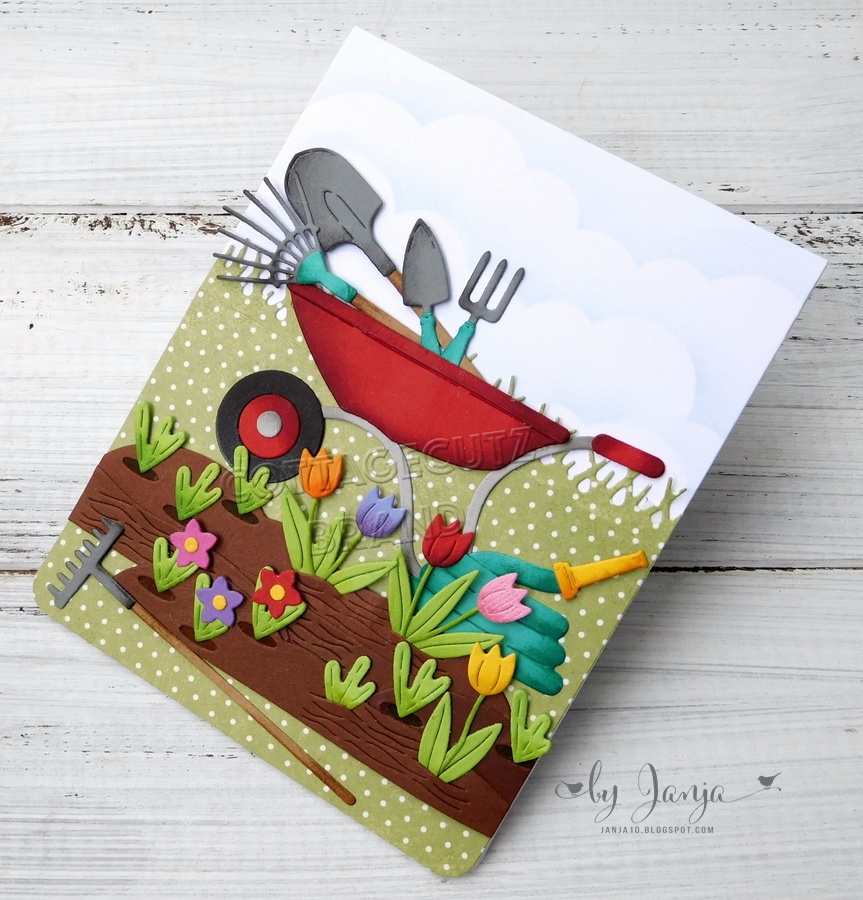
CottageCutz Products
Thanks for stopping by and make sure to check out our new release called
Magical Garden you won't be disappointed and happy summer!!
Blessings
Pam