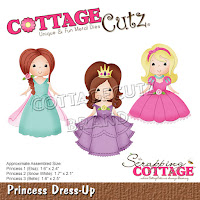
Showing posts with label Princess Dress-Up. Show all posts

Tuesday, May 14, 2019

Lovely Princesses

Hi, Janja is here with you.
For today, I prepared a quite simple birthday card. To create my card I used lovely princesses from Magical Fantasy release.


- CottageCutz dies: Princess Dress-Up, Little Princess & Roses, Horse & Carriage
- white card base: 5.3 x 5.3" (13,5 x 13,5 cm), folded
- patterned paper: 5 x 5" (12,7 x 12,7 cm)
- glitter paper
- colored cardstock
- colored ink pads
- glue, double-sided adhesive tape, self-adhesive foam pads

Die-cut the princesses and roses from different colors of cardstock. Die-cut the carriage from white glitter paper.
Add the shading on the edges with ink pads.


Prepare a white card base. Trim a patterned paper and golden glitter paper. Attach them to the card front.


Now attach all the cutouts to the background with self-adhesive pads and glue as shown.


I hope you like it.
Have a nice day.
Janja


Sunday, May 12, 2019

Little Princess


Hi!

It's Anja here. I made another card using new Magical Fantasy Designs. I combined it with a few older dies and made a card for a little princess.


For this card I used:
- Cottage Cutz dies (Little Princess & Roses, Princess Dress-Up, Springtime Window, Ivy, Dogwood Branch),
- Distress Inks (Pumice Stone, Vintage Photo, Mustard Seed, Spun Sugar, Peeled Paint, Worn Lipstick, Mowed Lawn, Tattered Rose, Shabby Shutters),
- white card base (21x10 cm),
- white card stock for die cuts and background,
- grey card stock for background,
- bricks embossing folder,
- white pigment ink,
- gold pigment ink,
- black pen,
- cutting knife,
- paper glue.

First I cut and colored the window.


Next I cut and colored the sentiment.


Then the flowers and the princess.


And last ivy leaves ...

... and two branches with flowers.


Next was the background. I cut and embossed two pieces of grey paper (10x3,5 cm). I used white pigment ink to color the bricks.


Next I cut and embossed white piece of paper (10x14 cm). I cut a square out of it using a cutting knife.


And when I had everything cut  and colored I arranged all the pieces and glued it on the card base. And my card was made.


This is all from me for today.

Have a nice Sunday.

Anja Z.

Cottage Cutz dies I used:


Saturday, May 04, 2019

You're My Happily Ever After

Hello Scrapping Cottage friends! Thanks for taking the time to stop and visit with us today. It's Mary Marsh here bringing you the Saturday edition of the Blog.

We have a new release of dies in our online store. If you haven't seen the Magical Fantasy release yet, you have to drop by the store and check it out. These new dies are all so cute and whimsical. There are 27 new designs and I am in love with everyone of them. 

The new dies are currently 25% off and in honor of National Scrapbook Day there is also a 60% off sale on select CottageCutz dies. 

Today, I am featuring the Knight + Princess Dress-Up dies. Check out the names of the princesses - Elsa, Snow White and Belle. When I saw these dies I immediately thought of wedding, anniversary or even a Valentine card. So this will be the card I will give my hubby for our anniversary. Let's get started with some details on how I created this clean and simple card.

Step 1: I decided to cut the knight and princess first so I could figure out the size on the layers. I went with the colors on the packaging for both images. Belle's dress matches the Knight's shield, banner and helmet decoration.
I colored her face and arms with Prismacolor pencils.
I then decided on my card colors. I bought this paper pack from Hobby Lobby that has cardstock that has a watercolored look to it. I chose one of the blue sheets. I wanted a green slope on the card front so I cut one from another sheet that had a green at the bottom. Layered it on white cardstock then my card base is the heather shade I used on the Knight & Princess.

Heather card base: 4 1/4" x 5 1/2"
white layer panel:  4" x 5 1/4"
image panel: 3 7/8" x 5 1/8"
With the help of my MISTI, I stamped my sentiment at the top of my designer paper panel in a grape ink. I got a good image the first time but I didn't think it was dark enough so I stamped it again. That's the beauty of the MISTI. I thought the sentiment was perfect for an anniversary card.
Step 2:  Now that the card elements are ready, I can start card assembly. Attached the grassy slope to the image panel with double sided tape. Then the image panel to the white layer.
My Knight and Princess Belle were attached with dimensional adhesive.
To complete my card, I added a few hearts and attached the card to the heather base. Well, that's it for me for this week. I hope I have given you some inspiration for a way to use both the Knight and the Princess Dress -Up dies.
See you next Saturday!

dies I used to create card:


Thursday, May 02, 2019

Fairytales!

Good Morning Friends.

It is Pam creating with you today!

I just love all of the Disney princess cartoons and this new release reminds me of all of those special fairytales! If you go to our store right now they are on sale for 25% off!  Please take some time to check them out.

Design Steps:
 1.  Using the Princess Carriage die cut all the pieces out with purple, pink, dark pink and yellow card stock
 2.  Use your favorite ink and add the shading
 3.  Assemble the carriage
 4.  Using the Princess Dress Up die cut out the girl using dark pink, purple, yellow and tan.  Shade the pieces and them assemble them
 5.  Using the Fairytale Princess die cut out the words "fairytales do come true."  I used black fun foam with an adhesive backing. I cut the words so the sticky side would be on the top.   I took off the waxy paper protecting the sticky surface from each of the words and sprinkled fine gold glitter over the sticky side.  I then burnished the glitter so it would adhere completely
 6.  Use a 4 x 5 1/4 piece of DP and glue the words to the top as shown

 7.  Glue the DP to a A2 black card base
8.  Add a piece of black card stock to the bottom to resemble rolling hills.  Pop dot the Princess and Carriage to the card


CottageCutz Products


I want to thank you for stopping by today!  We always appreciate it and look forward to your comments!
Blessings
Pam