Showing posts with label Ouch with Tooth. Show all posts

Tuesday, February 20, 2018

Get Well Cards

Hi, Janja here!

I have not managed to create with the new Spring dies, as they have not yet arrived at my address.
So, today I show you some cards I've created with Get Well dies.
With them, you will brighten the day to anyone who feels bad.


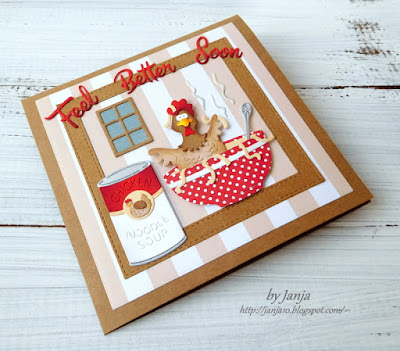
Chicken Noodle Soup from our kitchen.
Supplies:
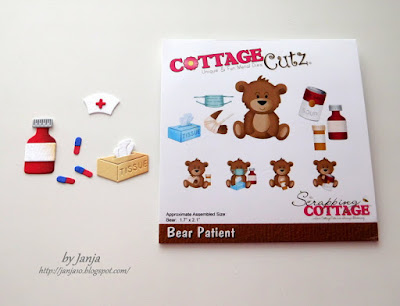
- CottageCutz dies: Chicken Noodle Soup, Bear Patient, Ouch With Tooth, Nurse Puppy, Stitched Wide Square Frame Set, Build A House Set 2 (window)
- kraft card base: 5.3 x 5.3" (13,5 x 13,5 cm), folded
- patterned paper: 4.7 x 4.7" (12 x 12 cm)
- white and colored cardstock
- Distress inks: Tattered Rose, Spiced Marmalade, Aged Mahogany, Brushed Corduroy, Vintage Photo
- double-sided adhesive tape, glue and self-adhesive pads

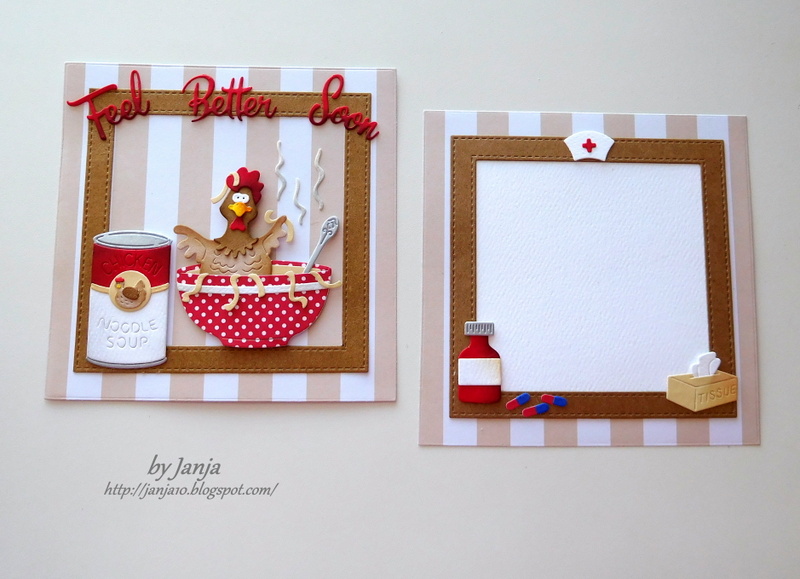
Prepare a card base from kraft cardstock, and two frames. Cut a patterned paper to the desired size. Cut a square from a white cardstock.


Cut all the individual pieces from colored cardstock. Emphasize the edges with different Distress inks.


To finish the card, mount all the elements as shown.


I added the window later. 


Inside the card. 


I embellished the glass on the window, and sentiment with a clear Wink of Stella.


For the next three cards, I used a little smaler card base 4.7 x 4.7" (12 x 12 cm).


Thanks for stopping by. Have a lovely day!


Thursday, January 25, 2018

Ouch!

Scrapping Cottage Friends!

It is Pam designing with you today! Welcome to the Blog!

My sweet sister-in-law fell on the ice while unloading groceries and broke her arm.  Luckily no extra surgery was needed and I had the perfect die to make her a get well card.


Designer Steps:
 1.  Cut out the bear using the Bear Patient die.   I cut it out several times in dark brown, light brown, yellow and white.
 2.  Use ink to shade the edges and assemble the bear.  I used a black marker to color the nose and small rhinestones for the eyes
 3.  Use an A2 white card base, cut a slightly smaller piece of blue and the another piece of DP a lightly smaller then the blue.  Cut out the scallops with a border punch and a 1/2 strip of blue

3.  Assemble the card as show then cut out the Ouch! and Feel Better Soon in white using the Ouch! with Tooth die
 4.  Cut out a rectangle second from the largest using the Pieced Rectangle die in blue.  Glue the bear and Ouch! to the rectangle and use foam to attach to the front of the card

 5.  Use the largest Pierced Rectangle die and cut out a rectangle in blue for the inside of the card.  Glue the Feel Better Soon and the can of soup which I colored with copic markers


Cottage Cutz Products


I hope this brings a smile to my sister-in-law's face! It is such a fun and cheerful card!

Blessings
Pam


Monday, December 18, 2017

Feel Better Bear

Hi, Lois here today with another card using dies from the Get Well release from CottageCutz.   The cute dies were released for Black Friday.  Again, I've made something other than an A2 card -- it's a Z Box Fold card, using both Bear Patient die and the Ouch with Tooth die, as well as a Double-Stitched Square die.


As I wasn't sure which of the images from the Bear Patient die I was eventually going to use, I cut all the pieces out of white cardstock so that I could color them.  I knew I was only going to use one sentiment from the Ouch with Tooth die, so I just cut it out of red cardstock.


Using various Copic markers and a couple of Wink of Stella brushes, I colored the bear pieces and constructed the various images.

I then cut the cardstock for the base of my card -- a 4 1/4" x 5 1/2" piece of dark brown and a 9 3/4" x 4" piece of kraft.


I scored the long piece at 5 1/4".   With the short edge of this piece at the top of my paper cutter and the long edge at the 1" mark, I cut a slit from the 3" mark to the 7 1/2" mark.   IMPORTANT:  If you decide to make a similar card, be sure that the larger section of the cardstock strip is at the top before you cut the slit.  (Ask me what happens when you don't place it in your paper cutter the correct way!)


I placed  the strip on my Scor-Pal with the long edge across the top and the larger section toward the left.  I then scored at the 3" mark down to the slit.  At the end of the slit (at the 7 1/2" mark), I scored down to the edge.  (I slightly folded on the score lines so that you can see them.)


Fold on the score lines to make the "box."


Apply Scor-Tape to the back of the 4 3/4" x 4" section, as shown.


Now it was time to cut the background panels of the card.  I wanted to use the Double-Stitched Squares and Rectangles on my card, but the rectangles weren't quite the right size.  So I just cut the front panel with the die and the rest of the panels as listed:
Cream cardstock - 2 1/2" Double-Stitched Square, 4" x 2 1/2" rectangle
Dark brown cardstock - 2 3/4" square, 4 1/4" x 2 3/4" rectangle, 3/4" x 5" strip, and (2) 3/4" x 2" strips
Patterned paper - 1/2" x 4 3/4" strip and (2) 1/2" x 1 3/4" strips


I layered the panels and adhered them to the front of the card.


I then glued the die cuts to the front and inside panels . . .


. . . removed the protective covering from the Scor-Tape and glued the back panel to the dark brown card base, carefully centering it.


And my card was complete.


CottageCutz dies used on my card are:

http://www.scrappingcottage.com/cottagecutzbearpatient.aspx

http://www.scrappingcottage.com/cottagecutzouchwithtooth.aspx


http://www.scrappingcottage.com/cottagecutzdouble-stitchedsquaresetbasics.aspx


Thursday, December 14, 2017

Sick Pup!

Good Morning Scrapping Cottage Friends!

It is Pam creating with you today!  I hate to say it but flu and cold season is upon us!  And Cottage Cutz is a step ahead of it with a new release with tons of adorable Get Well dies!  Check out this card I made for a friend!

Design Steps:

1.  Cut out all of the pieces in a cream color and then cut out the dogs body in brown using the Nurse Puppy die

 2.  Assemble the piece shading and coloring as you assemble

 3.  Using 3 different patterns and colors of DP cut out 3 different size circles.  Use the Nested Wacky Stitched Circle Set
4.  Use an A2 white card base and cut a slightly smaller piece of pink. Next cut a piece of green checked designer paper 4 x 5 1/4 glue the checked paper to the pink.  Add the circles popping up the largest circle then added all the die cut pieces as shown.  Cut the sentiment in pink using the Ouch with Tooth and add it to the top left corner


Hope your check out all of the Get Well Dies! They are so much fun and would make a great gift for any crafter!

Blessings
Pam