Showing posts with label Nested Stitched Eyelet Oval Set. Show all posts

Monday, January 22, 2018

Narcissus

Hi, Lois here today.  While waiting for the newest release from CottageCutz to arrive, I pulled out one of the stamp/die Birthday Flowers sets, which are currently on sale on the website.  The one I used for my relatively-simple card today is the Narcissus, which is December's flower.  I found some old patterned paper which I thought would work well with this flower.


To start my card, I cut the cardstock for the base:

White - 8 1/2" x 5 1/2"
Orange - 4" x 5 1/4"
Patterned paper - 3 7/8" x 5 1/8"


I constructed my card base.


I then cut my two ovals from white and orange, using the 2nd largest Double-Stitched Oval die for the white and the largest Nested Stitched Eyelet Oval for the orange.


I stamped a small sentiment at the bottom of the white oval and glued it to the orange oval before attaching it to the card base.


Next I stamped my images onto a piece of white cardstock . . .


. . . die cut them and colored them with Copic markers.


I attached the die-cuts to my card using small foam pop dots, and I was finished.


CottageCutz sets used on this card are:

http://www.scrappingcottage.com/search.aspx?find=Narcissus

http://www.scrappingcottage.com/cottagecutznestedstitchedeyeletovalset.aspx


http://www.scrappingcottage.com/search.aspx?find=double+stitched+ovals

I invite you to check out the CottageCutz store, which has lots of discounts on their dies -- up to 70% off on some of them.

Saturday, September 30, 2017

Christmas Joy Nativity

Hello Scrapping Cottage friends! Thanks for taking the time to stop and visit today. It's Mary Marsh here bringing you the Saturday edition of the Blog.

CottageCutz has a new release of Halloween & Christmas dies that are now available in the online store for ordering.  So if you have made a wish list, now is the time to get it fulfilled.

The DT has been showing lots of great samples and will continue to show them over the next couple of months to get your creativity flowing. There are plenty of beautiful new Christmas dies. Something for everyone's tastes.

I love Christmas time and making Christmas cards. Today, I am using one of our new dies Joy Nativity. To me this die represents the essence of Christmas. I love the bold Joy word as well as how the Holy Family is nested in the letter "O".  So let's get started with some details on how I created my card.

Step 1:   This week I started off with a sketch. I found this perfect one on Splitcoaststampers. It wasn't too fussy and it allowed the Joy word to be the center focus.
Step 2: I looked through my paper stash for patterned paper that wouldn't take the focus away from the Joy word and at the same time have a touch of elegance to it. I found this red and gold paper that I thought would work for the elegant look I was after. I paired it up with a red card base that was almost a perfect match.
Maraschino Red Card Base: 5 1/2" x 4 1/4"
Patterned Paper Layer: 5 3/8" x 4 1/8"
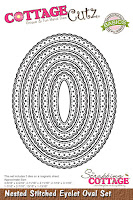
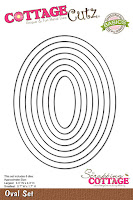
Step 3:  For the oval elements #3 & #4) of the sketch I used the largest nested stitched eyelet die and the 2nd largest oval die. It nested quite nicely in the eyelet die and the eyelet die kept with the elegant look I wanted for this card.
 
Step 4: I cut my Joy word in a gold cardstock. There is such detail in this die. If you click on this photo or any of them really, it will allow you to see the detail I am talking about. Attached to the oval shapes with dimensional adhesive. Being raised a bit from the ovals will give it nice depth.  
 
Step 5: Attached the oval panel to the striped patterned paper layer. For the #2 layer of this sketch I decided to use ribbon. Looked through my ribbon stash and found this pleated ribbon that is a good match for the card base.  I really like adding ribbon on Christmas cards. I think it dresses them up nicely. 

Attached my image panel to the card base and scattered a few sequins to complete this card. I hope I have given you an idea for using this new Joy Nativity die. By keeping your card simple, you could easily mass produce this one for Christmas. See you next Saturday!!!

Dies I used to create card:
http://www.scrappingcottage.com/cottagecutzjoynativityelites.aspx
 
http://www.scrappingcottage.com/cottagecutznestedstitchedeyeletovalset.aspx

http://www.scrappingcottage.com/cottagecutzovalsetbasics.aspx


Friday, August 25, 2017

Beautiful Bride

Good morning!  It's Jeanne sharing with you today.  My nephew just got engaged and we're having a celebration lunch for his bride-to-be so I wanted to make her a special card.
This elegant card is fitting for her personality!  The card uses only two colors of card stock - white and vanilla.
It's a top folding card so I cut the vanilla base 4 1/4 x 11 and scored at the 5 1/2 inch mark. I used a piece of white card stock cut to 4 1/4 x 5 1/2 for the front panel and scraps of vanilla and white for the die cut pieces. (And I used a tiny piece of silver CS for the hanger!  You could cut it out of white and color it instead.)  My banner is 3 1/2 x 5/8 inches.  I used paper snips to cut a flag at one end.
I heat embossed the 4 1/4 x 5 1/2 inch white card stock and the white scrap using a lace background stamp and white embossing powder.  The powder I had came out a little bit cream color giving it a nice contrast to the white and blending well with the vanilla.
I die cut the dress from the scrap and trimmed the full panel down to 4 1/8 x 5 3/8.  I cut my ovals using the middle and second largest ovals from the Nested Stitched Eyelet Oval set.
The larger oval is adhered directly to the card so I used Scor-Tape to make certain it stuck to the embossing - any really strong adhesive should work.  The embossing is slick so the adhesive needs to be strong.  The smaller oval is popped off the card using foam dots. The die cut dress and hanger were added to the top.
I finished off the card by embossing the sentiment in silver and using silver ribbon and a crystal button. 
http://www.scrappingcottage.com/cottagecutzweddinggown.aspx
http://www.scrappingcottage.com/cottagecutznestedstitchedeyeletovalset.aspx

I hope you enjoyed this card - I had a lot of fun making it!

See you next week!
Jeanne