Showing posts with label Hugs Phrase. Show all posts

Friday, August 17, 2018

Penguin Hugs

Happy Friday!  Have you had a chance to look at the new Christmas Dies Part 1?  Aren't they wonderful?  And for a limited time they are 25% off!

It's Jeanne today and my card features the adorable Hugging Penguins from that release.
I started by cutting the penguins from black, white, Cherry Cobbler and Mossy Meadow cardstock.
I used Copic markers to color the beaks and feet, and add dimension and shading to the white of the penguins and the fur trim on their hats.
I assembled the penguins.  In order to get them close enough to "hug" I had to cut off the arm of the guy on the left.  A great thing about this die is that these also stand alone - they don't have to hug or wear winter gear making them very versatile.
When they were close enough I added the scarf.
I cut the word "hugs" from Mossy Meadow and used an adhesive backing sheet.  I really like to do this with word dies.  It makes adhering them so much easier.
I used an A2 card base in Mossy Meadow, cut a white panel 5 3/8 x 4 1/8 inches and embossed that using a cable knit embossing folder.
The plaid and solid panels are cut using the second and third largest dies from the Double Stitched Rectangle Set.
After adhering the phrase I added the penguins using foam tape.  I just love these little guys - they give me the warm fuzzies!

 Dies:
http://www.scrappingcottage.com/cottagecutzhuggingpenguins.aspx

http://www.scrappingcottage.com/cottagecutzdouble-stitchedrectanglesetbasics.aspx

http://www.scrappingcottage.com/cottagecutzexpressionsplushugsphrase.aspx

 Thanks for stopping by today.  I hope you have a relaxing and creative weekend!

Friday, January 12, 2018

Bouquet of Hugs

Happy Friday! It's Jeanne posting today.  I wanted to bring some sunshine to winter so I thought a bouquet of flowers would be nice.
Like many of my cards, I have a general idea of what I want to do but pick colors based upon one element.  In this case I knew I wanted to use this paper, so I picked the flower colors based on that.
The card base is A2 in size and I cut a panel of the floral paper to 4 1/4 x 5 1/2 inches.  I used the largest of the Double Stitched Rectangle dies for my top panel.
I measured the washi tape for the side (it was 1/2 inch) and trimmed almost that much from the floral panel.  I stuck the washi tape down to the side of the card and then glued the floral panel on top.  I overlapped the washi tape just a very little bit.
Next I die cut the flowers, foliage and vase out of various colors  of card stock and vellum.
I used Distress Oxide inks to color the edges and centers of the greenery and flowers.  I also used the Antique Linen on the sides of the stitched panel.
I used washi tape to temporarily hold down the vase while I glued the stems underneath.  Then I used Ranger Multi Medium Matte to glue down the vellum over the stems.  I used a VERY small amount.  This is the only glue I have found that doesn't show through the vellum.
I removed the washi tape and added the foliage and flowers.  I used an adhesive sheet on the back of the gold card stock before I cut it with the sentiment.  When I placed the sentiment on the card I overlapped the vellum vase and this helped hold that down.  The flowers on the top did the same thing to the top of the vase.

I adhered all layers together and used a few sequins for a bit of sparkle.
http://www.scrappingcottage.com/cottagecutzflowerbouquetjar4x4.aspx

http://www.scrappingcottage.com/cottagecutzdouble-stitchedrectanglesetbasics.aspx

http://www.scrappingcottage.com/cottagecutzexpressionsplushugsphrase.aspx

Thanks for stopping by - I hope you find time to do something creative this weekend!


Saturday, June 10, 2017

Hugs from the Herd


Hello Scrapping Cottage friends! Thanks for taking the time to stop and visit today. It's Mary Marsh here bringing you the Saturday edition of the Blog.

Hope you have been enjoying all the different cards from the DT using the new Expressions Plus word dies. The team has shown some really creative ways to use these dies with your existing collection. With 35 word phrases in these dies, there is so much you can do with them in your own card making.

Combining the word die phrases with a stamped sentiment is just one idea. That's the direction I am going with my card today.  I did this technique with this card and another idea popped into my head using the 
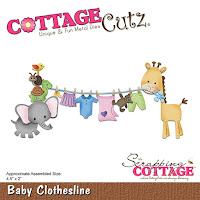
Baby Clothesline and
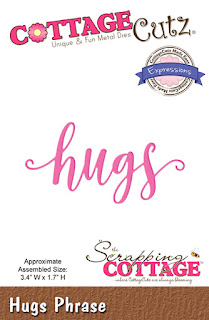
 Hugs Phrase dies.

I need a card of encouragement for a friend of mine who is battling cancer. And, the sweet baby animals are just too cute. And, they worked perfectly with the Hugs Phrase and sentiment I used.

So let's get started with some details on how I created my card.

Mint Card Base: 5 1/2" x 4 1/4"
Patterned Paper: 5 3/8" x 4 1/8"

Step 1: As I was looking through my cardstock and patterned papers, I found some card bases that have the look of water coloring. This is so popular in card making right now but I never like how mine turn out. That was the reason I bought the card bases. They are 4 different color schemes in the pack and I chose the mint.  With the coral hugs word and all my animal colors, I thought this would be a good base color.
Step2: I used the Baby Clothesline die and cut all the animals. Instead of cutting in white and coloring them, I used different colored cardstock for each animal. Either way works just fine. Just depends on what you want to do. Ranger multi-matte medium is my adhesive for securing the pieces together. 
Step 3: I cut the Hugs Phrase in coral cardstock. I only show one cut in this photo but on assembly I decided to cut another one. It just gives it a bit of dimension.

Step 4: Now that everything is cut, it's time for card assembly. First, I stamped my sentiment. Although I forgot to take a photo after this step. I used a combination of glue dots and the multi-matte medium to secure the animals to the patterned paper.
Attached my hugs phrase and then used some coral twine because I wanted it to look like the animals are holding the word.
Step 5: I die cut a few hearts to add to the top of the card. This helped to balance it out for me. The stitched hearts are part of the Stitched Cupcakes dies set. They were the perfect size to fill in the open area. I cut the hearts in the coral cardstock. This color works nicely with the mint. 
Well, that completes my card for this week.  Hope I have given you another idea for a way to use the Expression Phrase dies. See you next Saturday. We are on Instagram now. Check us out here.
 
Dies I used to create card:
 
http://www.scrappingcottage.com/cottagecutzexpressionsplushugsphrase.aspx

http://www.scrappingcottage.com/cottagecutzbabyclothesline.aspx

http://www.scrappingcottage.com/cottagecutzstitchedcupcakes.aspx


Tuesday, May 16, 2017

Hummingbird Hugs (new die)

Hello Scrapping Cottage friends! Thanks for taking the time to stop and visit today. It's Mary Marsh here bringing you the Tuesday edition of the Blog. Hope your Mother's Day celebration was a great one whatever you did.

There is another great release of new dies over in the online store. The Expressions Plus (word dies) with 35 designs are currently on  promotional pricing and are 25% off. The font is so beautiful and you will definitely want these in your collection.

For your viewing pleasure today, I am featuring one of the new dies. It's the hugs phrase along with the hummingbird die.  So let's get started with some details on this card.

I started my card this week with the card colors. I am using the colors from the Splitcoaststampers color challenge #636. They are Peach, Coral and Artichoke. Once that was decided, I started thinking about my layout. I am using the MojoMonday #497 sketch.
Peach, Coral, Artichoke
Card Sizes:
Card base: 4 3/8" x 5 5/8"
Coral Layer: 4 1/4" x 5 1/2"
Coral Patterned Paper Layer: 4 1/8" x 5 3/8"
Vanilla Rectangle Layer: 2 1/4" x 4 3/4"
Coral Flower Paper: 2 1/8" x 4 5/8"
Image Layer: 2 3/8" x 4 1/8"
Coral Layering Panel: 2 1/2" x 4 1/4"

Step 1: I first figured out all the card panel sizes. Since I had the card colors, I looked through my patterned papers and found these ones in the coral shade. I decided I would go after a more monochrome look. I liked the gradient look on the background panel. I ended up putting the lighter shade at the top.
Step 2: I cut the flowers in peach and coral cardstocks and the leaves in artichoke. The hummingbird I cut in white cardstock and then sponged in coral, peach and a bit of artichoke.
Step 3:  I am now ready to start the card assembly. I wanted to show how I did my angled panel. I attached it onto the patterned paper panel at an angle with double sided tape . I used my craft knife and trimmed off the excess.


Step 4: The Hugs Phrase is cut with both artichoke and coral cardstocks. I did a slight offset for added interest. Here is a close-up shot of the hugs phrase as well as the hummingbird.
 
Well, that's it for me for this post. See you again on Saturday. The team will be showcasing some of the new Expressions Phrases so check back each day for more inspiration.

Dies I used to create card:
http://www.scrappingcottage.com/cottagecutzhummingbird4x4pre-order.aspx

http://www.scrappingcottage.com/cottagecutzexpressionsplushugsphrase.aspx