Showing posts with label CottageCutz Double-Stitched Oval Dies. Show all posts

Friday, July 26, 2019

What Does the Fox Say?

Happy Friday Cottage Cutz fans!  It's Jeanne today with a fun birthday card using dies from the new Birthday release.  These dies are 25% off right now at the online store.  They are so cute that they are certain to brighten someone's birthday!

Now on to my card and the answer to that question - what DOES the fox say?  I'm not sure what all foxes say, but we'll find out what this one says anyway.
I started with this week's sketch at Splitcoaststampers.
I picked my patterned paper and then the coordinating colors.  I used an A2 card base and cut the panels to 4 x 5.25 inches.
To get the curve, I used the largest of the Stitched Oval dies (you could also used the Pierced Oval or Double Stitched Oval dies) and partially die cut it.  I placed the top plate of my die cut "sandwich" over half of the oval so that only  that portion was cut.
Then I was able to shorten those panels by cutting off the top.

I die cut the fox and the presents and balloons from various colors of card stock that coordinate with my pattern.  I was planning on using just a couple of presents but ended being able to make several which I can now use on other cards.
Ultimately I ended up using only one present.  I placed it on the panel without gluing it down so I knew where to stamp my sentiment and also draw my balloon strings with a multi-liner pen.
 I glued the balloons down and attached my panels to the card base.
And to answer THE question....the fox says CELEBRATE!
To finish off the front of the card I popped up the fox and present using foam dots and added gold sequins.

I hope you enjoyed the card today  Remember to visit the online store and check out this adorable release!

Dies used:
http://www.scrappingcottage.com/cottagecutzbirthdayfox.aspx

http://www.scrappingcottage.com/cottagecutzbirthdayhedgehog.aspx

http://www.scrappingcottage.com/cottagecutzexpressionspluscelebratephrase.aspx
http://www.scrappingcottage.com/cottagecutzpiercedovalsetbasics.aspx


Thanks for stopping by.  I hope you have a relaxing and creative weekend!


Wednesday, May 10, 2017

CottageCutz Baby Lamb on Moom

Hello and welcome to the Scrapping Cottage Blog!  I am Beverly Polen from Guneaux Designs, and today I am a guest designer.  I have for you a darling card that features the CottageCutz Baby Lamb on Moon Die.  I think the baby lamb is so adorable!


The card design is a Z-Fold with ovals cut out from the first and second sections.  You can see through the ovals to the main element on the back section of the card, which is the CottageCutz Baby Lamb on the Moon.  I have not seen before a Z-Fold card with the first two sections cut out for windows to see through to the main image on the back section.  If there is no such design in the crafting world, I guess I just created a new Z-Fold card design.   LOL!

To create my Z-Fold card, I cut from white card stock the pieces from the lovely CottageCutz Baby Lamb on Moon Die.  


I colored the pieces with Copic Sketch Markers, adding a touch of gray to the moon.  Afterwards, I glued the pieces together.


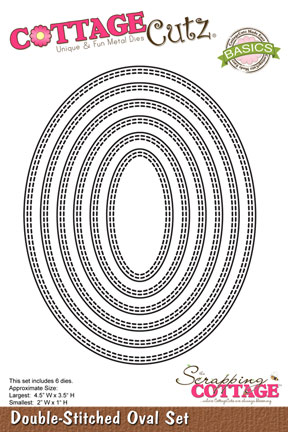
Using the second and third to the largest CottageCutz Double-Stitched Oval Dies, I cut out an oval and frame from white card stock.  I later colored the frame with a yellow copic marker.  I also cut a second frame with the largest and second to the largest dies and colored it yellow. 


I colored the oval with two of the new Tim Holtz Oxide Ink Pads (i.e., faded jeans and broken china). I used the lighter blue for the center of the oval for the moon's glow.


Then, I cut a 10-13/16" x 5-1/2" piece of white card stock and, on the 10-13/16" side, scored at the 3-5/8" and 7-1/4" measurements.  The 3-5/8" score line is a mountain fold and the 7-1/4" score line is a valley fold.  At this point, I did not fold the card stock on the score lines until I finished additional steps.  


I wanted to create the appearance of a galaxy; therefore, I sponged onto the card stock three of the Tim Holtz Oxide Inks (i.e., fossilized amber, faded jeans, and broken china) and spritzed it lightly with water.  After drying, I used a toothbrush and diluted white acrylic paint to splatter paint onto the colored card stock.


After that dried, I turned the card stock over and colored the center section with the same inks, spritzed with water, and splattered with acrylic paint.  When the card is finished, this section will be the inside center fold.


Before folding on the score lines, I placed the second largest Double-Stitched Oval Die on the first section of the card, and the third largest die on the center section, centering them as much as possible. I ran the card stock and dies through my die cutting machine.


I then folded the card on the score lines, and the following photo shows the result.


Next, I assembled the card by attaching the baby lamb and moon onto the oval previously colored and adhered it to the last section of the card.  I used an old star stamp to stamp, emboss, fussy cut, and add to this piece.


Then I added the largest yellow frame to the first section of the card and the smaller frame to the inside center section. 


When the card is closed, the back middle section that was inked will show as the second section on the card.


I did not add other embellishments to the card as I did not want to distract from the "galaxy" effect on the card.  A sentiment will be added when I know who is the recipient.

I hope you enjoy this card and take time to browse the recently released baby and script design dies! The script dies are 25% off for a limited time!  Have a blessed day!

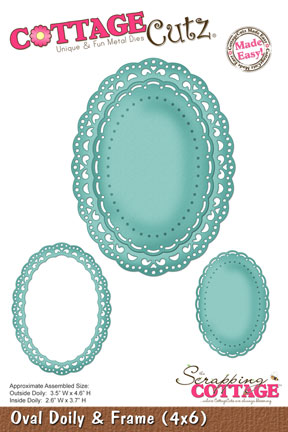
I used these two CottageCutz dies for the card:


Friday, April 14, 2017

Layered Die Cuts Card

Hello !!!!

A very Happy Easter to all !!!
I am Anita here and for today's post , I have a layered die cut card that mainly uses different types of oval designs. You can check them out here at the store. There is a whole new range of new baby dies also now available and shipping at 25 % discount so do not miss it.

Here is my card.


To make this card, just follow the picture tutorial below.


Cut two pieces of die cut in white card stock using these dies.


Adhere each die cut together to add a little thickness to the die cut. Distress with Oxide inks


Cut a card panel 5.5 inches by 4.25 inches and emboss in an embossing folder.


Adhere the base oval die cut after distressing the embossed card panel with worn lipstick oxide ink. Distress the oval lightly with Peeled Paint  Oxide ink.


Distress more die cuts and layer them as shown using Foam tape.


Add glitter to the Songbird Die cut


Score a card base 5 inches by 6.5 inches at 1/4 inch interval on the scoring board.  Add the green ribbon. Distress with oxide ink. Add the layered card panel. Insert  a CottageCutz Victorian corner die cut at the two corners. Add the best wishes sentiment die cut. Add a bow and pearl stick pins.


I hope you liked this card. See you next Friday. Have a good day.

Wednesday, April 12, 2017

CottageCutz Cross With Vine


Hello, Scrapping Cottage friends!  Happy Wednesday!  This is Beverly Polen from Guneaux Designs, and I am pleased to be a guest designer today!  Because Sunday is the Easter holiday for Christians, my card share for you is an Easter card that showcases the CottageCutz Cross With Vine Die.  But before I discuss the card, I want to draw your attention to the new CottageCutz Baby Release for April.  These new dies are adorable, and I encourage you to check them out.  For a limited time, you can enjoy a 25% discount on the dies!

Here is the Easter card I made for your enjoyment.


If you would like to make the card, please follow these instructions:
  • Cut out the cross, vine, and flowers using the CottageCutz Cross With Vine Die.
  • Color the cross, vine, and flowers (I used Copics Sketch Markers), and attach the vine to the cross.  (I started with pink flowers following the image for the die but changed to white.)
  • Cut a 4" x 5-1/4" piece of white card stock and use the third to the largest CottageCutz Double-Stitched Oval Die to cut an oval in the center of the card stock.  If desired, emboss the negative piece.  The oval cut out will not be used.
  • Cut an oval from a piece of purple designer paper using the same die.
  • Cut out three ovals from white card stock using the second and third largest dies from the Double-Stitched Oval Dies.  Glue the three ovals together.
  • Cut out and color two vines and grass using the CottageCutz Grass, Trees, and Vines Die.   
  • Also, using the CottageCutz Cross With Vine Die, cut and color purple flowers and attach them to the vines.  (Note:  After finishing the card, I decided to add a third vine with flowers.)
  • Cut a 5-1/2" x 8-1/2" piece of purple card stock, fold in the middle for the card base, and begin assembling the card.
  • Adhere foam tape to the back of the piece of white card stock with an oval cut from the center. Attach this to the center front of the card base.  
  • Attach the purple designer paper oval inside the oval on the card front.
  • Attach foam tape to the piece of grass and adhere it to the bottom of the cross.  
  • Attach foam tape to the cross and adhere it to the center of the oval on the card front.
  • Attach the three glued ovals onto the card front.
  • Attach the vines with flowers around the oval.
  • Add a sentiment.  I added one inside the card.

Enjoy the card and come back tomorrow!  Remember to check out the new baby dies!

COTTAGECUTZ DIES USED: